
Risks Register
The Risk Register logs and tracks all identified Risks across an organization in a single location.
Our Risk Register provides a centralized place for identifying, analyzing, evaluating, and responding to risks across your organization's GRC activities. All risks are managed through the Risk Register landing page, where they can be created, edited, and modified. Each risk entry captures key attributes including its nature, potential triggers, and affected areas, alongside an analysis of likelihood and impact to support prioritization.
Risks are evaluated against the organization's risk appetite and assigned a response strategy — such as avoiding, mitigating, accepting, or transferring the risk — with owners accountable for monitoring and driving the appropriate mitigation actions. This serves as the authoritative record for all risk-related information, supporting audit trails, stakeholder reporting, and ongoing review cycles.
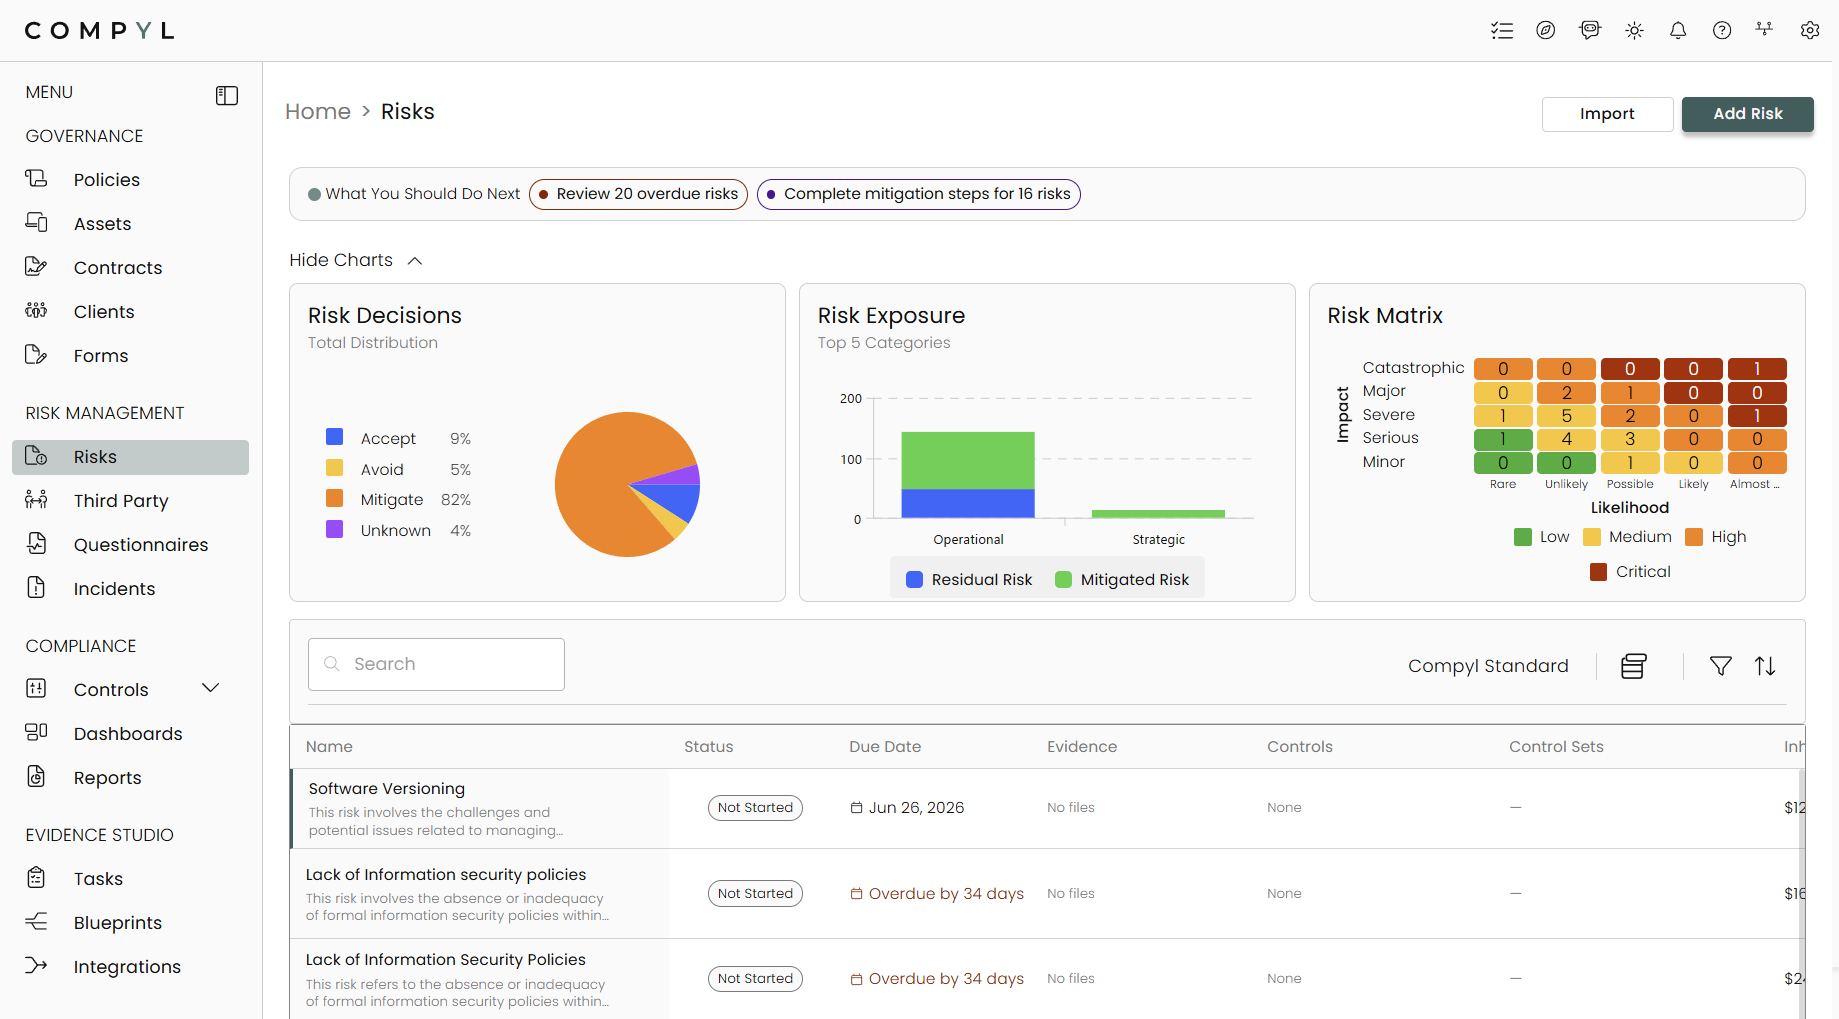
At the top, the What You Should Do Next and Charts not only give you a quick overview of your Risk data but also act as filters to see which risks they refer to.
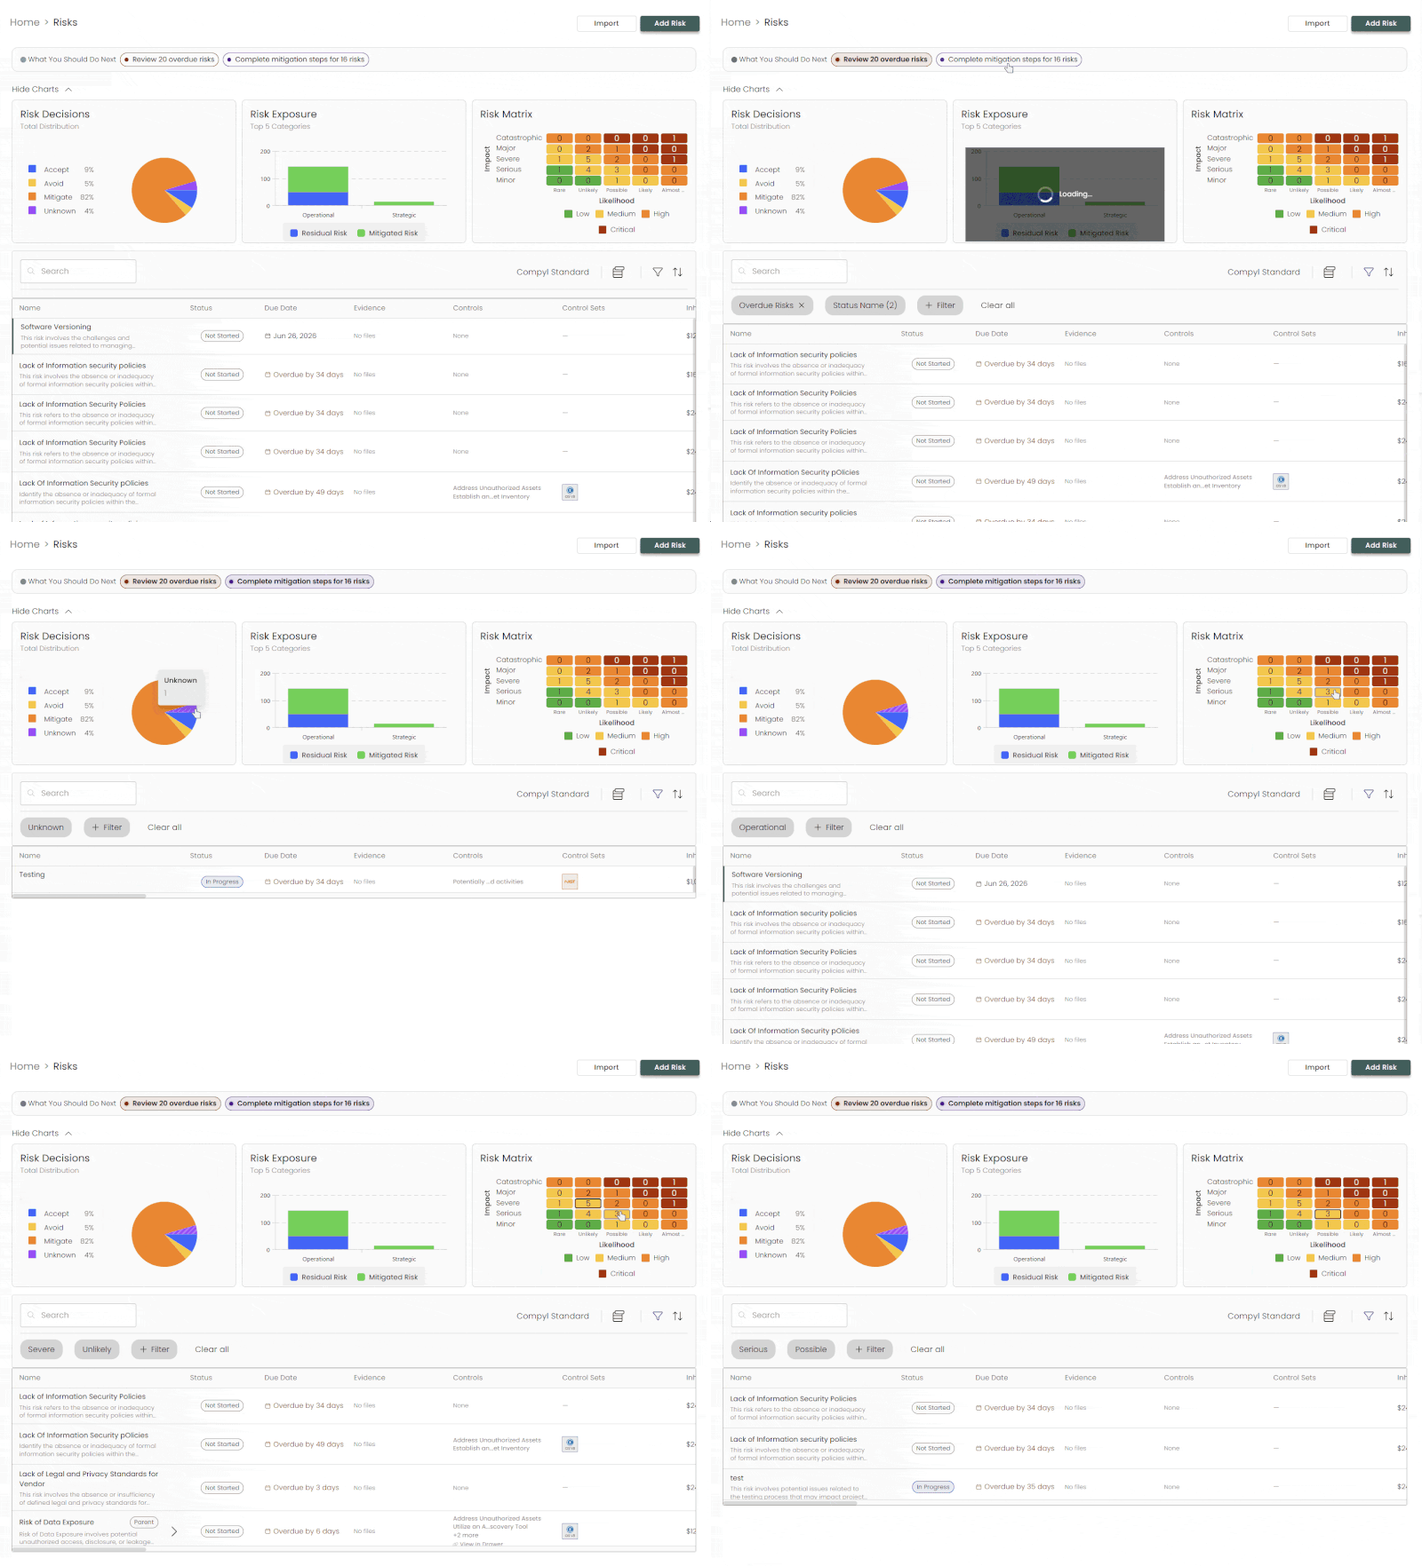
Adding Risks
Select Risks from the sidebar on the left-hand side under Risk Management and then select Add Risk.
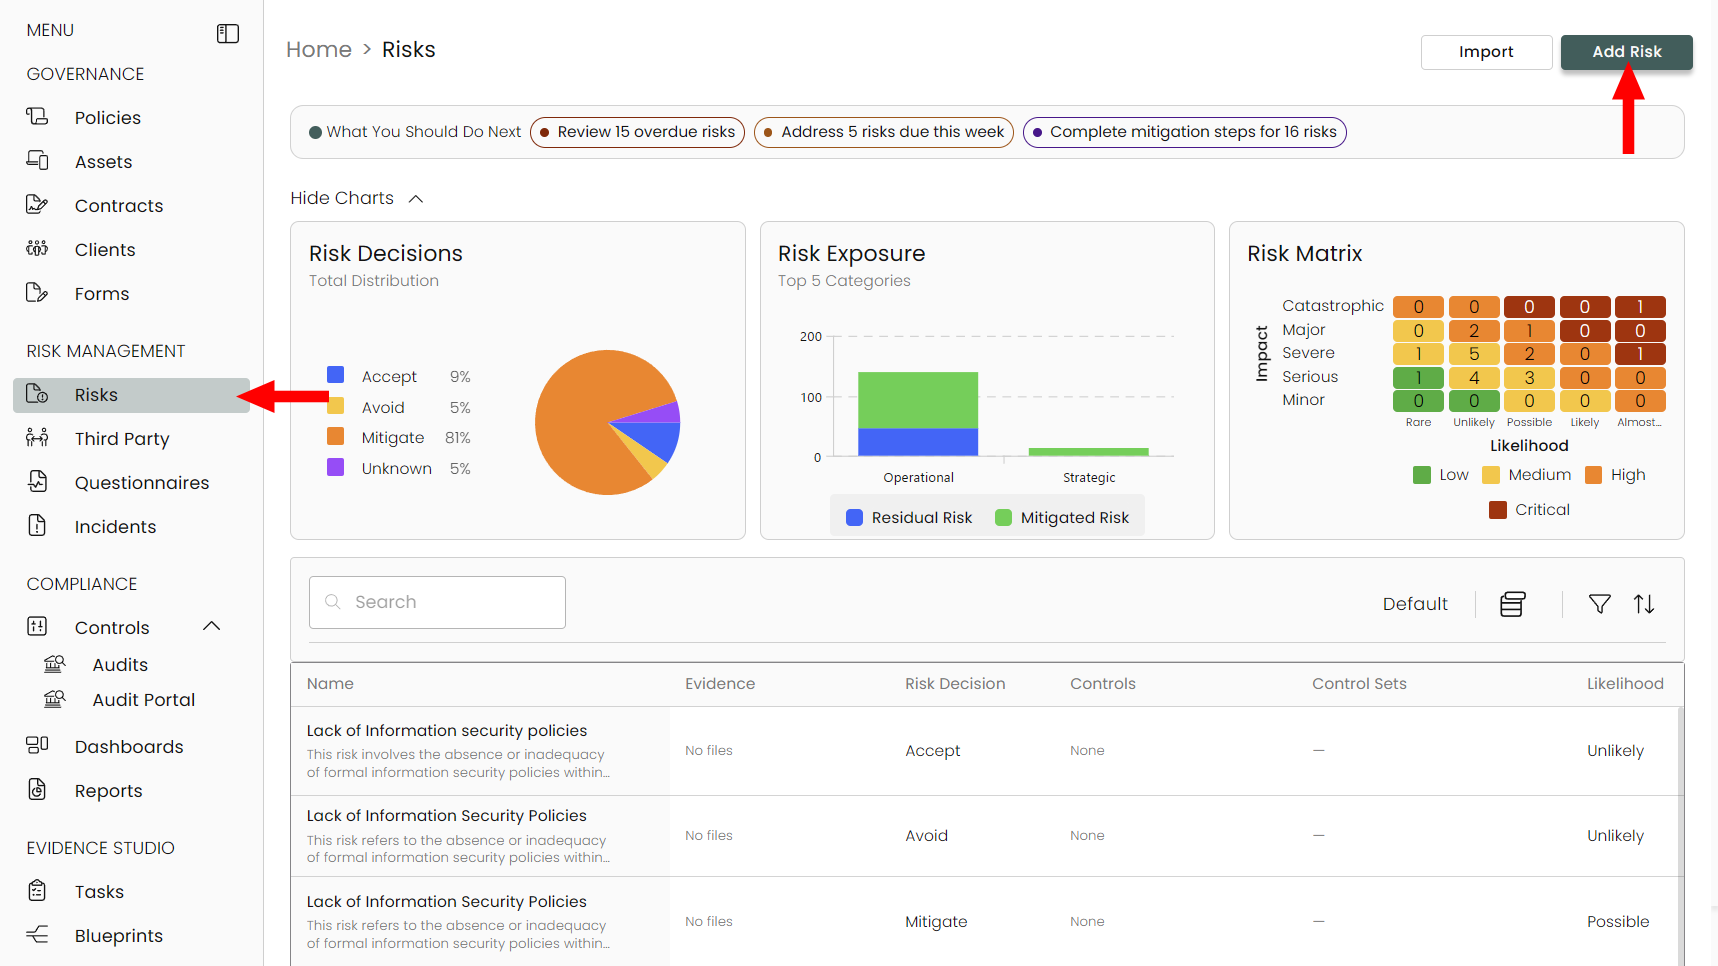
1. Identify
A guided modal will pop-up to set up your risk. Complete the fields as needed or required. You can then link any sub-risks (that are already created) or controls. Continue to the next step once done.
2. Score
Here you can choose between Traditional and a FAIR Model for scoring your risk. By filling in the required fields, we generate set of scores.
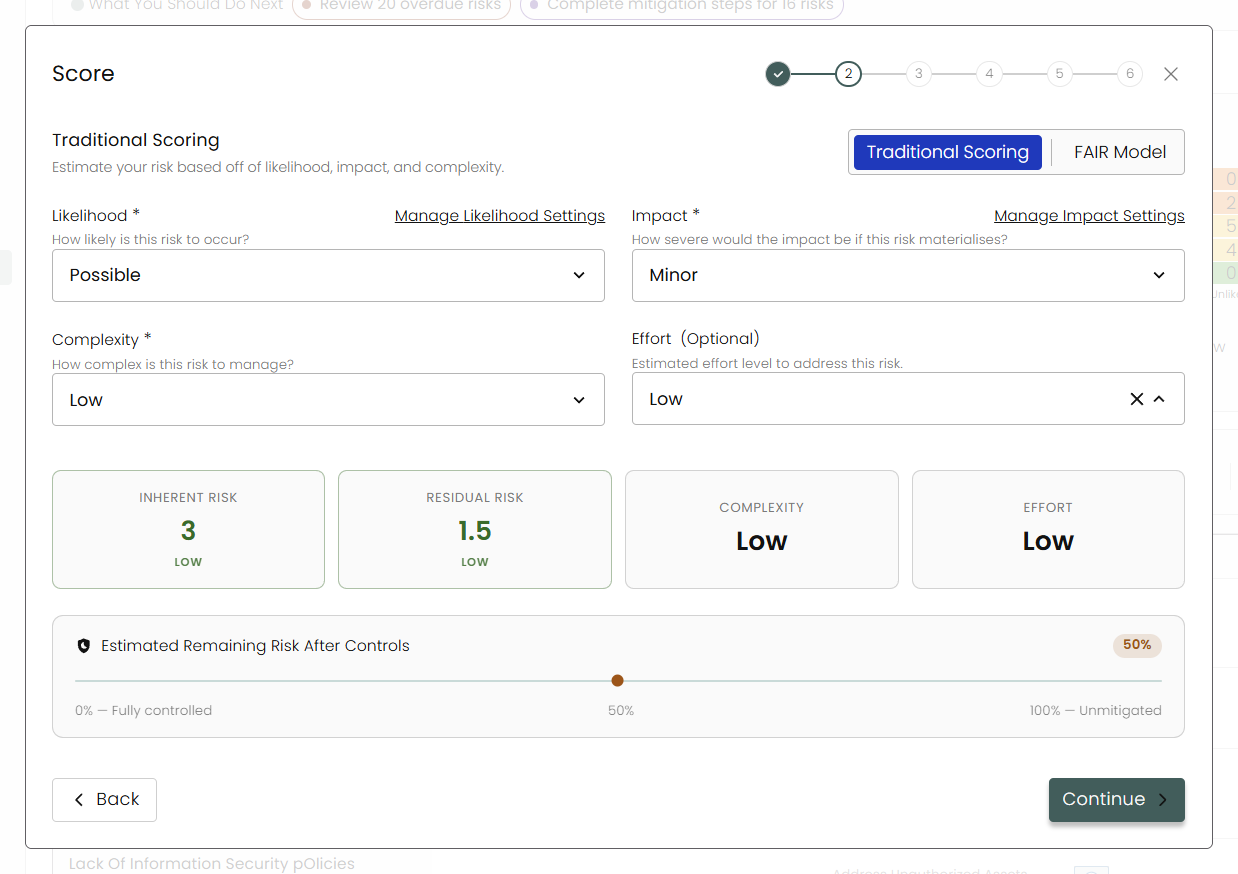
Inherent Risk
The base risk score calculated from Likelihood x Impact. Likelihood and Impact are each scored 1-5, so the highest score can be 25. You can manage both by clicking on the link above the drop-down.
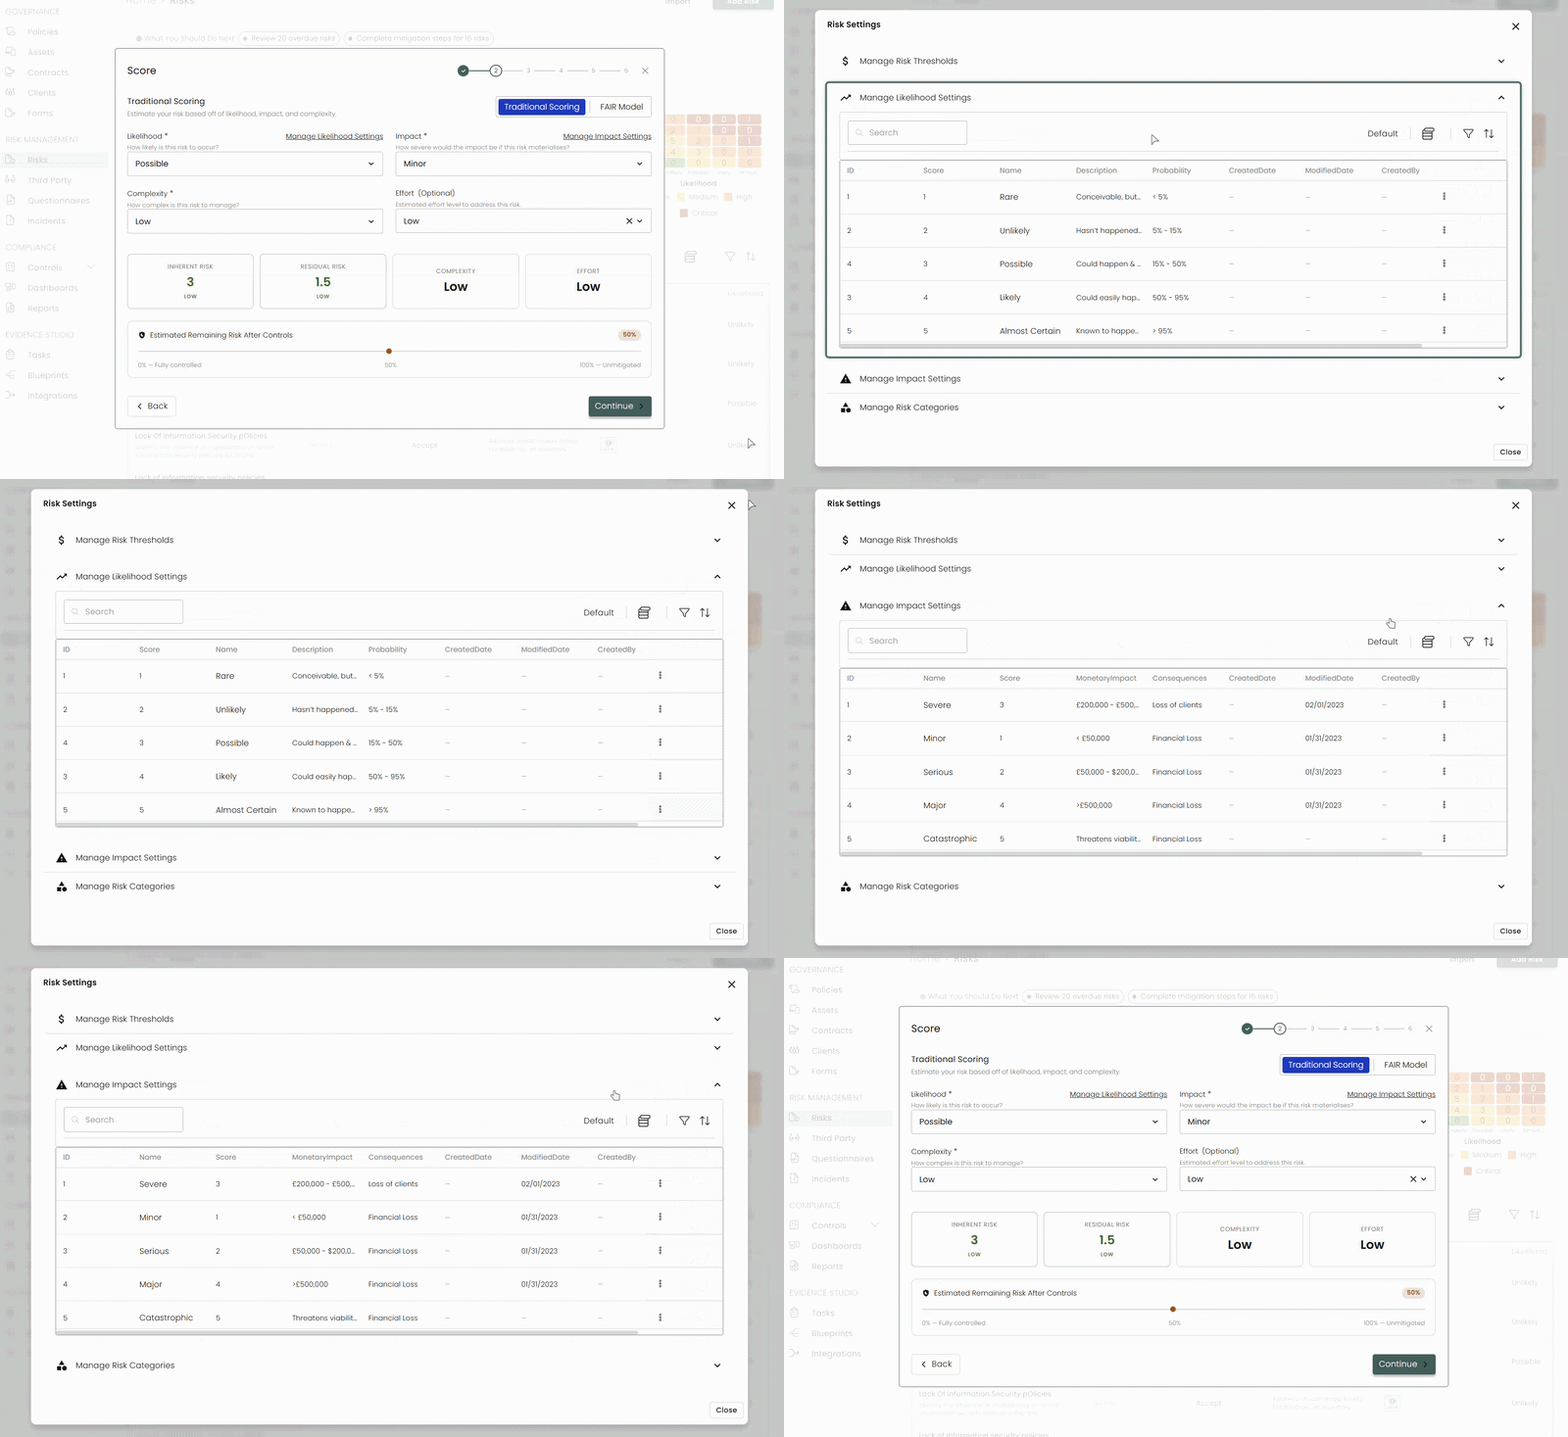
Residual Risk
The estimated risk score after the mitigation plan is completed, calculated from what was entered as the Estimated Remaining Risk. In other words, this is the "leftover risk" after the mitigation plan is complete. For example, if an Inherent Risk Score is 3, and the Estimated Remaining Risk is 50%, the Residual Risk Score would be 1.5.
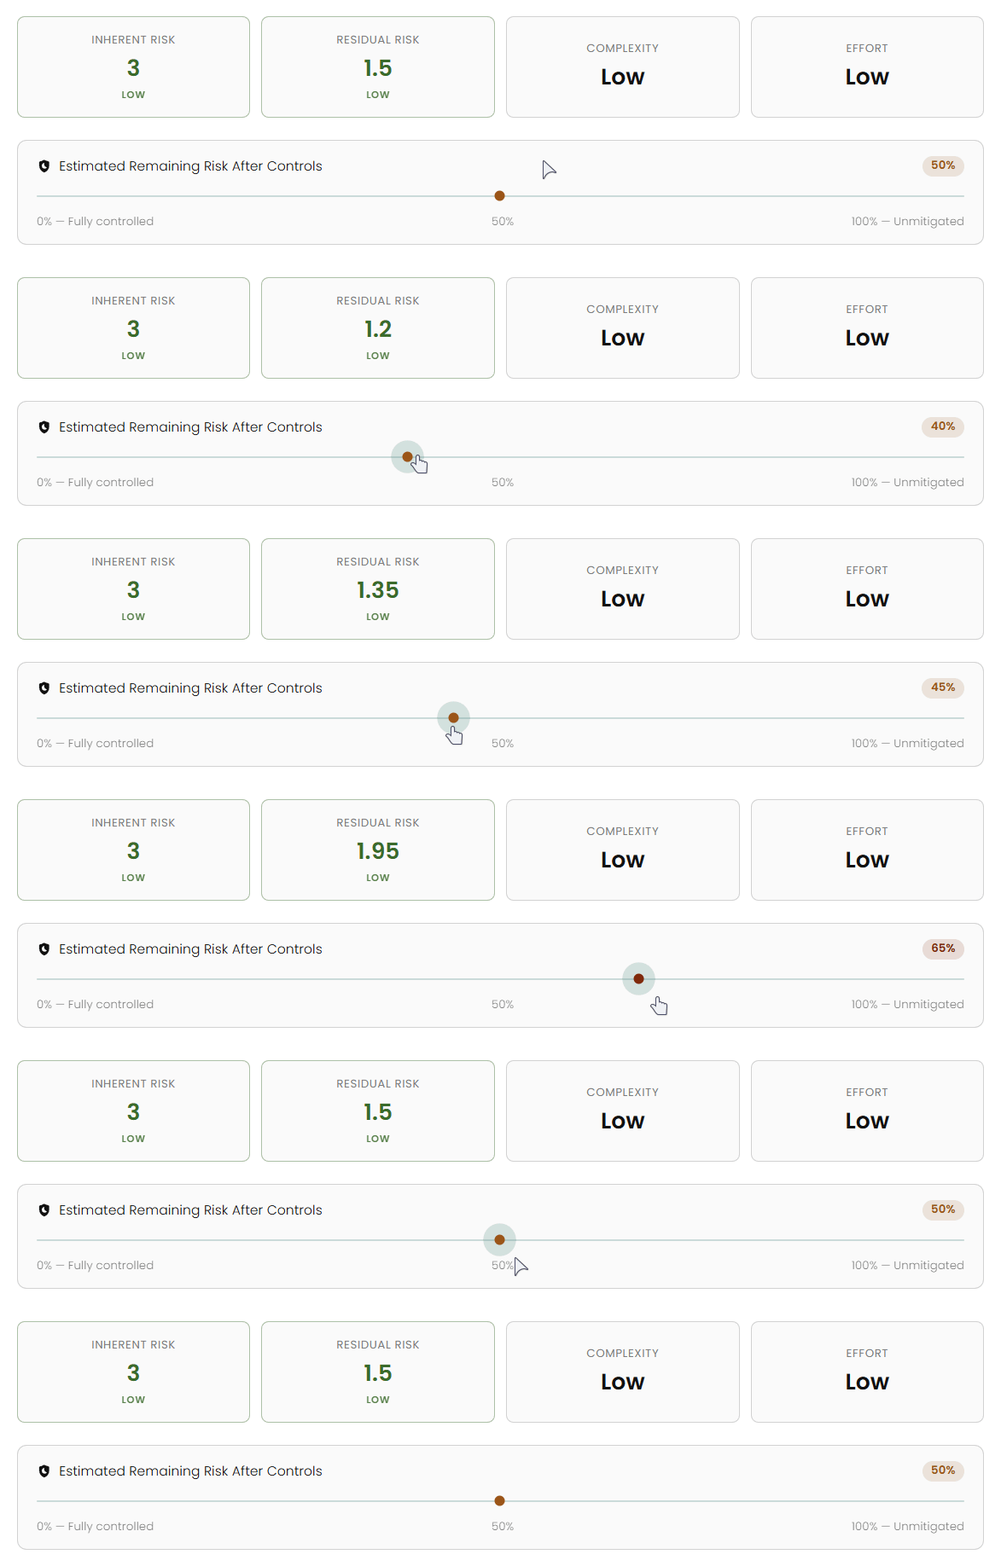
Complexity & Effort
These are pulled from your choices above.
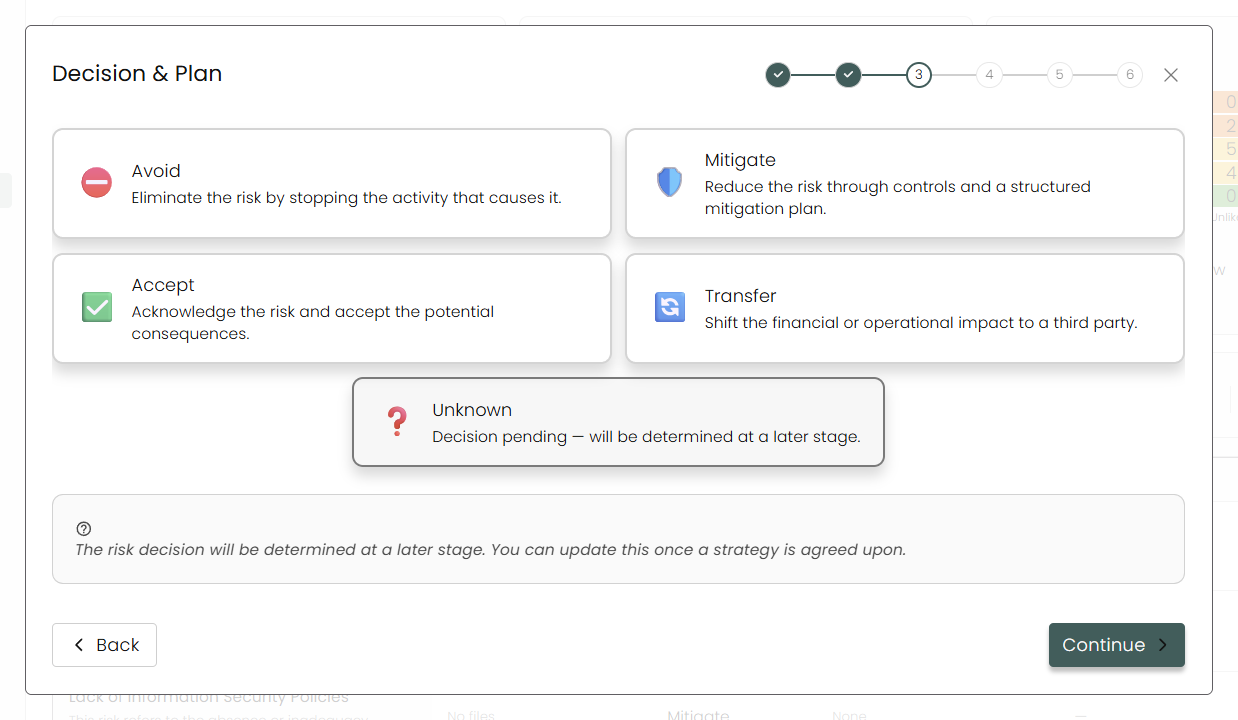
3. Decision & Plan
Once a risk has been identified and give a score, decide how you'd like to respond to it.
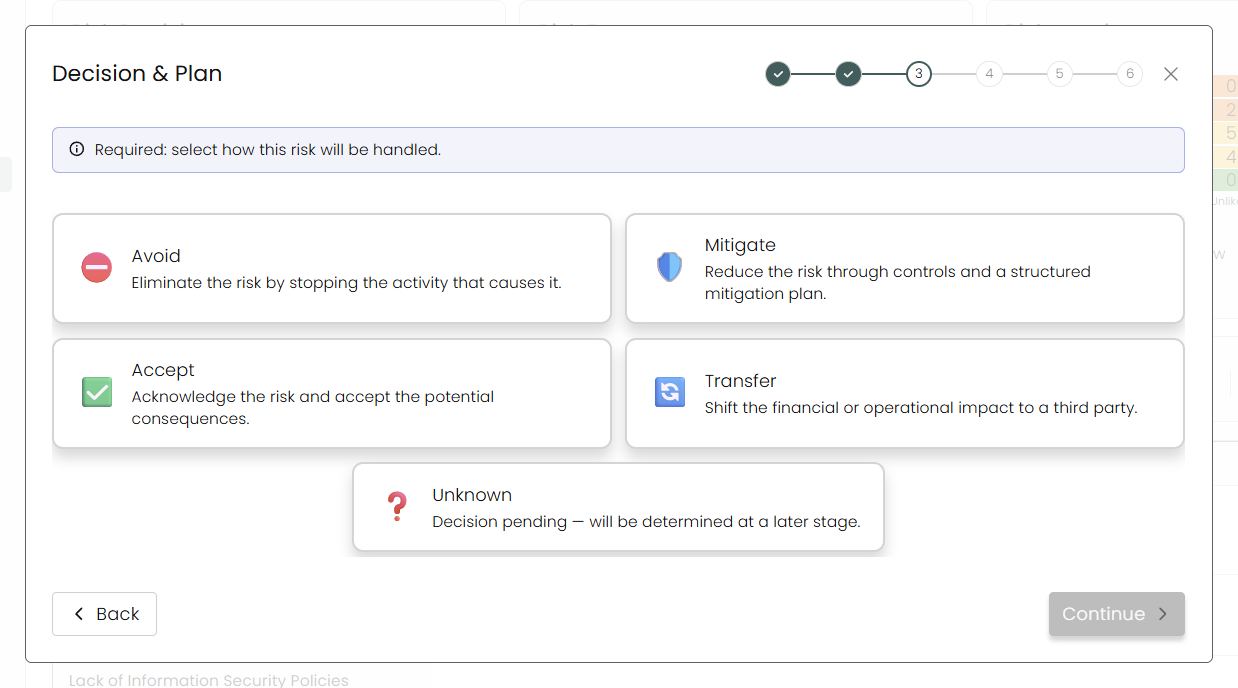
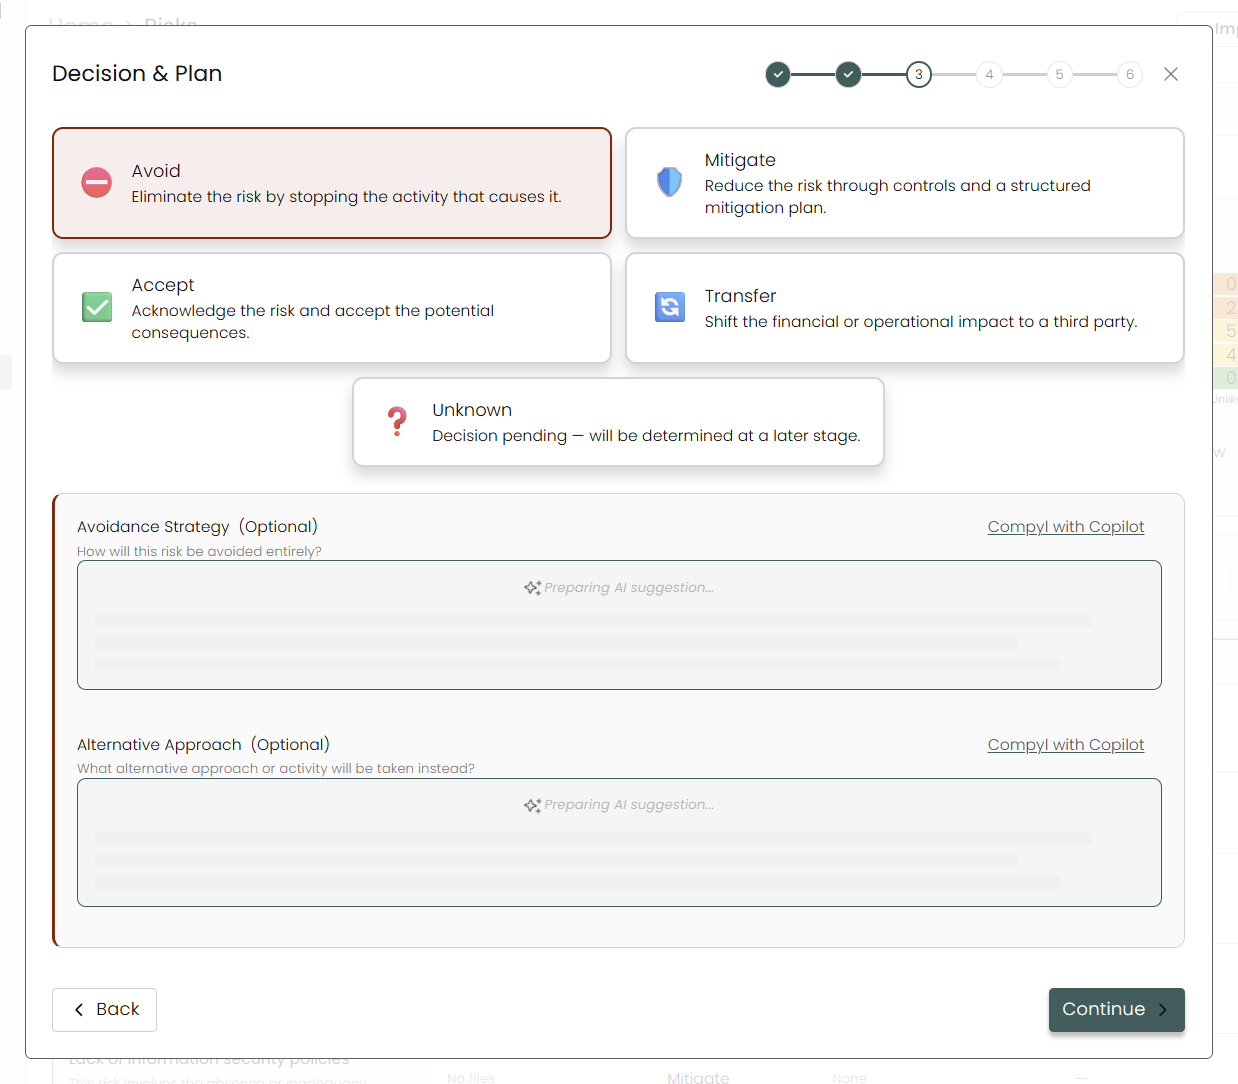
Avoid: Eliminate the risk by stopping the activity that causes it
Capture your Avoidance Strategy* and a possible alternative here to prevent this risk from happening in the first place.
Mitigate: Reduce the risk through controls and a structured mitigation plan
Create a step by step process that will allow you to track each step/task individually.
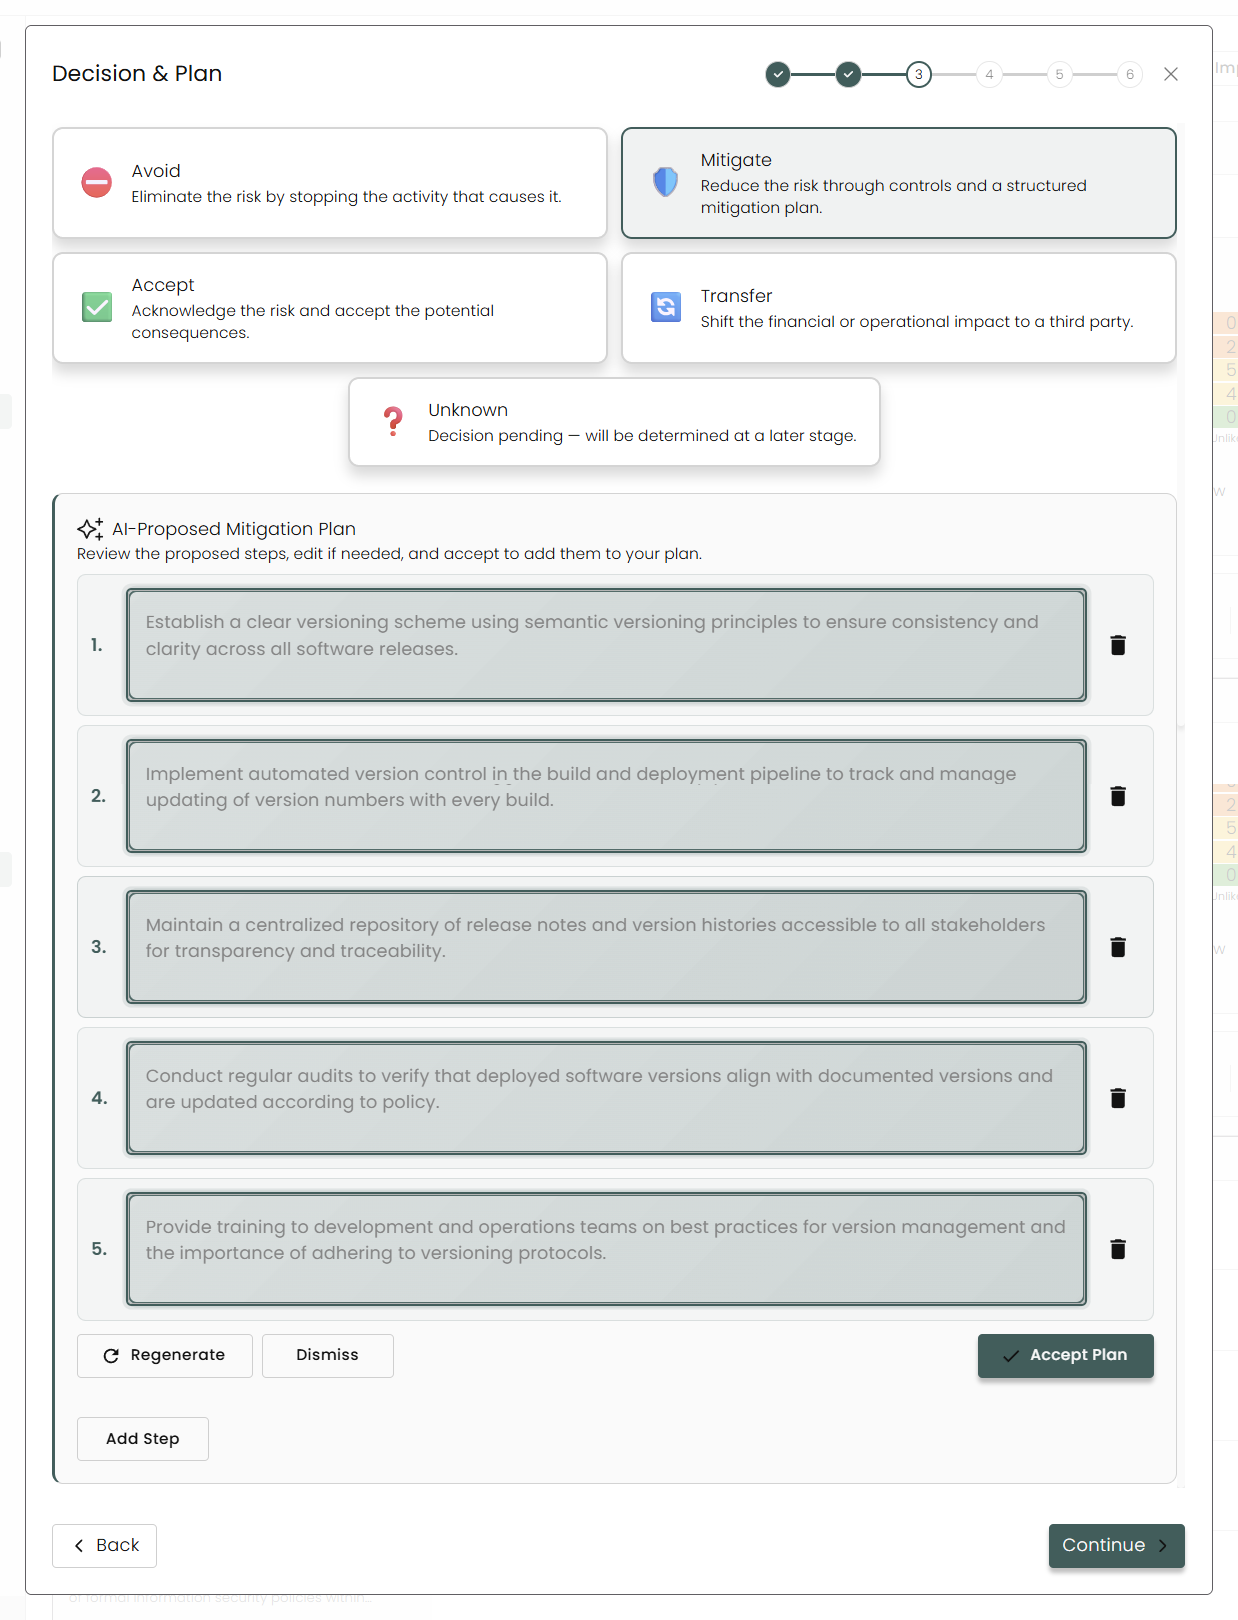
- Click on Accept Plan if the Compyl Copilot-generated plan is acceptable (you can always edit this later).
- Click on Regenerate to have it redo the plan.
- Dismiss will wipe the plan clean, allowing you to recreate it from scratch.
- Add Step allows you to add additional steps or start building a plan from the start after dismissing it.
- Delete individual steps by clicking on the trash can icon on the right.
Once it's complete, click on Continue.
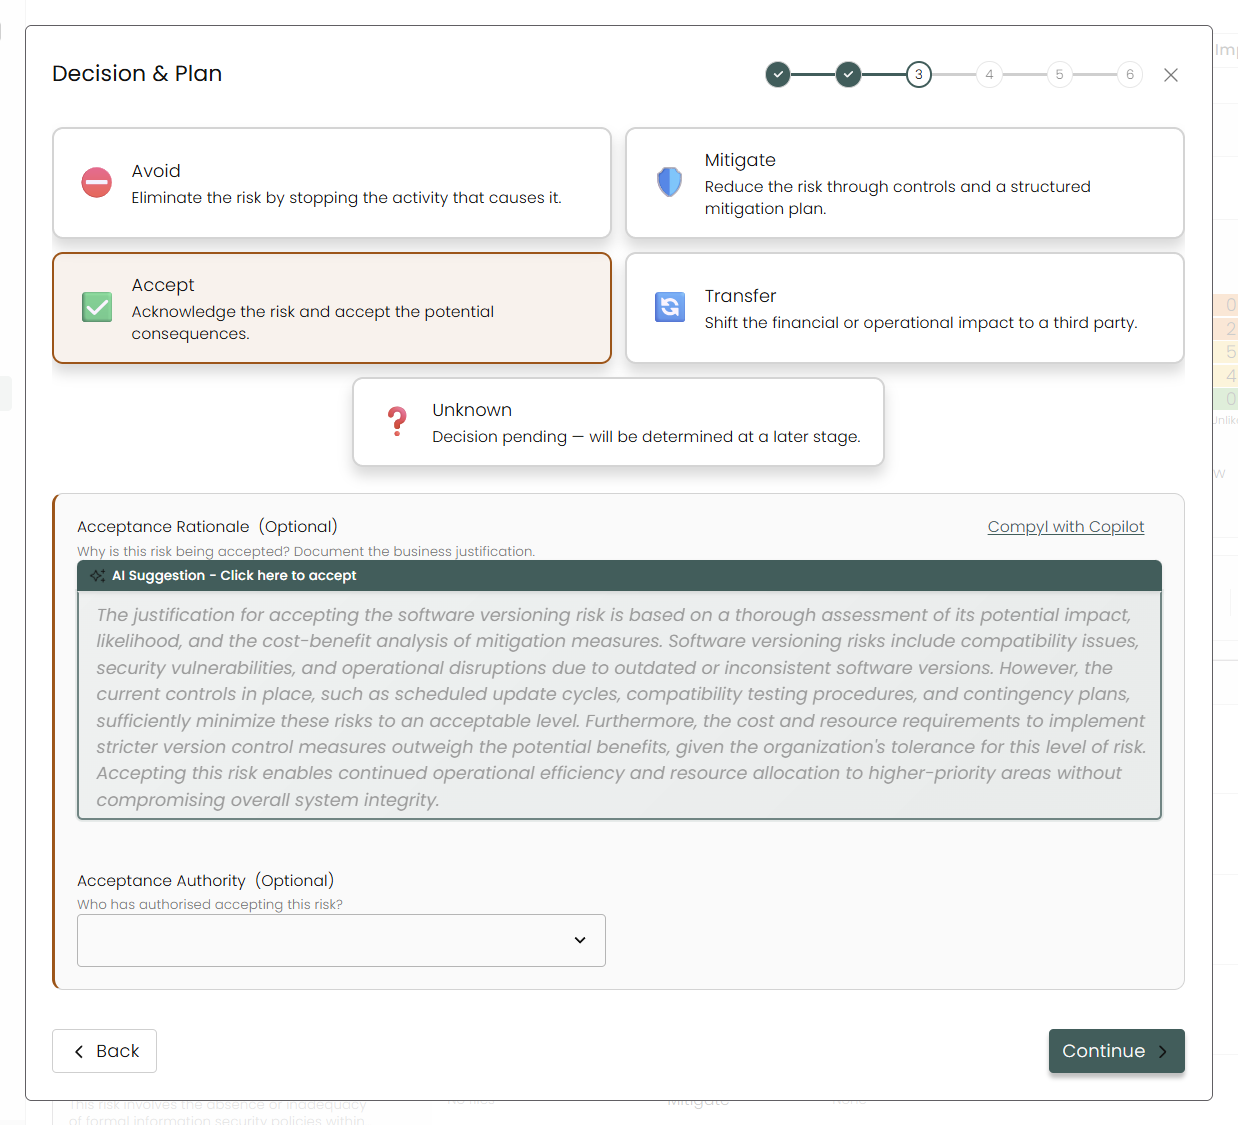
Accept: Acknowledge the risk and accept the potential consequences
Author your rationale for accepting this risk here. You can also assign who has accepted responsibility of this for auditing and other purposes.
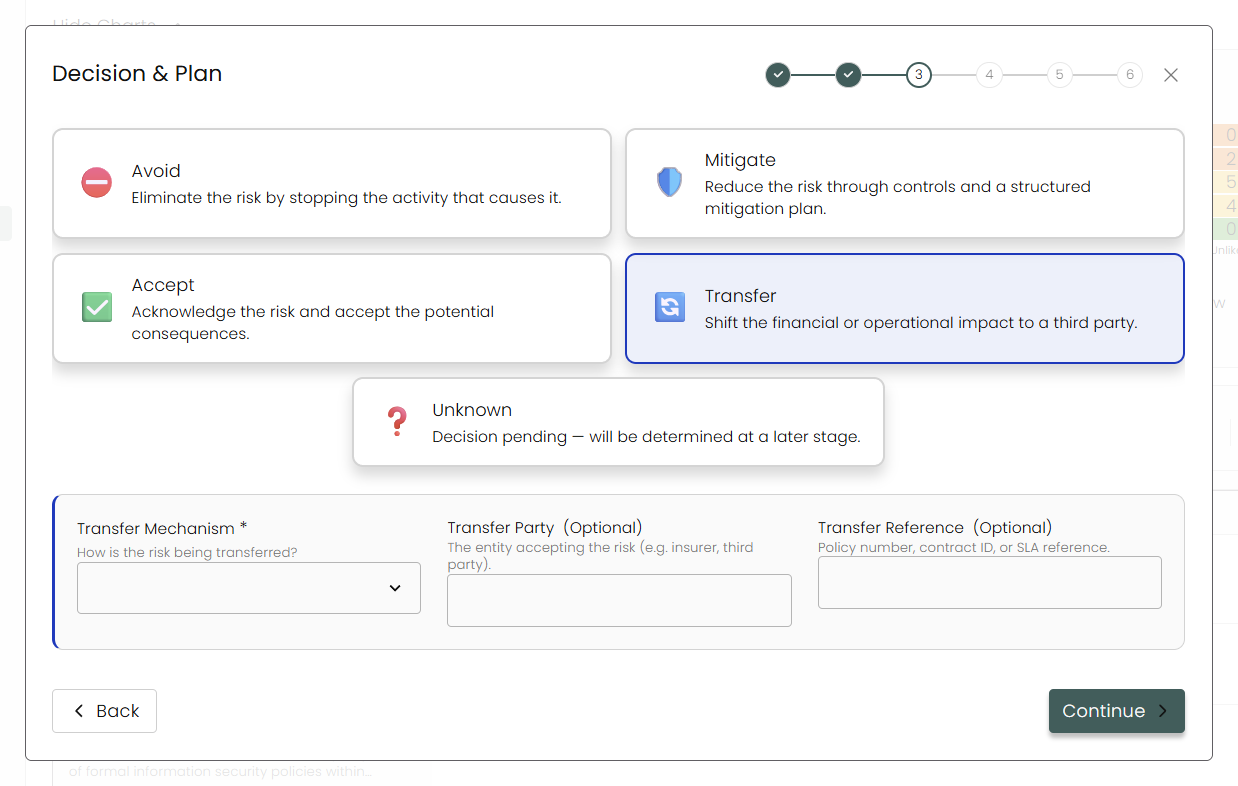
Transfer: Shift the financial or operational impact to a third party
Here you can select how this risk will be transferred:
- Insurance
- Contract
- SLA
- Third Party
As well as any additional information you might require.
Unknown: Decision pending - will be determined at a later stage
If this risk currently has no known decision or plan, choose this as recognizing the risk itself is important and it can be updated at a later date.
4. Assign
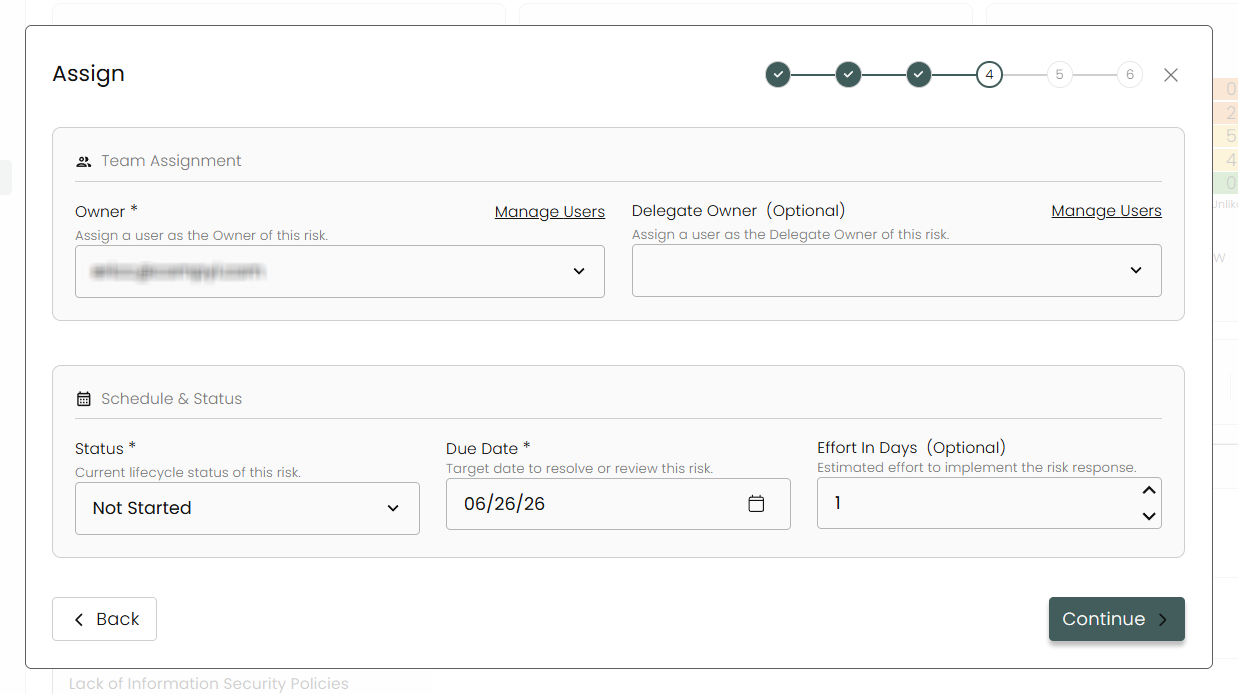
Add an Owner for the risk and set the status and due date.
5. Custom Fields
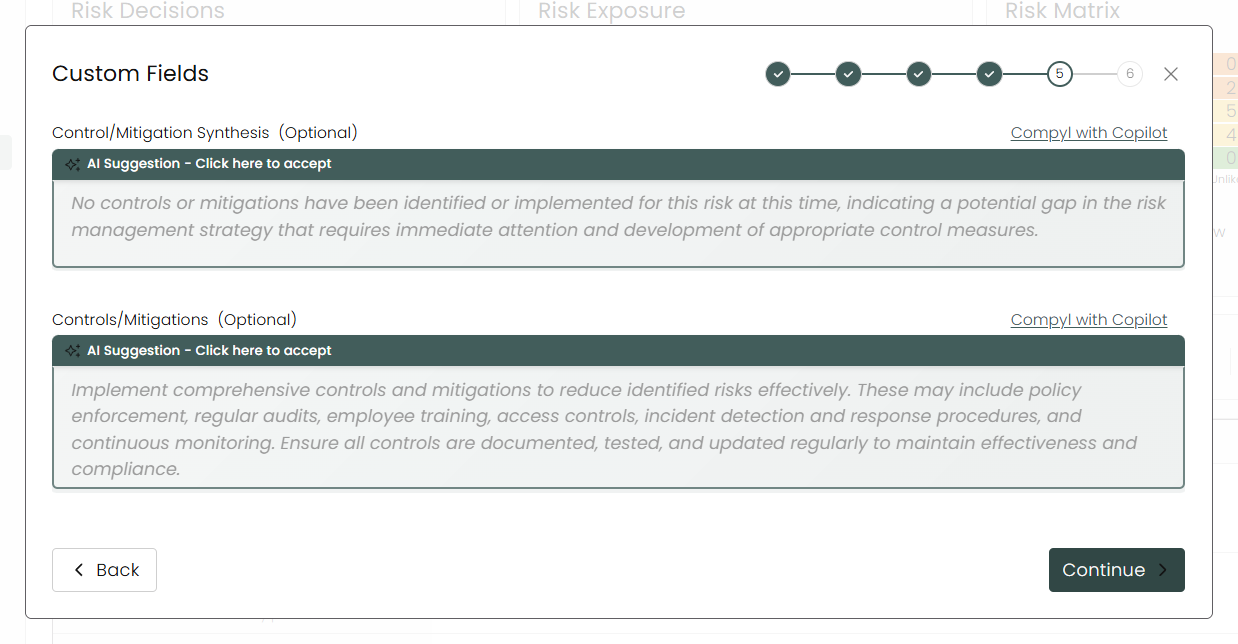
Any of the custom fields you created for risks will show up here.
6. Review
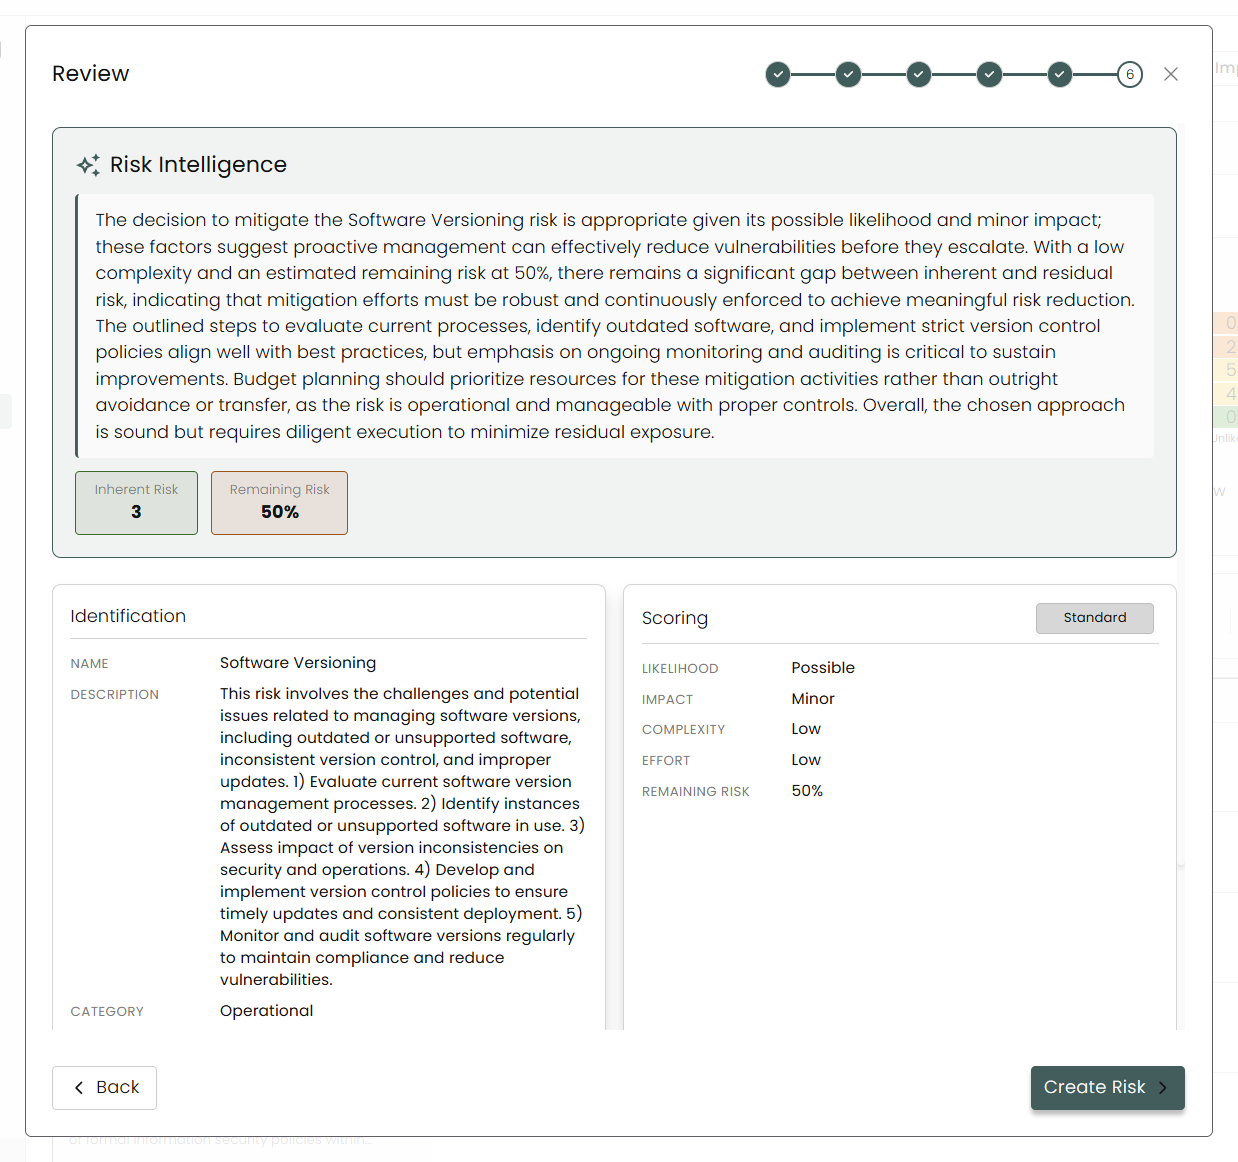
Finally, you are given an overview of your risk that you can review. If you're satisfied with everything, click on Create Risk.
Edit a Risk
If you wish to edit and existing risk, click on it on the grid.
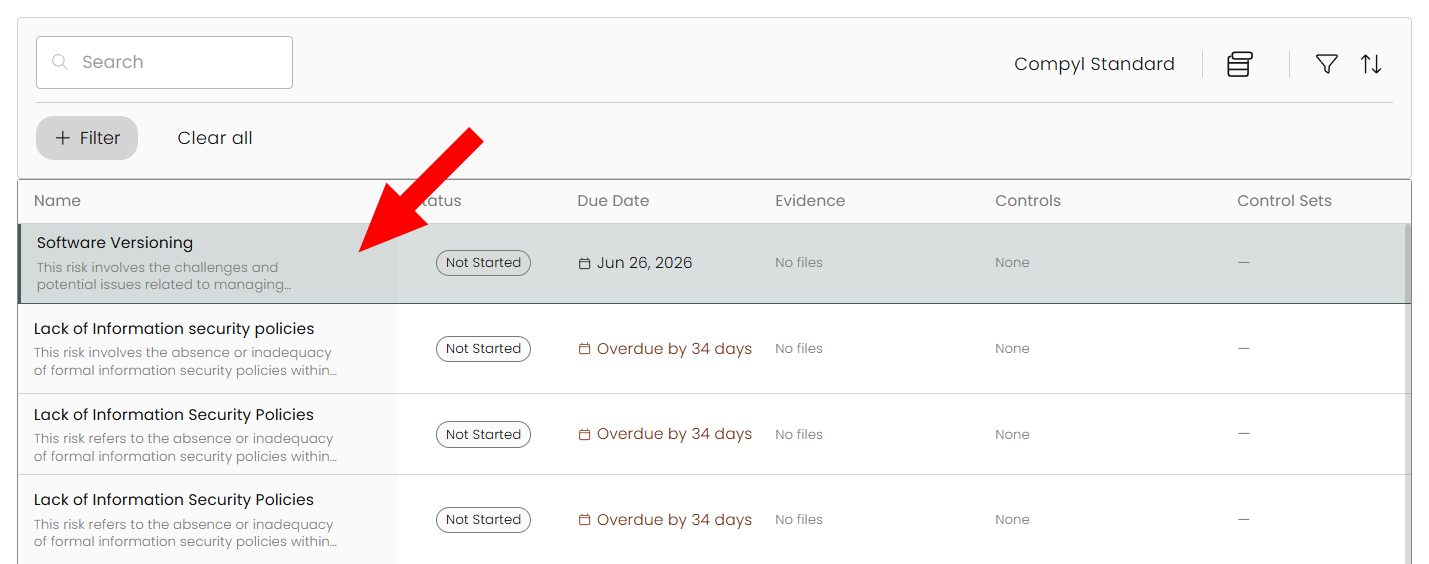
A new modal will slide out from the right, giving you all of the risk details.
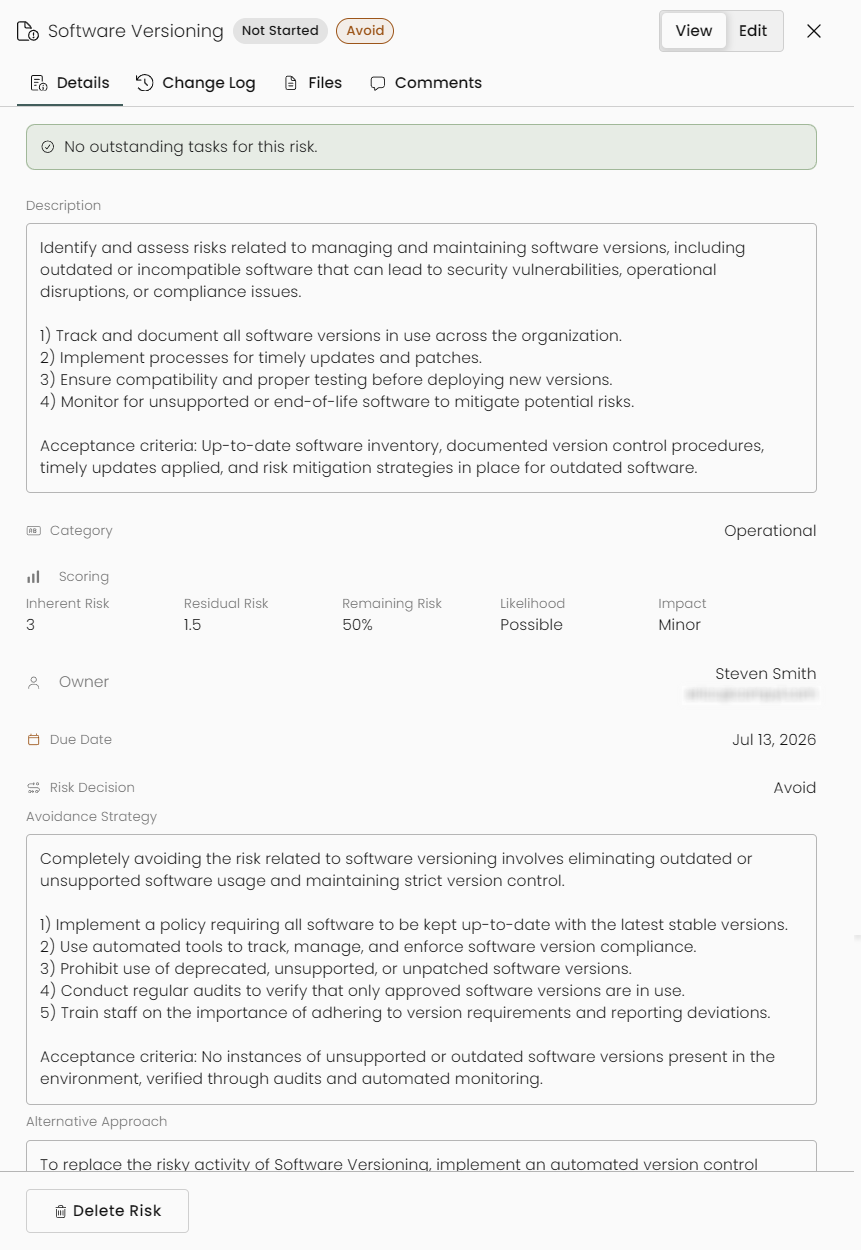
Selecting Edit will allow you to edit every aspect of the risk: name, category, description, business impact, and more. You can add sub-risks, associate with controls, and change its scheduling as well.
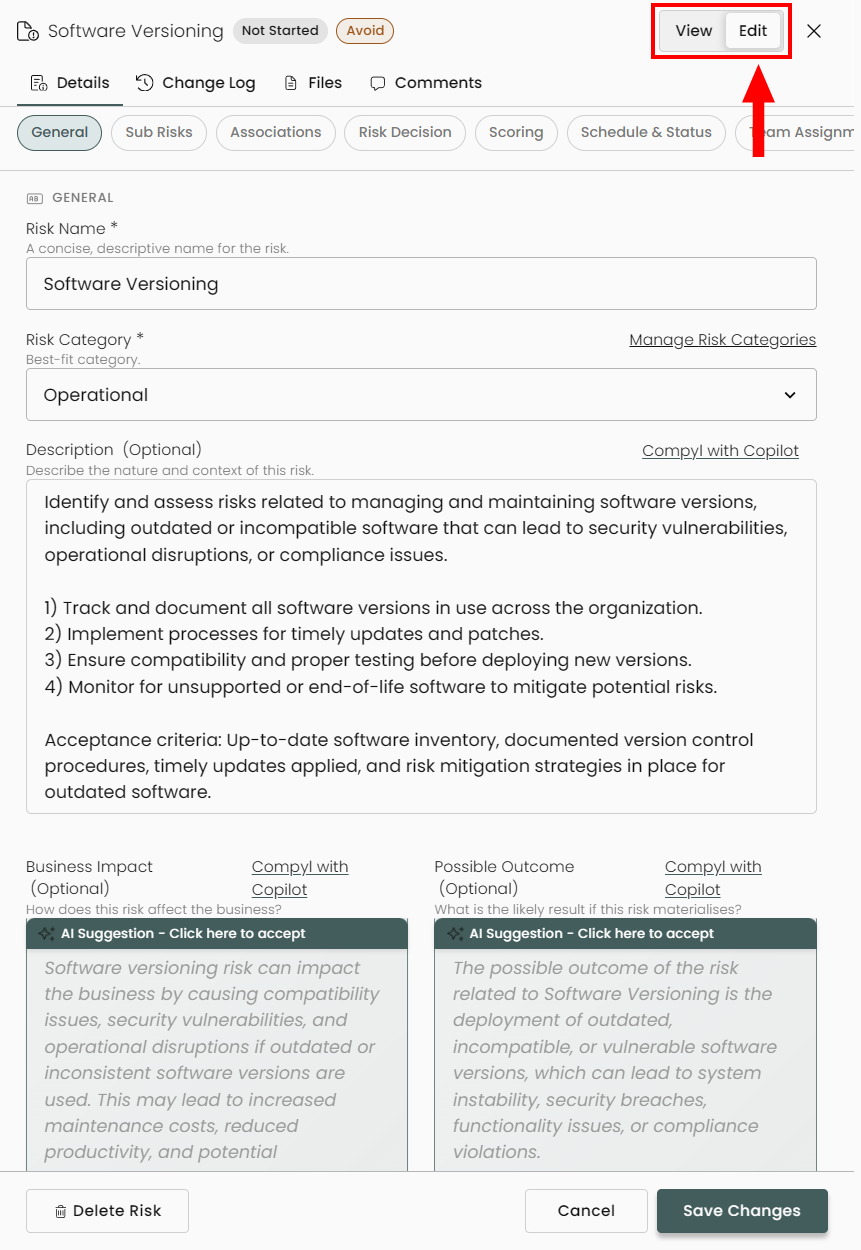
Click on Save Changes when complete.
Completing a Risk
Working on and completing a Risk is very similar to editing one. When you are assigned a risk, open it via the link in your notifications or by finding it in the Risk Register's grid view.

If there are any associated tasks, there be a link that takes you directly to the task itself to complete.
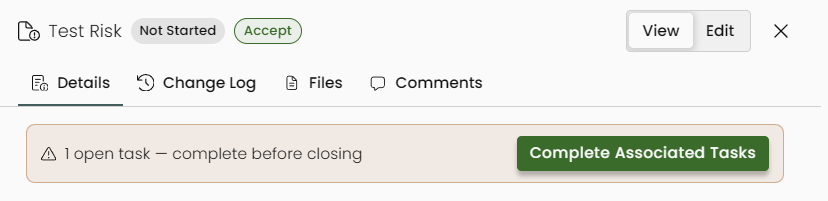
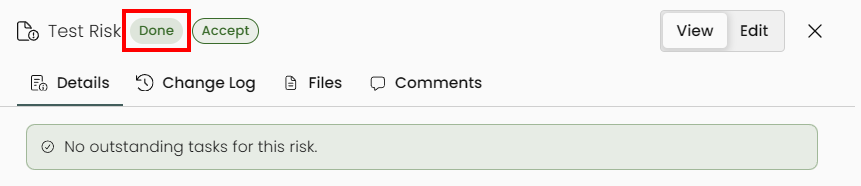
When the task is complete, the risk will indicate this as well as automatically be marked as Done. The tag to the right of the status indicates which Risk Decision was chosen (Avoid, Mitigate, Accept, Transfer, Unknown).
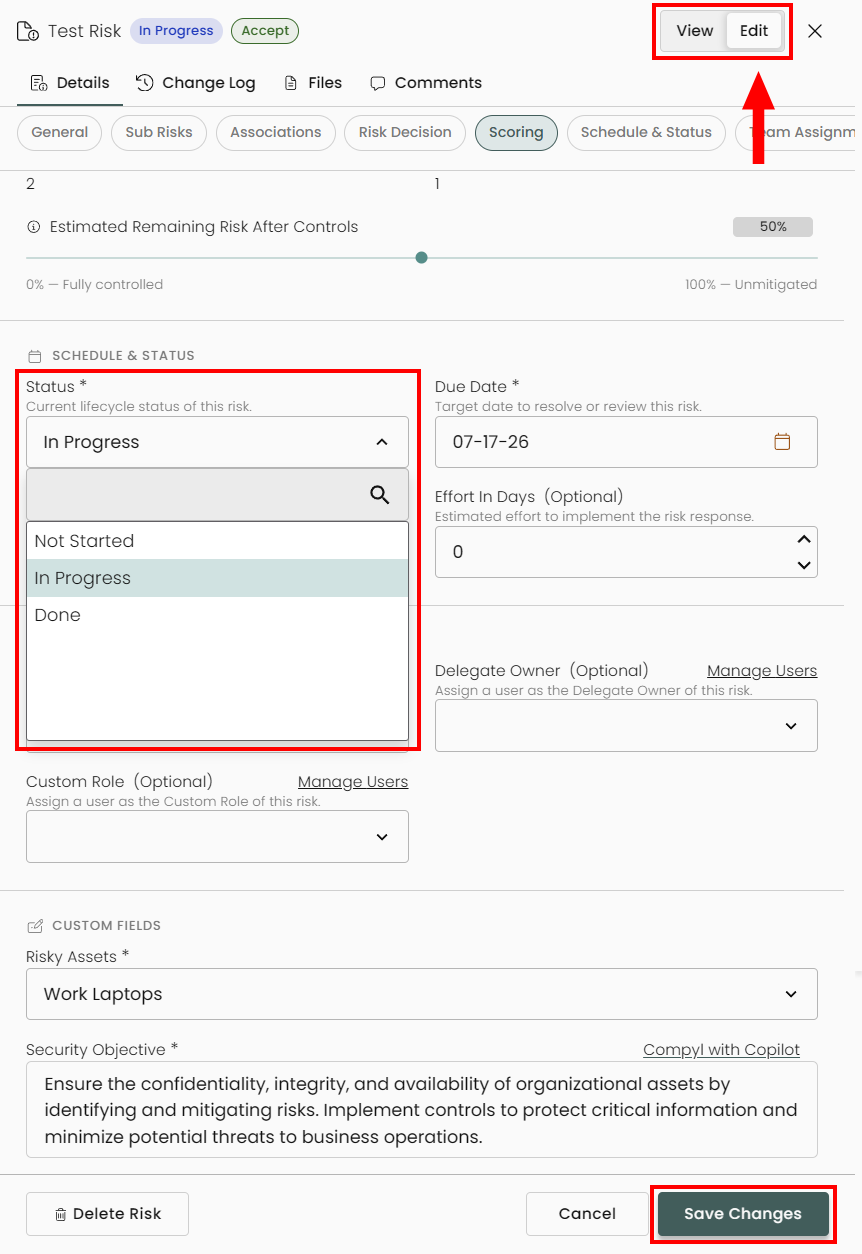
There are no Tasks associated with the Risk but the necessary steps have been completed, switch to Edit mode, change the Status drop-down from either Not Started or In Porgress to Done, and then click Save Changes at the bottom.
Uploading Evidence and Files
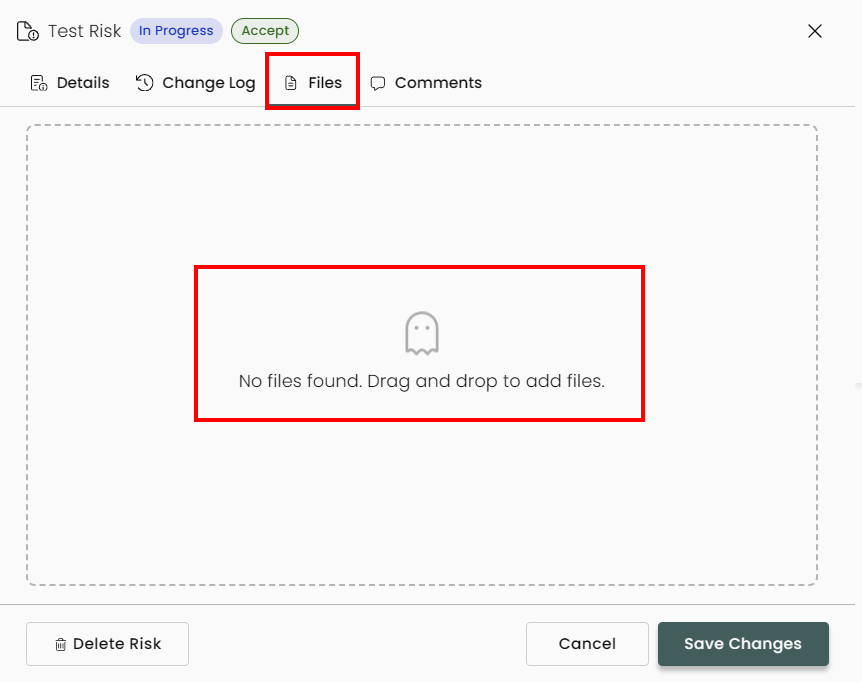
To upload evidence of completion (or any related files), select the Files tab at the top and then drag/drop them onto the risk or click to select them from your file browser.
Updated 8 days ago