
Adobe Sign Integration
Integrating with Adobe Sign gives Compyl access to Adobe Sign data as well as enhances the Contract Management process.
Through this integration, agreement and user data can be pulled in Compyl to satisfy controls. In order to integrate with Adobe Sign, a secret key will first need to be generated in the Adobe Sign account settings portal.
Create the Integration Key
To create an API token, follow these steps:
-
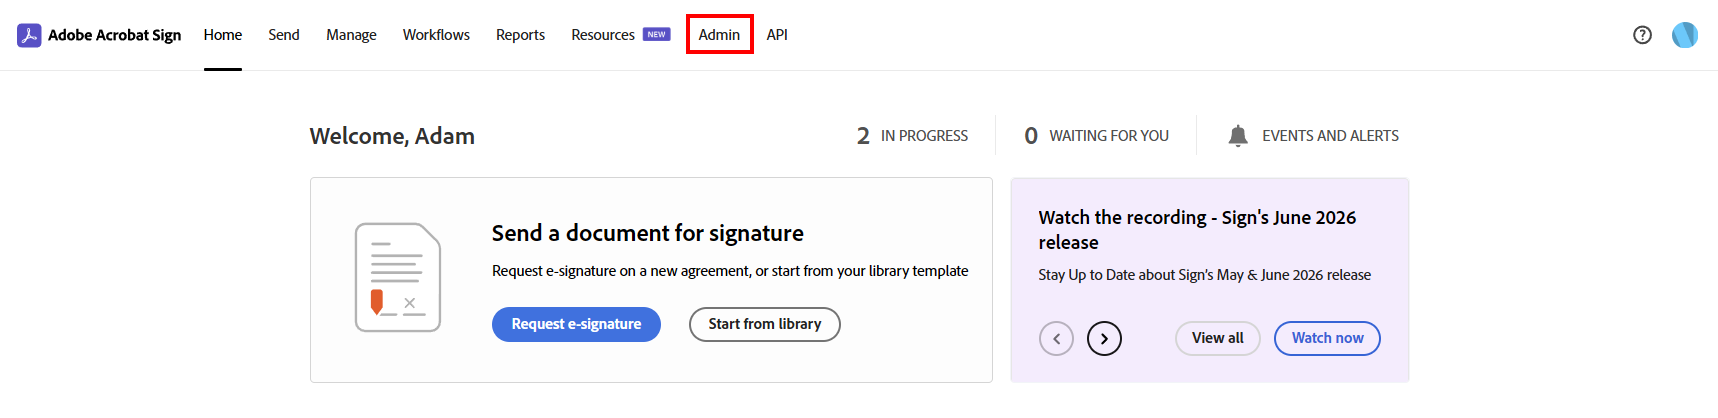
Sign into Adobe Sign and navigate to the Admin tab.
-
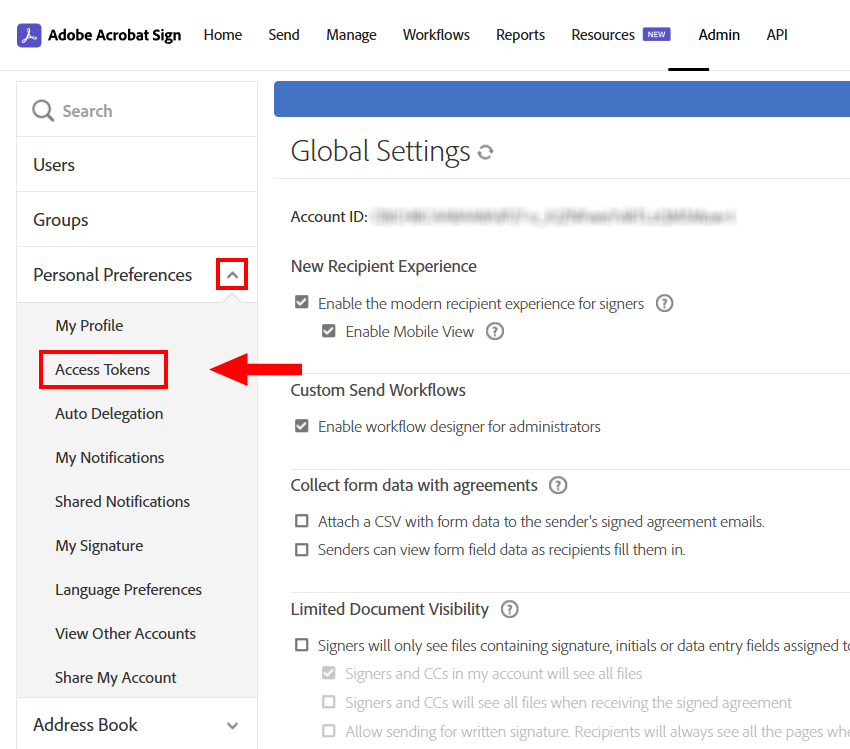
Expand Personal Preferences on the left navigation menu and select Access Tokens.
-
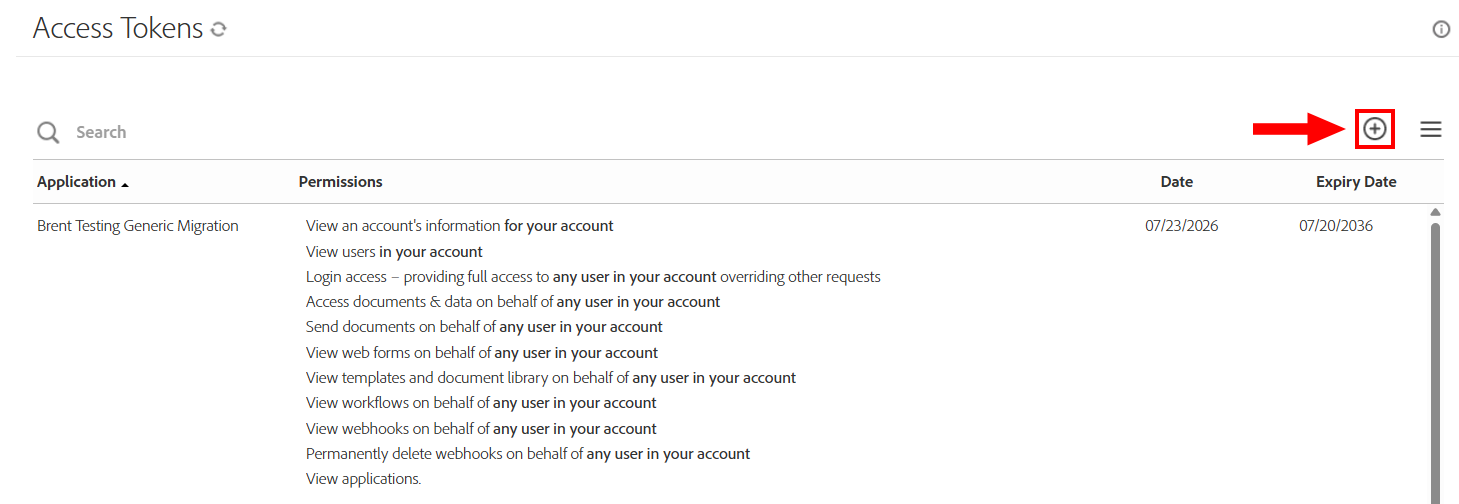
Click on the + icon in the upper right side of the page
-
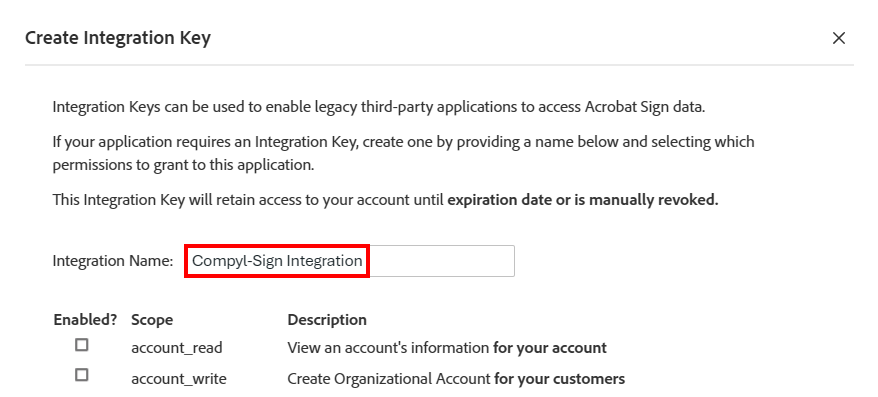
A pop-up window will appear. Enter a name for the integration key. This is only for identification purposes.
-
Select the scopes you would like Compyl to have access to. The scopes listed below are necessary in order to enable the integration between the Contracts Register and Adobe Sign.
However, if there is other data you would like Compyl to be able to access through Blueprints, feel free to select any other scopes as well.- user_read
- agreement_read
- agreement_write
- agreement_send
- webhook_read
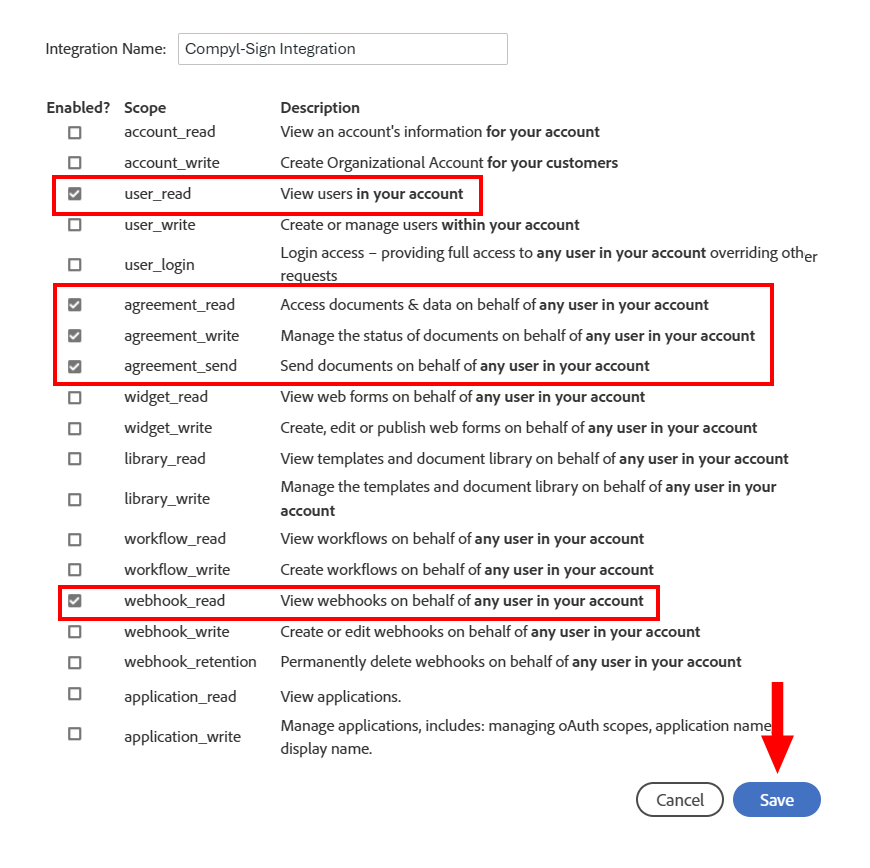
Click Save to generate a new integration key. -
On the main Access Tokens page, your new application will appear at the top. Click on it.
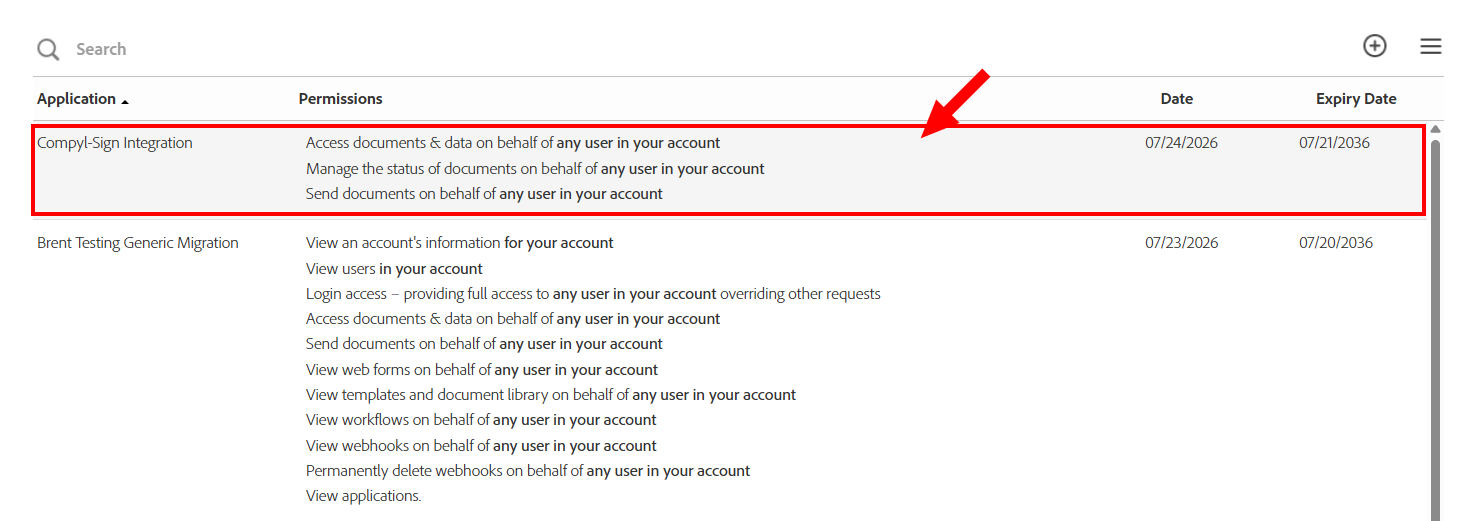
-
Select Integration Key

-
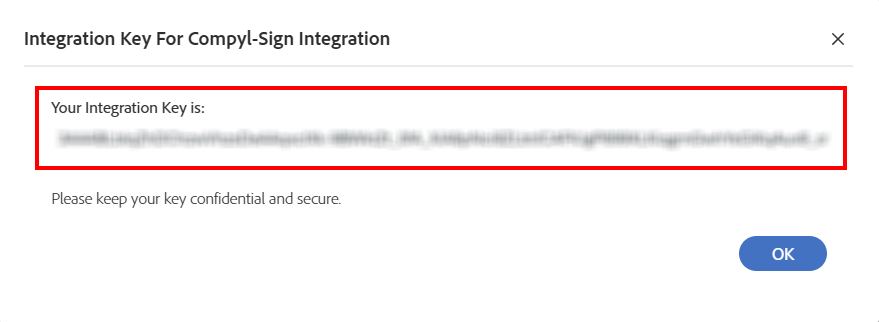
A pop-up window will appear showing the integration key. Copy this key, as it will be needed when integrating with Compyl.
FYIGenerated keys cannot be modified. If required permissions are missing in an Adobe Sign integration key, a new key will need to be created.
Optional: Account Sharing
If you would like to only create one Integration key to capture all of the contracts of any and all of your adobe users you can utilize account sharing. You will need adobe enterprise, advanced account sharing turned on (Advanced Account Sharing) , and admin privileges on the account you wish to do this for.
If you navigate to Users, you will see your list of users:
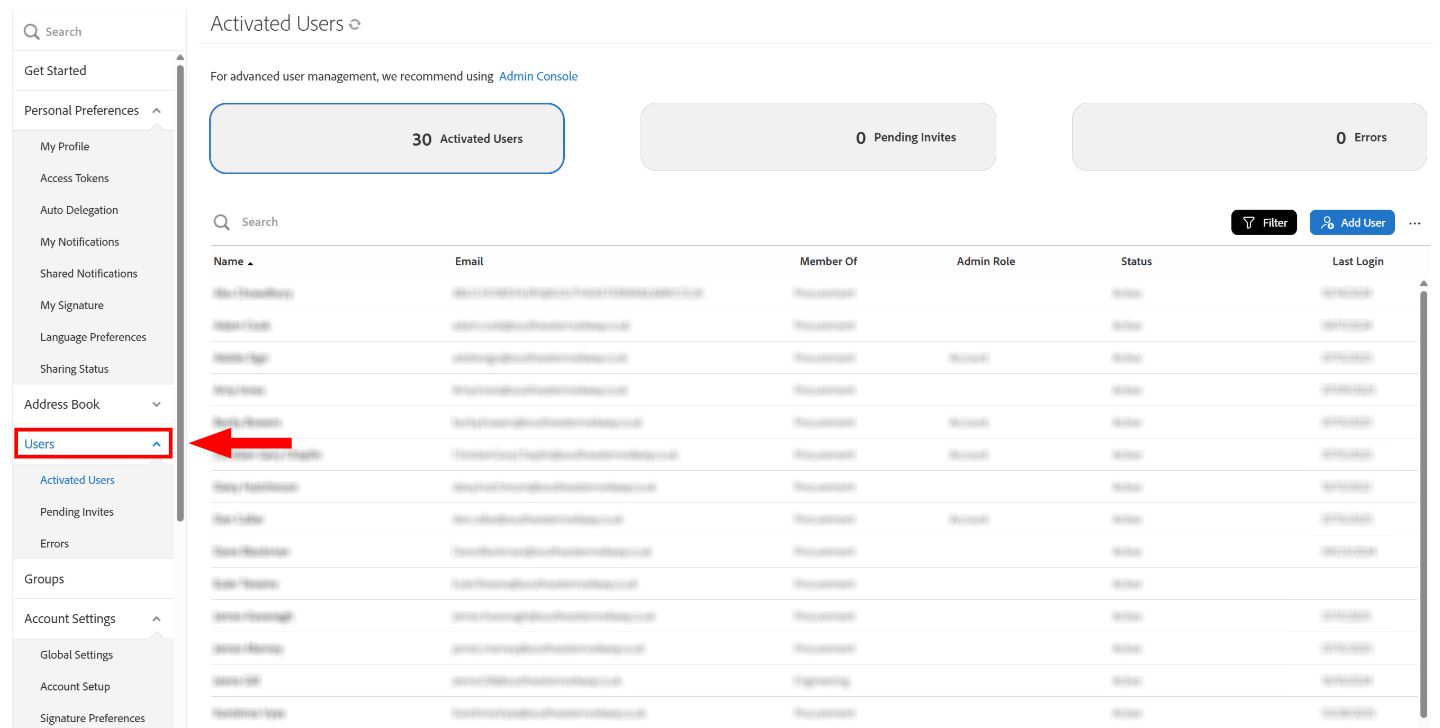
Choose your user account (the one you created the integration key with), pick Sharing Status and then the Shared With User tab:
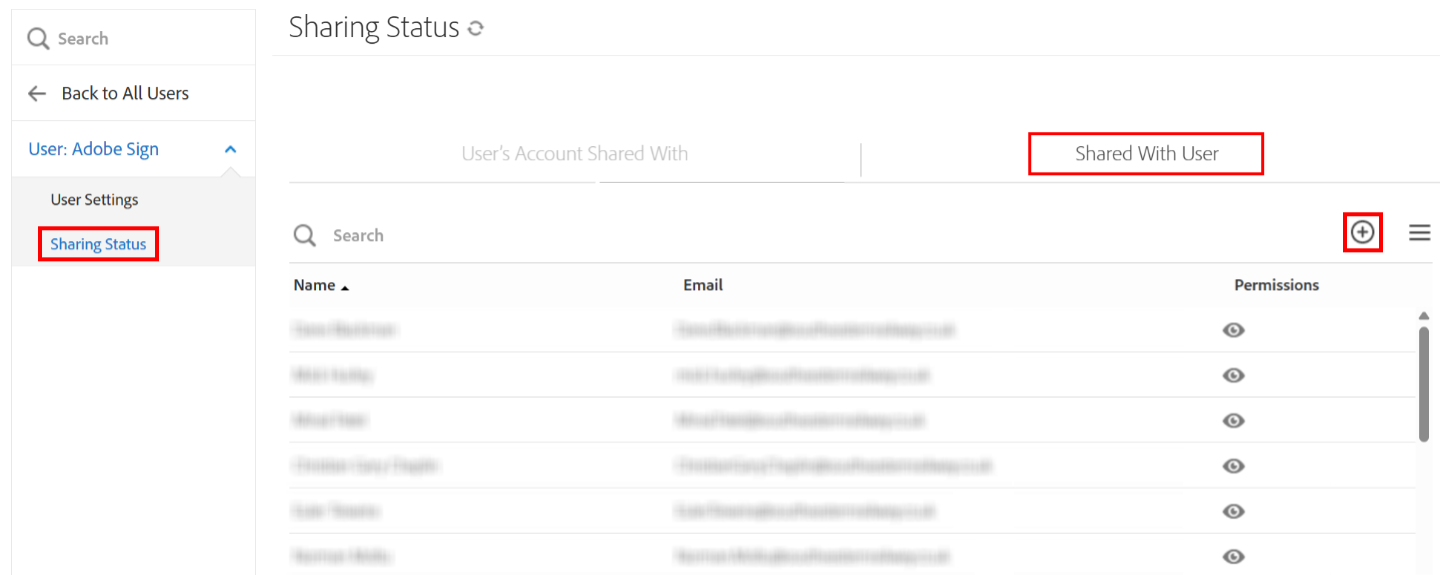
Click the + button on the top right of the table to choose every user you wish to have access to. Your integration key will now pull agreements for all the users you’ve shared to your account.
Add Configuration
-
Navigate to the Integrations tab using the left-hand menu, find Adobe Sign, and select +Add Configuration.

-
Next, fill in the details below and select Continue.
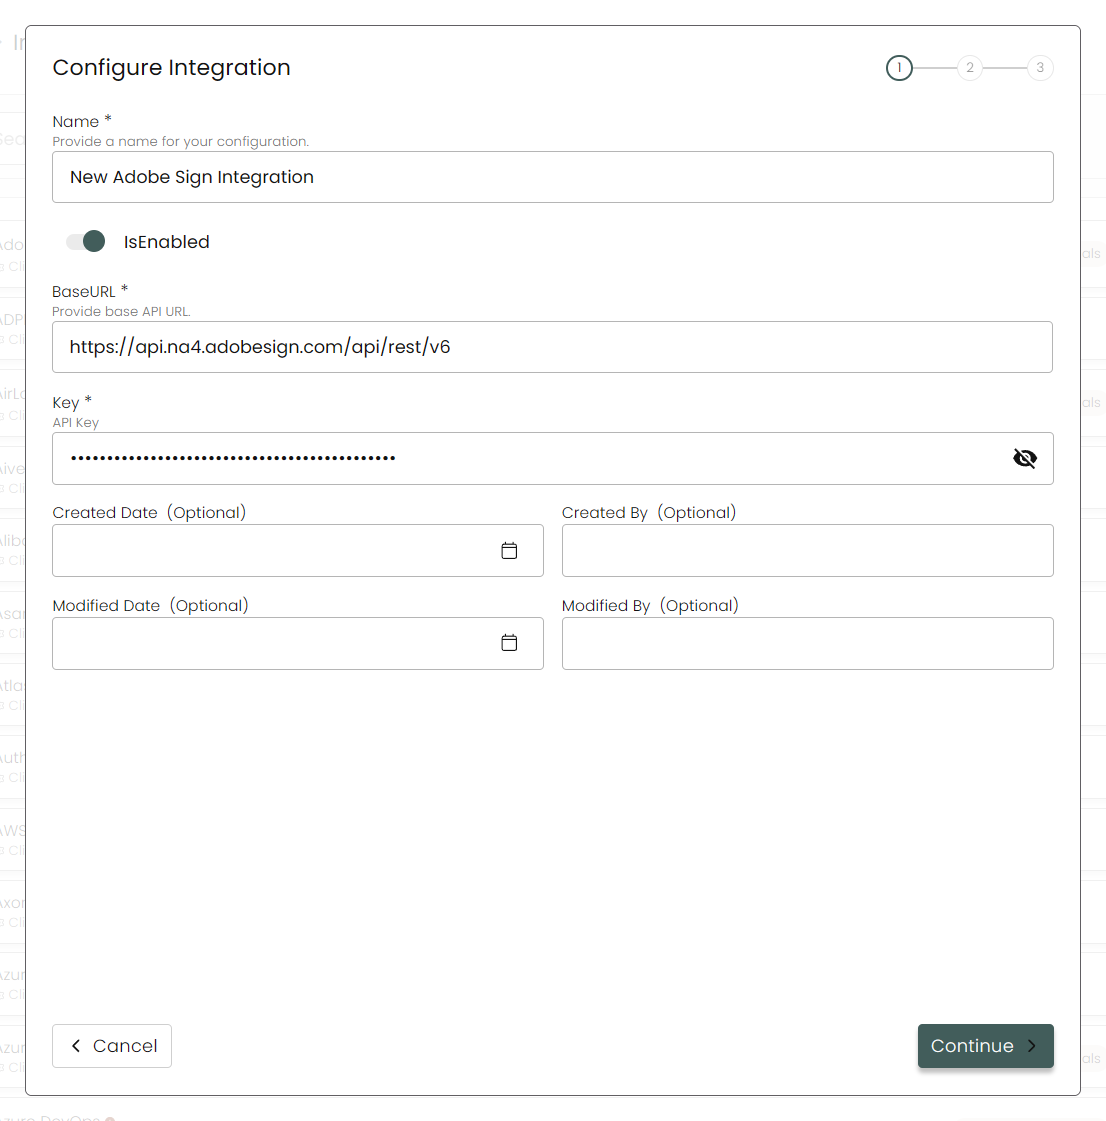
Name: Enter the name of the integration.is Enabled: Toggle button to ensure data is populated into Compyl.
Base URL: The URL of the Adobe Sign API is based on region. This is found by looking at the URL of your Adobe Sign account. Start with:
https://api.and then copy and paste the below string from your URL directly following.
In this example, na4 is the region. Add
api/rest/v6at the end.The final Base URL will look like:
https://api.na4.adobesign.com/api/rest/v6.Key: This is the Integration Key is obtained from above .
-
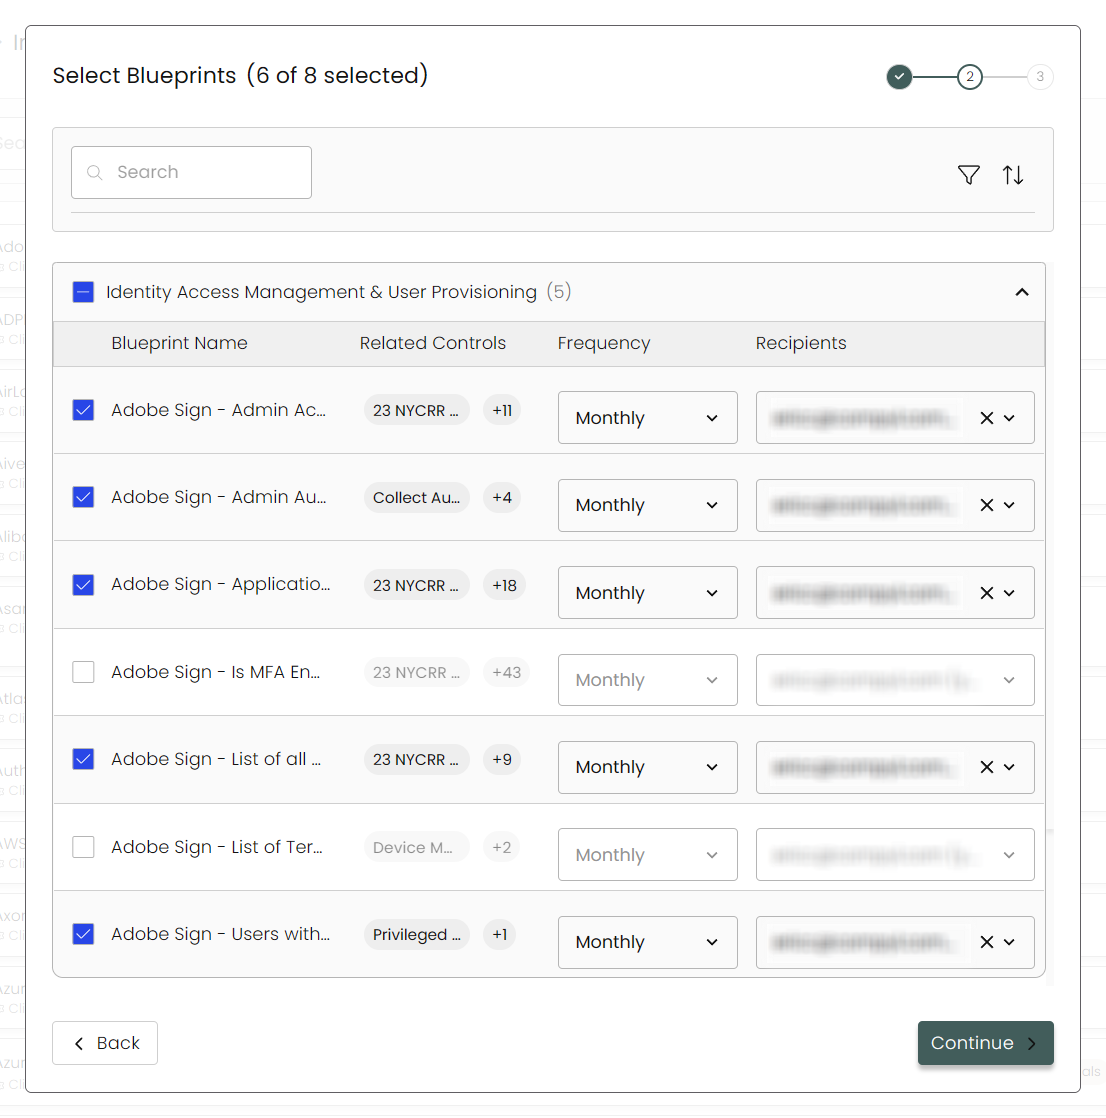
Select any Blueprints you wish to associate with this integration.
-
After you hit Continue, you'll see a summary screen. Click Save to complete the configuration.
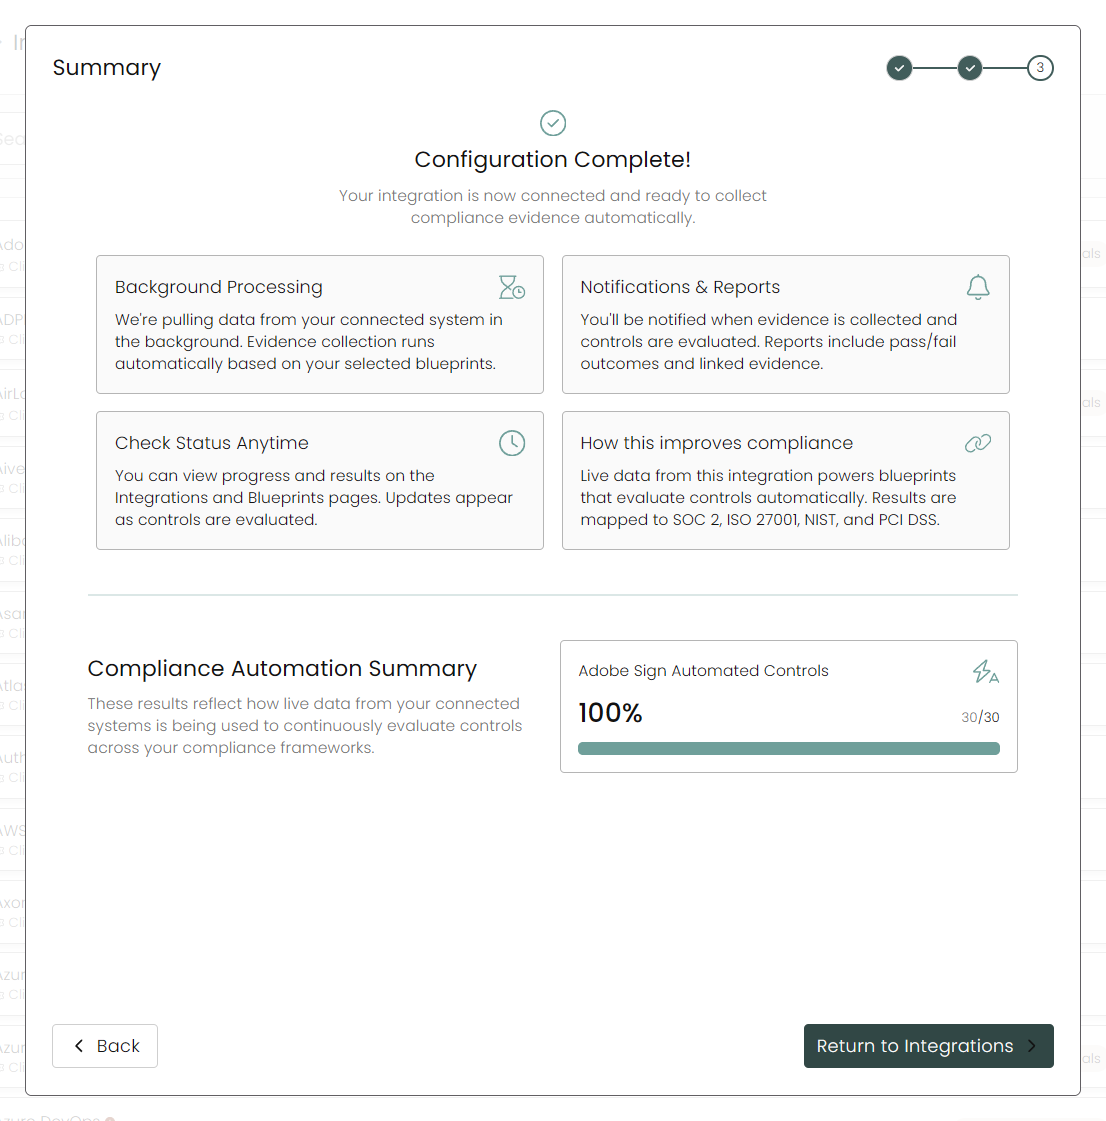
Once you have completed filling out the form click Return to Integrations.
You'll know the integration is successfully added when the status updates to Complete.

Data is synced on a recurring schedule configured by your Compyl administrator. Each sync pulls the latest data from all enabled endpoints.
To query the data from the integration, refer to the Blueprints article.
Updated 2 months ago