
Netsuite Integration
Enabling the Required Netsuite Features
Before you create the role, confirm the following features are enabled at the account level. The integration will not work if any of them are off.
- Sign in to NetSuite as an account administrator.
- Go to Setup → Company → Setup Tasks → Enable Features.
- On the SuiteCloud subtab, check:
- REST Web Services (under SuiteTalk (Web Services))
- Token-Based Authentication (under Manage Authentication)
- On the Analytics subtab, check:
- SuiteAnalytics Workbook
- Accept the SuiteCloud Terms of Service if prompted, then click Save.
FYISuiteAnalytics Workbook must be enabled even if you don't plan to use Workbook features. NetSuite requires it as a prerequisite for REST Web Services. See NetSuite's Prerequisites and Setup for REST Web Services .
Creating the Netsuite Role
-
Sign in to NetSuite as an account administrator
-
Go to Setup → Manage User & Roles → Manage Roles.
-
Create the new role and give it a name (e.g., Compyl Integration Role).
-
On the Permissions tab, add the following at the listed minimum level. Equal or higher levels are fine.
Setup subtab
- REST Web services - Full
- Log in using Access Tokens - Full
Reports subtab
- SuiteAnalytics Workbook - Edit
Lists subtab
- Vendors - View (required for the
/vendorendpoint) - Accounts - View (required for the
/accountendpoint) - Employees - View (required for the
/employeeendpoint) - Perform Search - View
- Entity-Subsidiary Relationship - View (required only if your NetSuite account uses OneWorld).
-
Click Save.
FYIDo not add any restrictions to the header portions of the role (Subsidiaries, Departments, Locations, or Classes) unless you intentionally want to scope what data Compyl can read. Restrictions set here filter the records we can fetch, and overly narrow restrictions can cause permission errors on list endpoints even when the per-record permission is granted.
Note
SuiteAnalytics Workbookat the Edit level is mandatory. This is the most common reason a NetSuite role passes a manual record lookup in the UI but returns "Your current role does not have permission to perform this action" against the REST API.
Creating the Integration User
-
Create a new user and assign the role that was created in Creating the Netsuite Role.
-
Go to Setup → Integrations → Manage Integrations → New.
- Optional: give the integration a name and description.
-
Set State to Enabled.
-
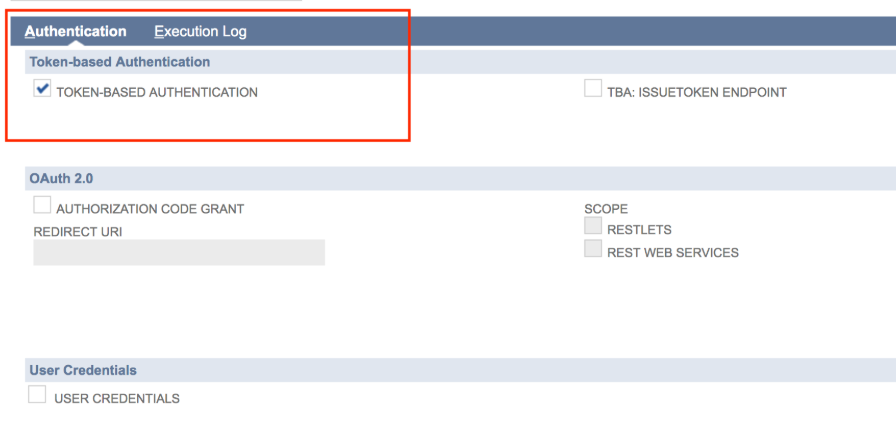
Select Token-based Authentication. Leave User Credentials unchecked as Token-based Authentication does not use the legacy User Credentials flow, and leaving this on can cause unexpected behavior.
-
On the confirmation page, securely copy your Consumer Key and Consumer Secret before leaving.
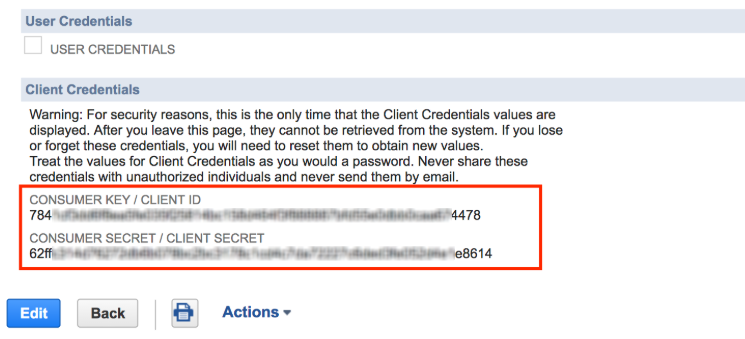
WarningThe Consumer Key and Consumer Secret are displayed only once. If you lose them, you must reset the credentials on the integration record, which invalidates every token previously issued from it.
Creating the Access Token and Key
Now that the User and Role have been created and assigned, it's time to generate your Access token and key.
Generating the Access Token and Secret
-
Navigate to Setup → Manage User & Roles → User Management → Access Tokens.
-
Select New Access Token.
-
In the new window, enter in the following:
-
Select Save and that will give you both the Token ID (key) and the Token Secret.

WarningCopy these down securely for use when setting up the integration within Compyl as they will not be shown again.
NoteThe access token is permanently bound to the Integration + User + Role triple you picked above. If you later need to use a different role or user, you must issue a new token. Permission changes to the role itself do not require a new token — they take effect on NetSuite's next API call.
Obtaining the Netsuite Realm
The Realm is your NetSuite Account ID, not a URL.
- Navigate to Setup → Company → Company Information.
- Locate and copy your Account ID - this is your Realm.
-
Alternately, you can grab it from your NetSuite URL subdomain, (e.g.
1234567-sb1inhttps://1234567-sb1.app.netsuite.com).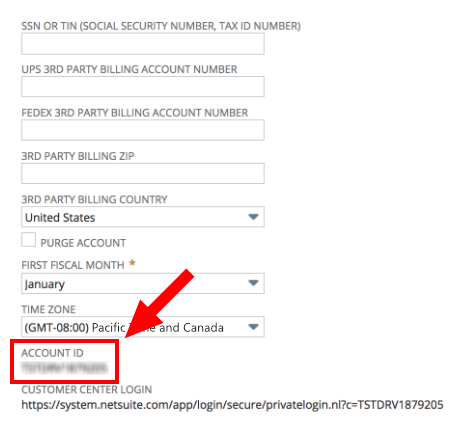
-
Add Configuration
-
Navigate to the Integrations tab using the left-hand menu, find NetSuite, and select +Add Configuration.

-
Next, fill in the details below and select Continue.
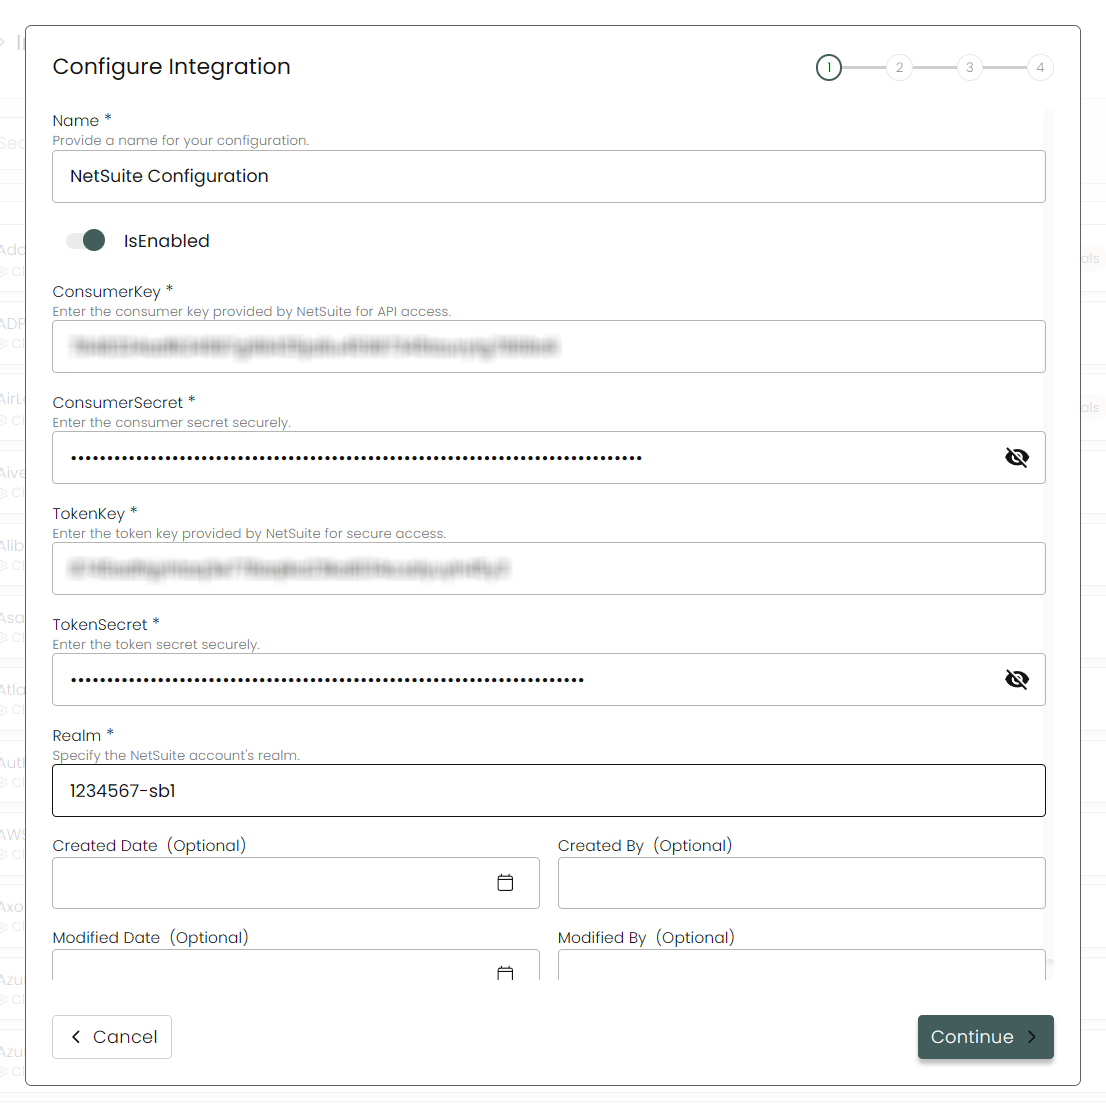
Name: Enter the name of the integration.
is Enabled: Toggle button to ensure data is populated into Compyl.
Consumer Key: Created as part of the Integration User.
Consumer Secret: Created as part of the Integration User.
Token Key: Generated above.
Token Secret: Generated above.
Realm: Your NetSuite Account ID (e.g.,
1234567or1234567_sb1). Obtained above.
-
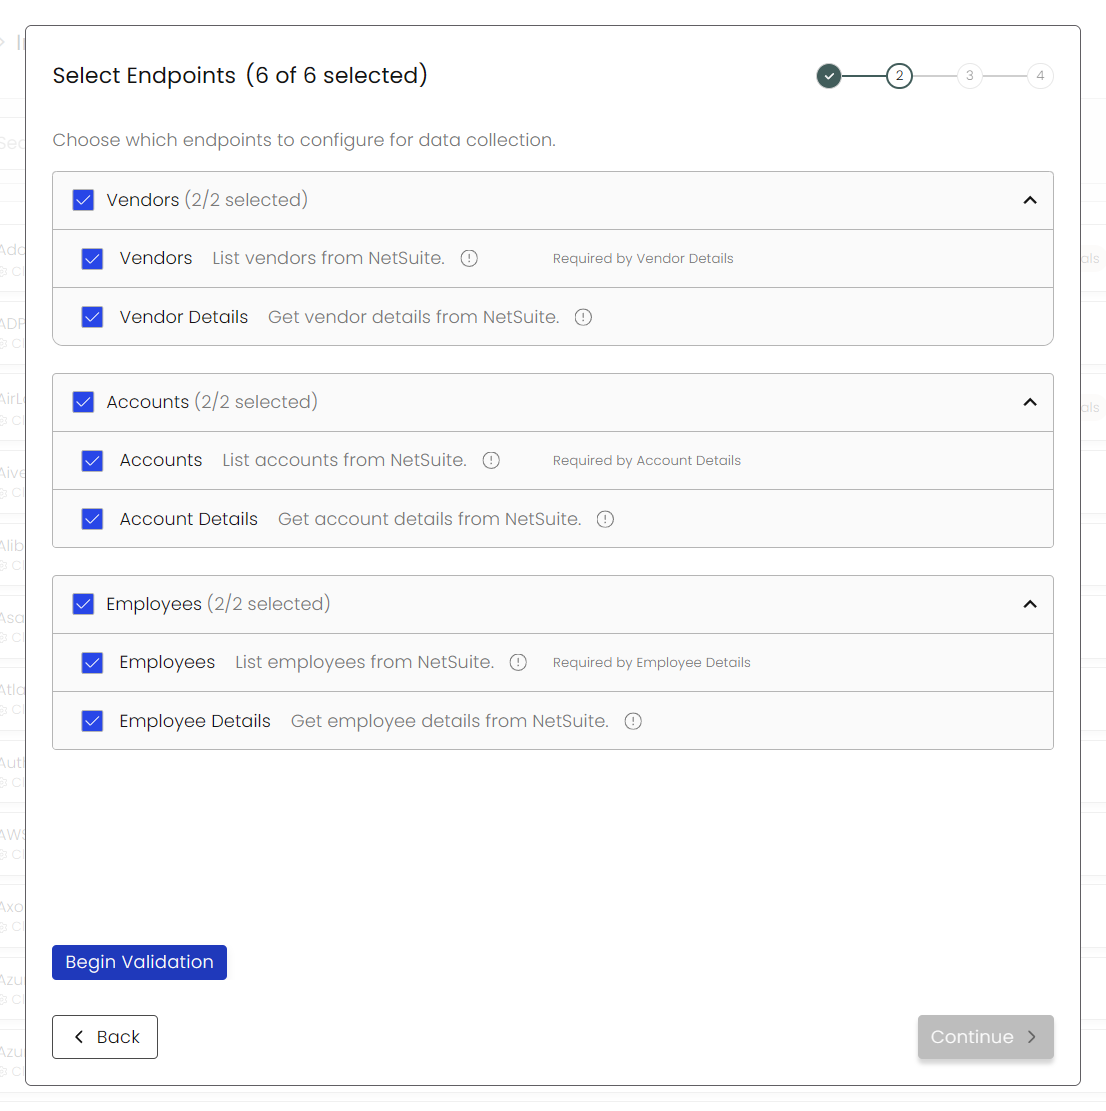
Choose your Endpoints and Begin Validation to validate your connection.
-
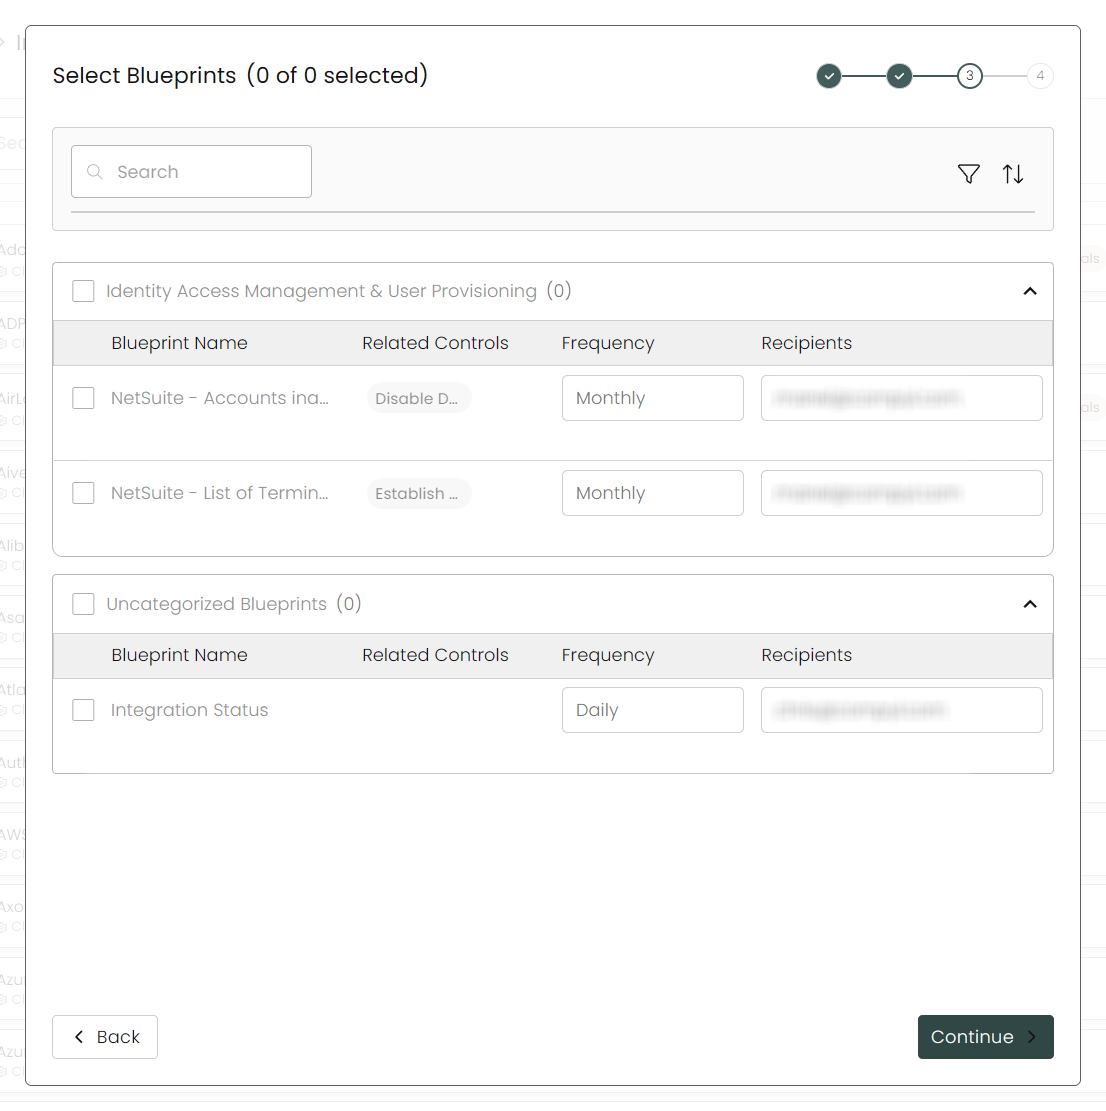
Select any Blueprints you wish to associate with this integration.
-
After you hit Continue, you'll see a summary screen. Click Return to Integrations to complete the configuration.
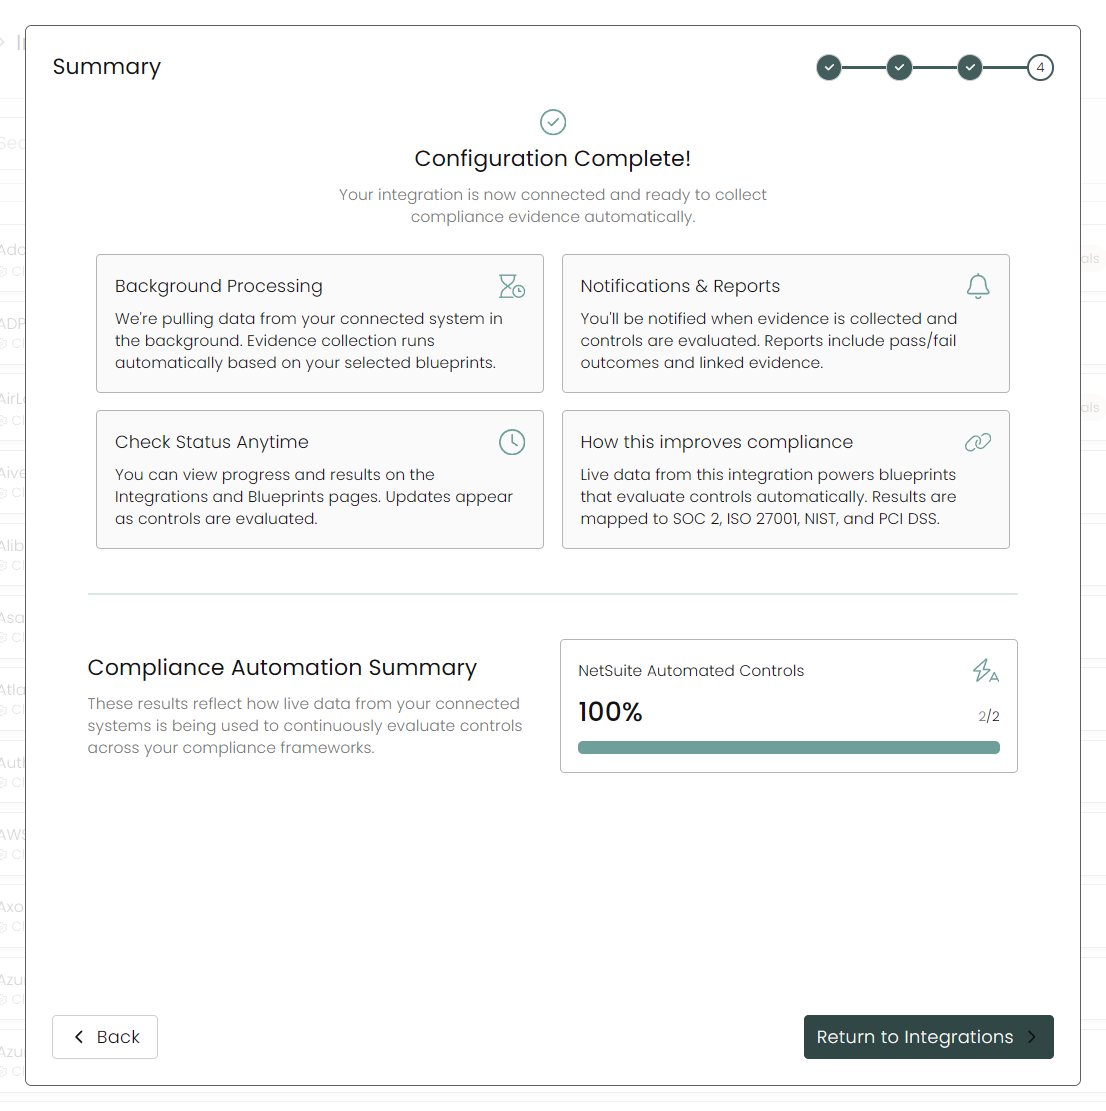
Once you have completed filling out the form click Return to Integrations.
You'll know the integration is successfully added when the status updates to Complete.

Data is synced on a recurring schedule configured by your Compyl administrator. Each sync pulls the latest data from all enabled endpoints.
To query the data from the integration, refer to the Blueprints article.
Updated 2 months ago