
AWS Integration
Our integration with AWS enables users to pull in raw data from their AWS environment, run queries for configuration checks and other forms of monitoring, and log evidence for security audits.
Choosing How to Access AWS
- If you wish to access AWS via a User Account pick Setting Up a User in IAM.
- If you, instead, want to use Role-Based Authentication, choose the Setting Up AWS Role-Based Authentication tab.
ImportantYou can only pick one way to access AWS - attempting to use both will result in the integration failing.
-
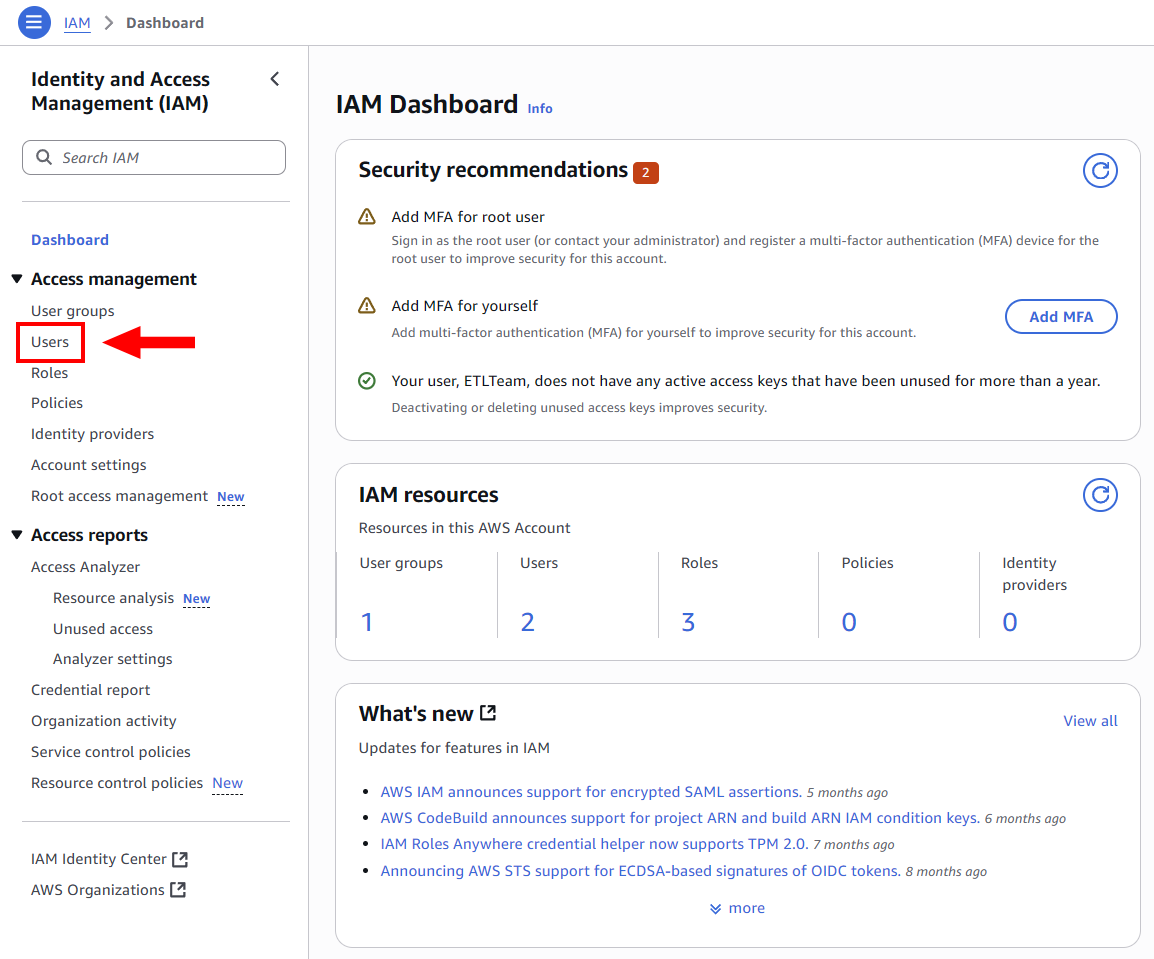
Navigate back to the IAM Dashboard and under Access management, click on Users.
-
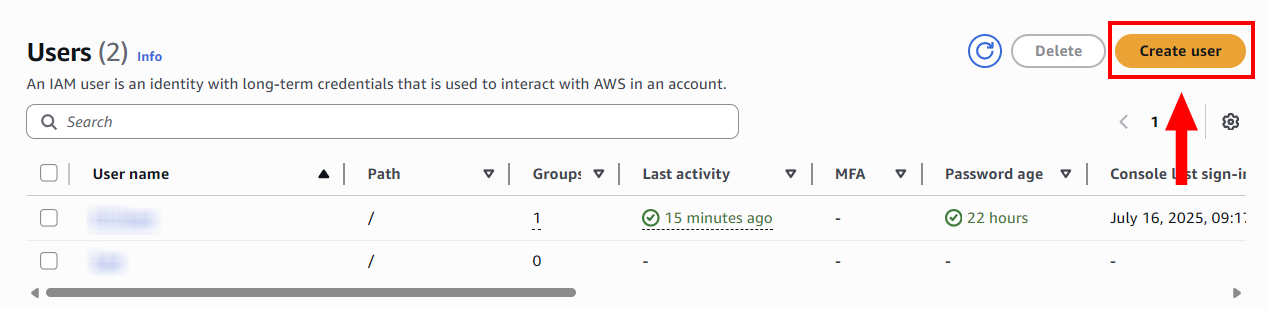
Click on Create User.
-
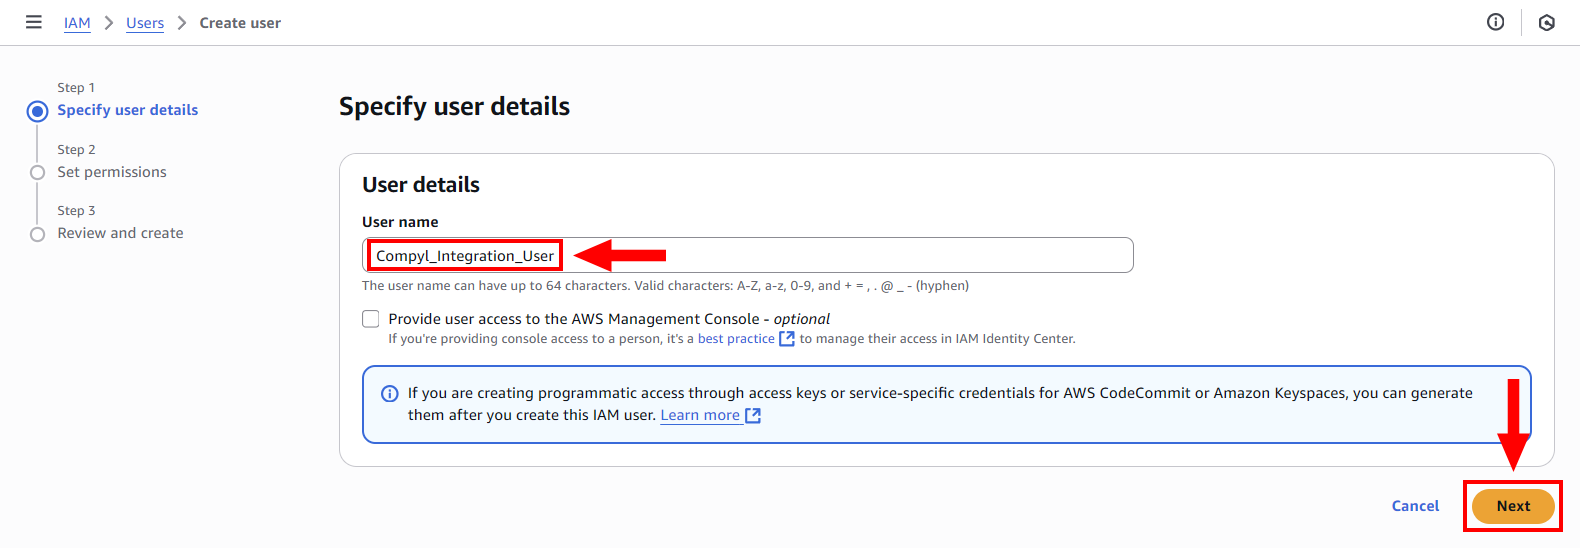
Enter the User name and click Next.
-
Click on Attach policies directly. Search for ReadOnlyAccess under AWS managed - job function and select it. Then click Next.
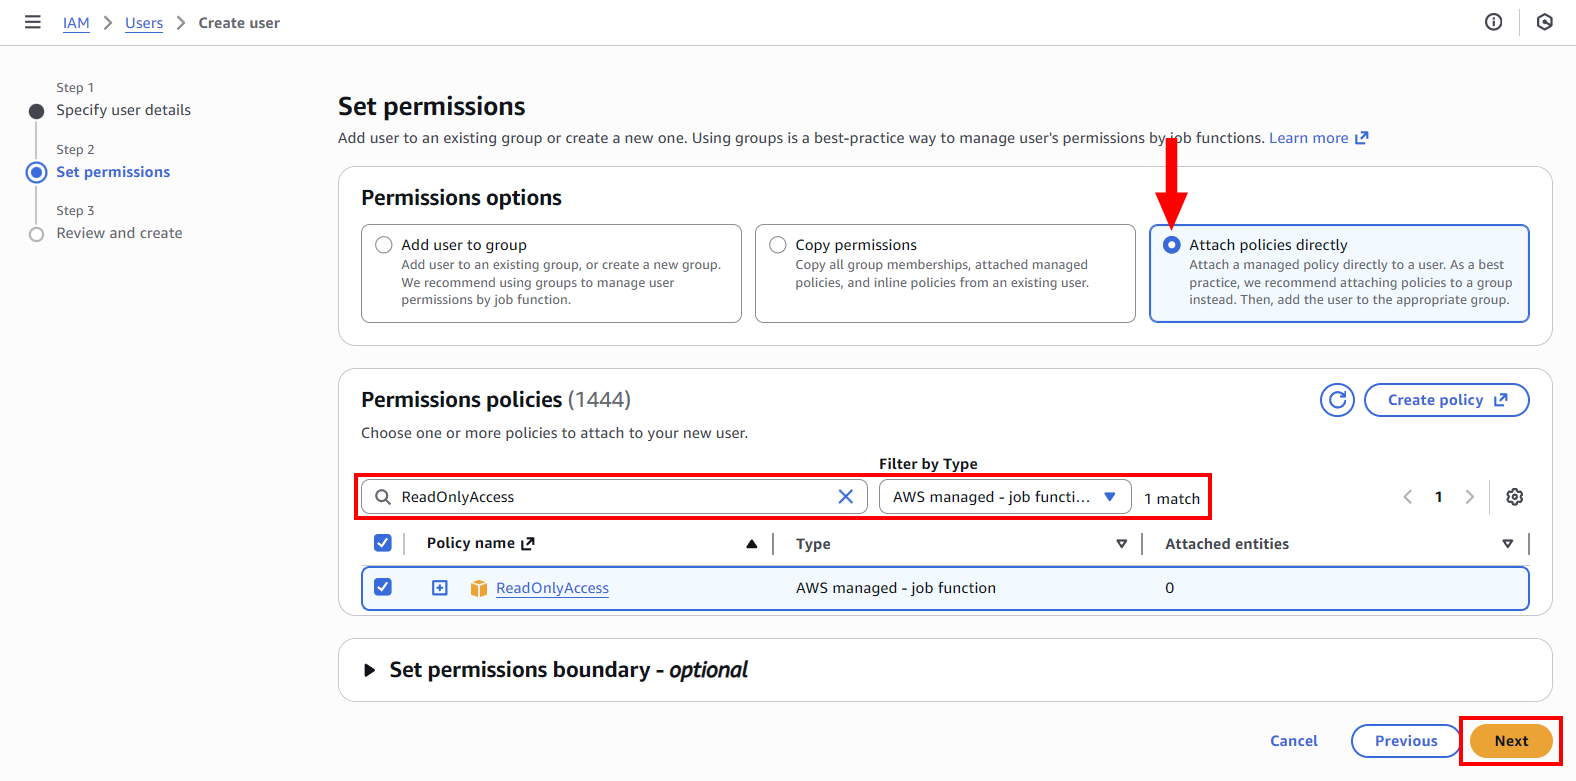
Important InformationIf you plan on using Role-based Authentication, do not attach the policy to the user. It must be attached to the Role instead as outlined in that section.
-
Review user details and permission summary and click Create user if everything is correct
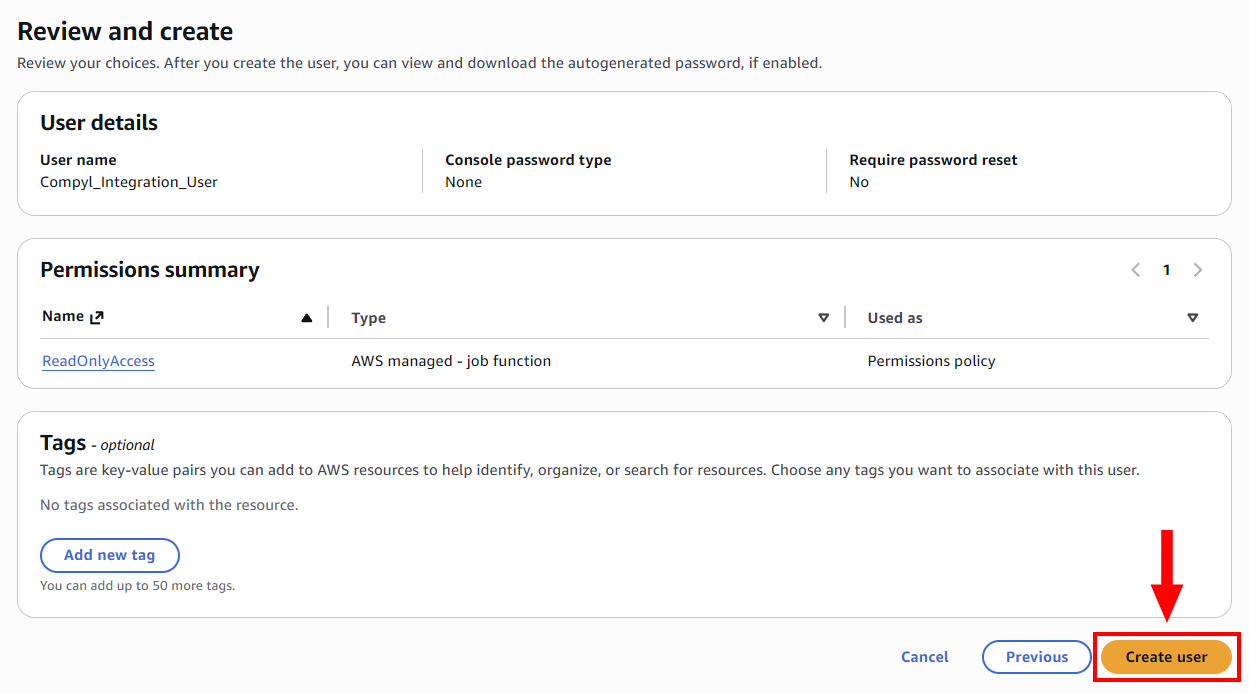
-
Once the user is created, you will return to the user page. On the header of the page you'll be able to view the user created.
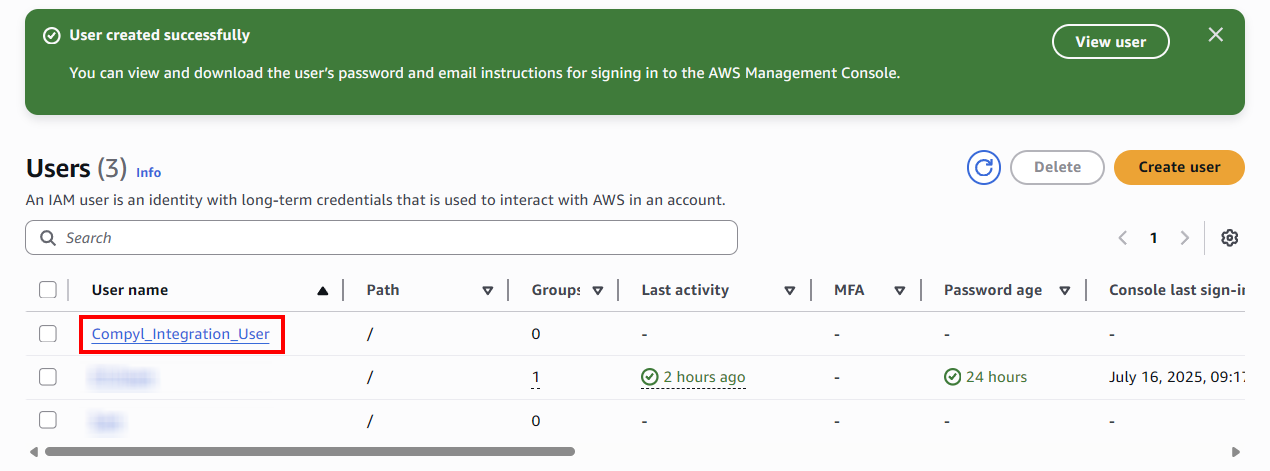
You can now skip to Creating the Access Key and Secret Access Key .
Creating the Access Key and Secret Access Key
-
Under the Access management tab in the side navigation menu, click Users.
-
Select the user you are using for the integration and click Create access key.
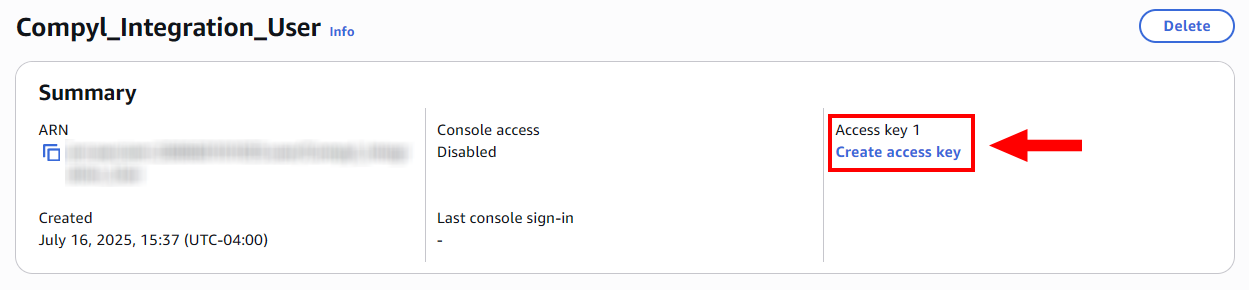
-
Select Application running outside AWS and click Next.
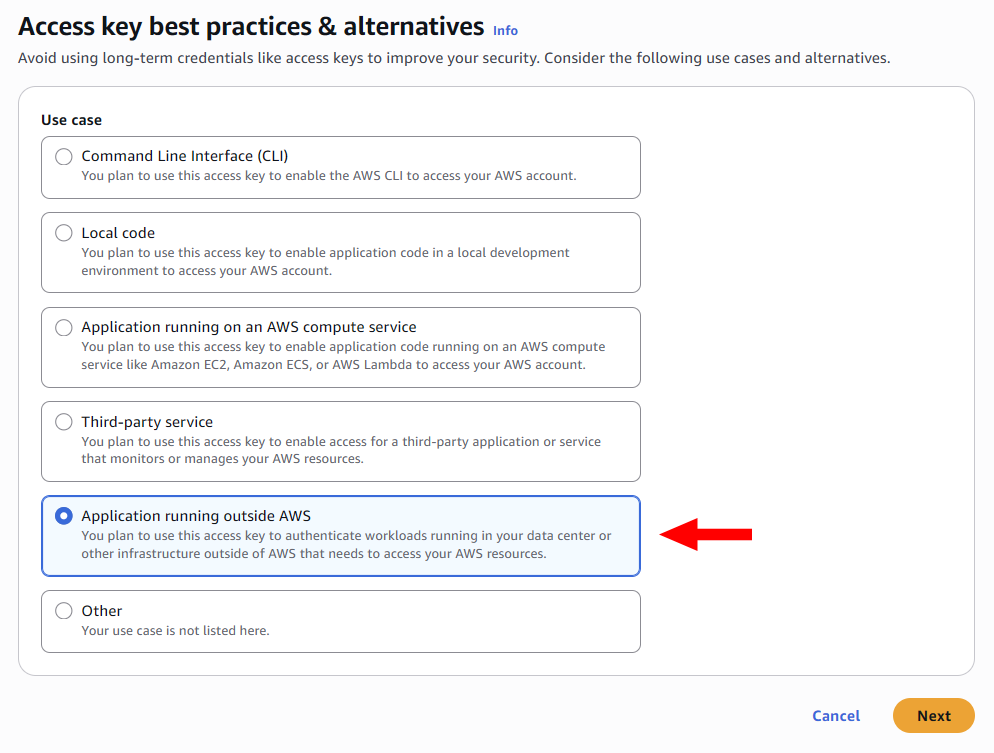
-
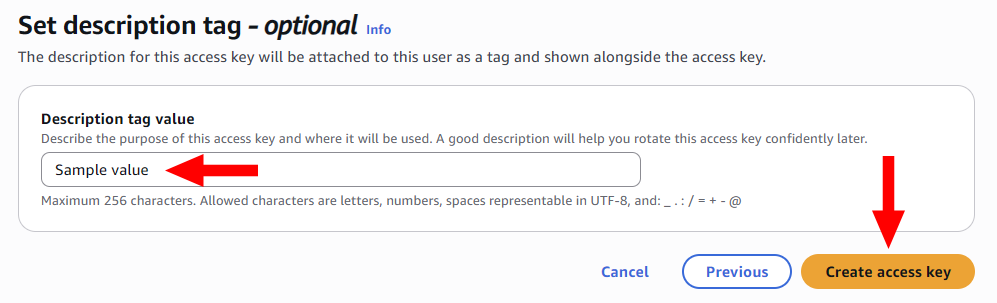
Create a description tag (optional). Then click Create access key.
-
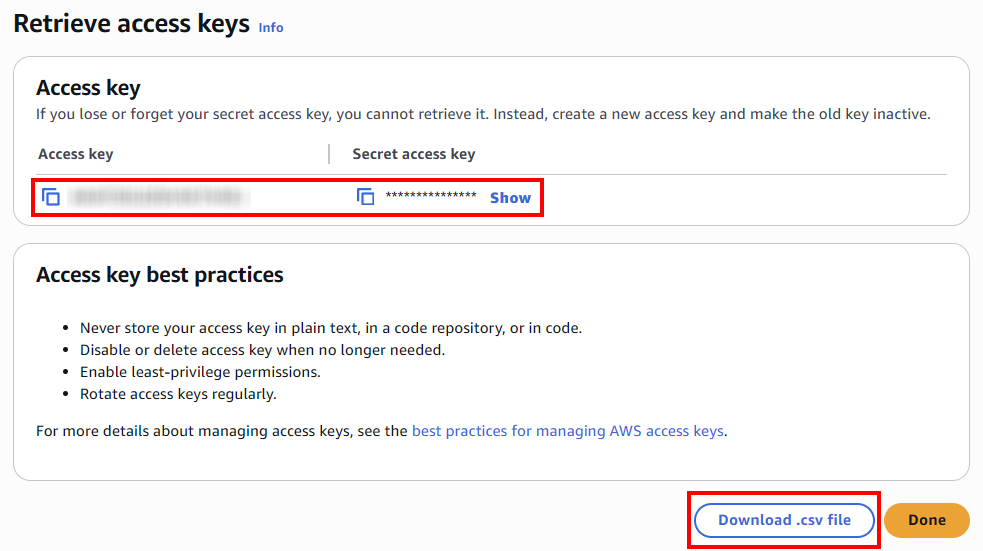
You will now see your Access key and Secret access key which will be used for the integration configuration in Compyl. You can also download the CSV file for safe keeping.
Creating the Surgical GRC Controls Permissions
Attach this policy to the IAM user or role Compyl uses for the AWS integration (the same principal as the access key / AssumeRole in the AWS config).
-
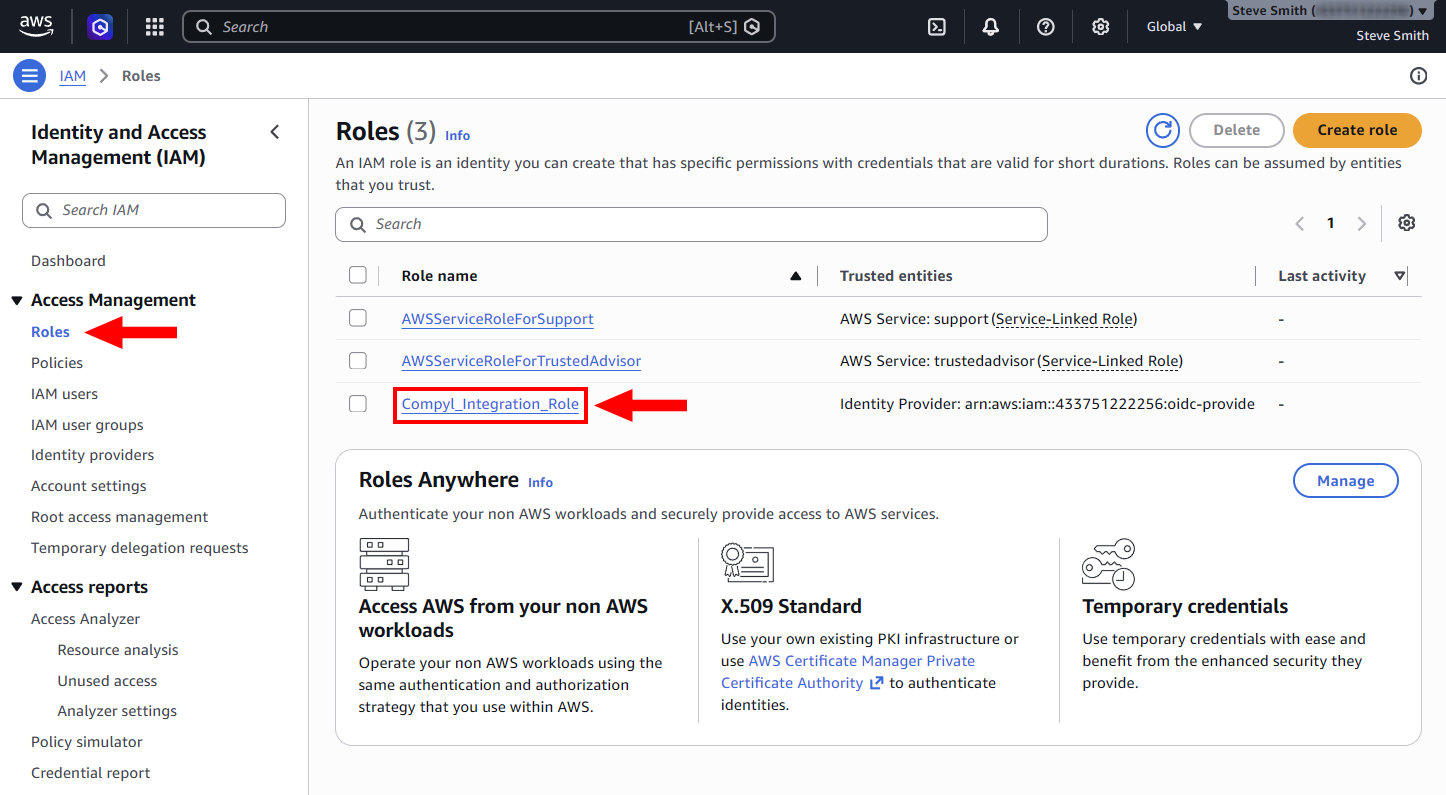
From your AWS Console, open IAM and under Access Management, go to Users > Roles > your Compyl principal.
-
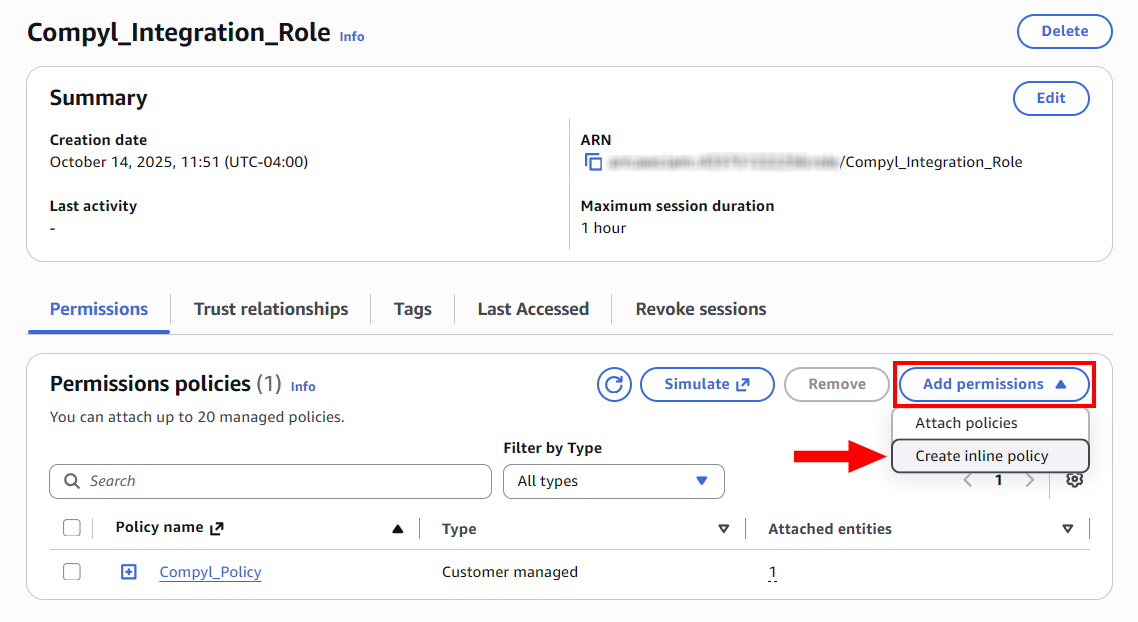
Next, click Add permissions and select Create inline policy.
-
Select JSON and paste the policy below into the editor. Then click Next.
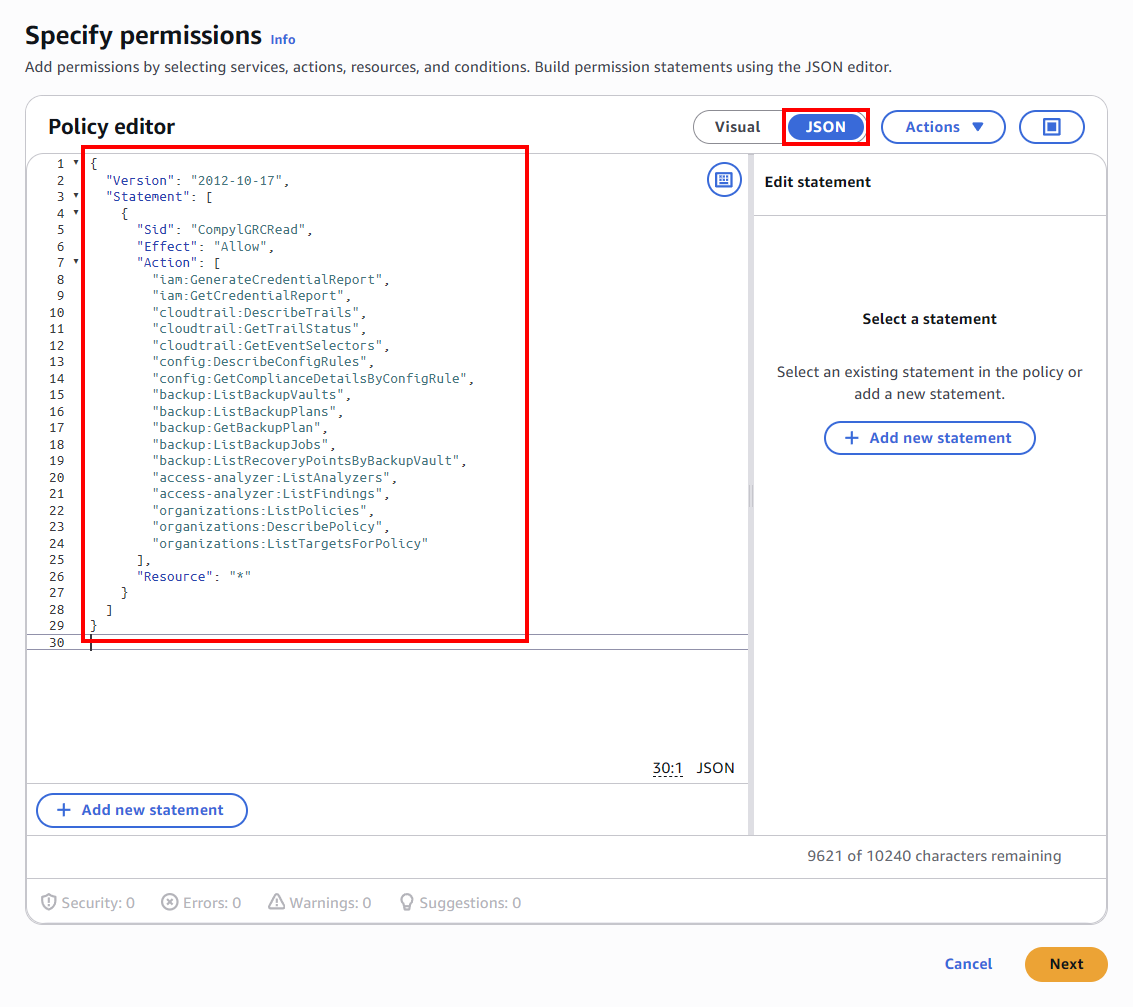
{
  "Version": "2012-10-17",
  "Statement": [
    {
      "Sid": "CompylGRCRead",
      "Effect": "Allow",
      "Action": [
        "iam:GenerateCredentialReport",
        "iam:GetCredentialReport",
        "cloudtrail:DescribeTrails",
        "cloudtrail:GetTrailStatus",
        "cloudtrail:GetEventSelectors",
        "config:DescribeConfigRules",
        "config:GetComplianceDetailsByConfigRule",
        "backup:ListBackupVaults",
        "backup:ListBackupPlans",
        "backup:GetBackupPlan",
        "backup:ListBackupJobs",
        "backup:ListRecoveryPointsByBackupVault",
        "access-analyzer:ListAnalyzers",
        "access-analyzer:ListFindings",
        "organizations:ListPolicies",
        "organizations:DescribePolicy",
        "organizations:ListTargetsForPolicy"
      ],
      "Resource": "*"
    }
  ]
}
-
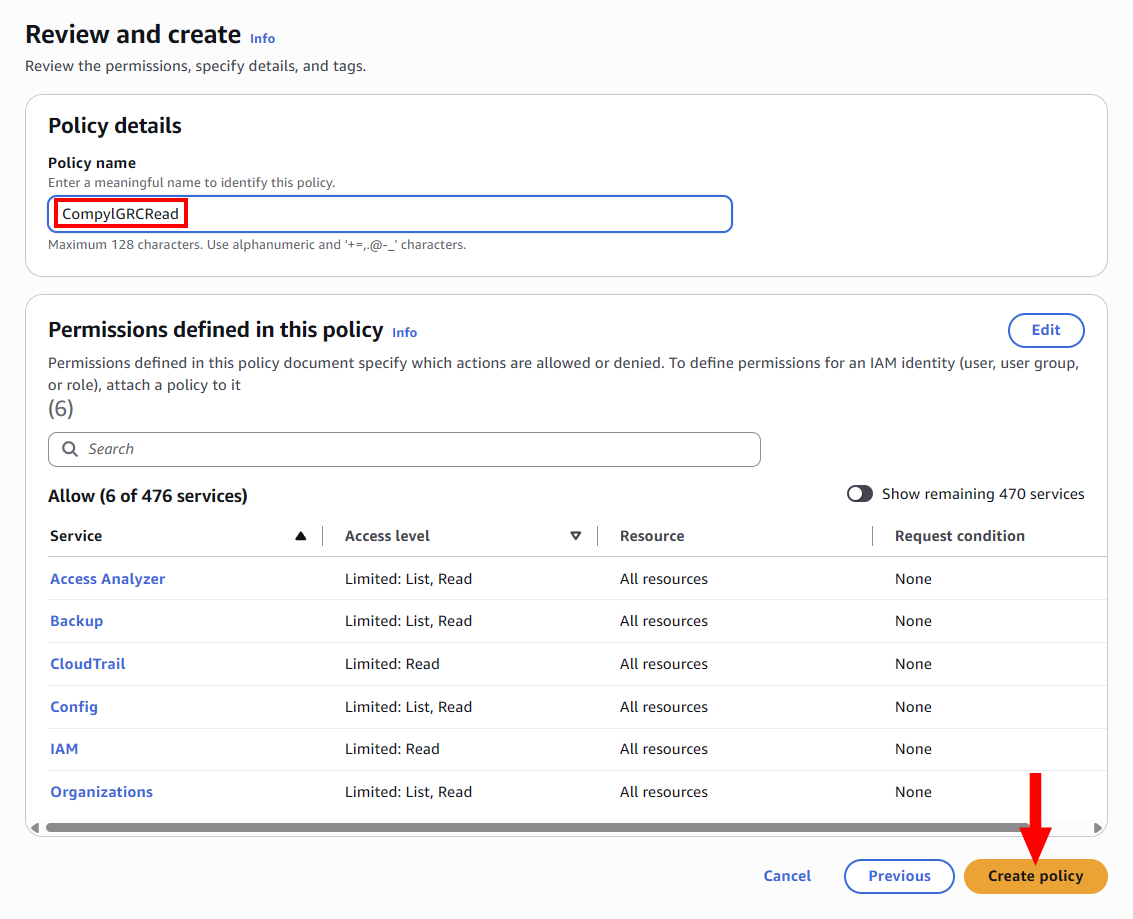
Name the policy (e.g. CompylGRCRead) and click Create.
-
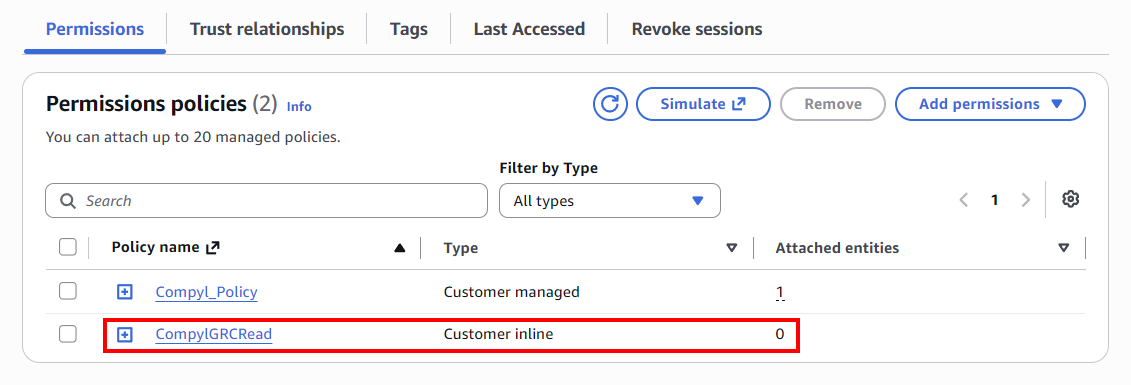
You'll now see the successfully created policy in your policy list.
ImportantIf you are adding this to an existing AWS configuration in Compyl, open your existing AWS configuration, go to the Endpoints section and Validate your endpoints.
Then run a manual sync.
Add Configuration
-
Navigate to the Integrations tab using the left-hand menu, find AWS, and select +Add Configuration.

-
Next, fill in the details below and select Continue.
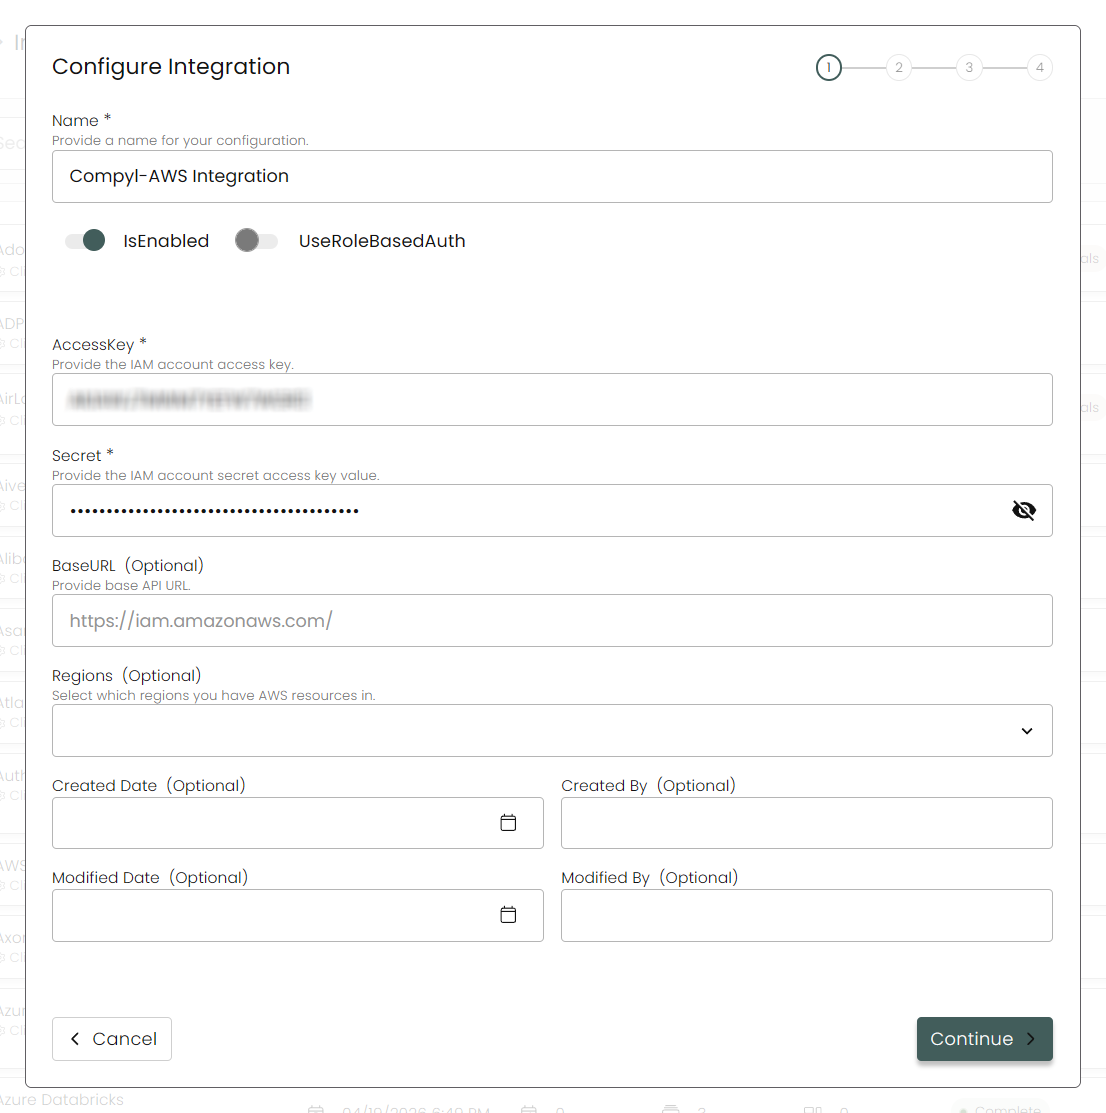
Name: Enter in the name of the integration.
is Enabled: Toggle button to ensure data is populated into Compyl.
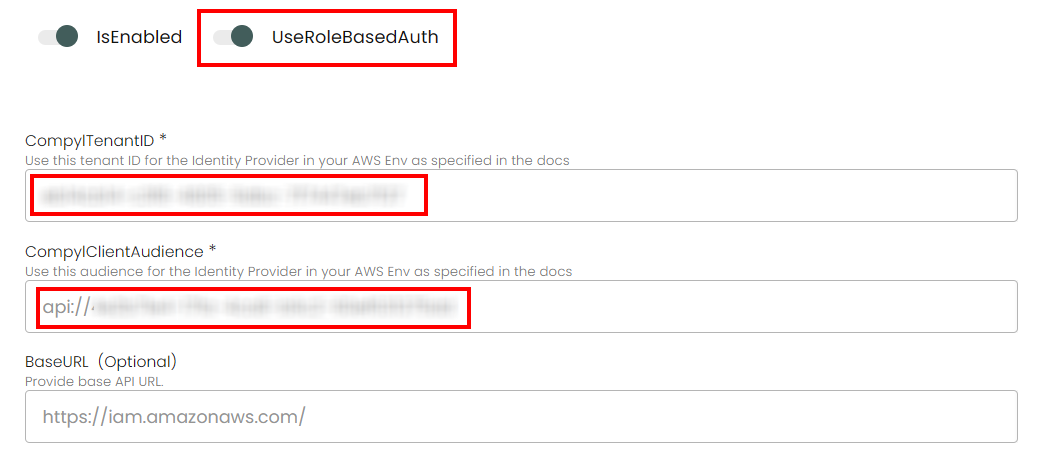
Use Role Based Auth: Toggle button only if you are using Role-Based Authentication (expand for details).
Role-Based Authentication
Role-Based AuthIf this is toggled on, the fields will change to the following:
- Compyl Tenant ID: Use this tenant ID for the Identity Provider in your AWS Env as specified in the docs. This field should be pre-populated.
- Compyl Client Audience: Use this audience for the Identity Provider in your AWS Env as specified in the docs. This field should be pre-populated.
- Regions: A drop-down to select which regions you have AWS resources in.
- Role ARN: The Role Amazon Resource Name (ARN) you were given in Add Permissions to Role.
Access Key ID: This is obtained from AWS portal. Please see AWS - Portal above on how to create the access key.
Secret: This is obtained from AWS portal. Please see AWS - Portal above on how to create the secret access key.
-
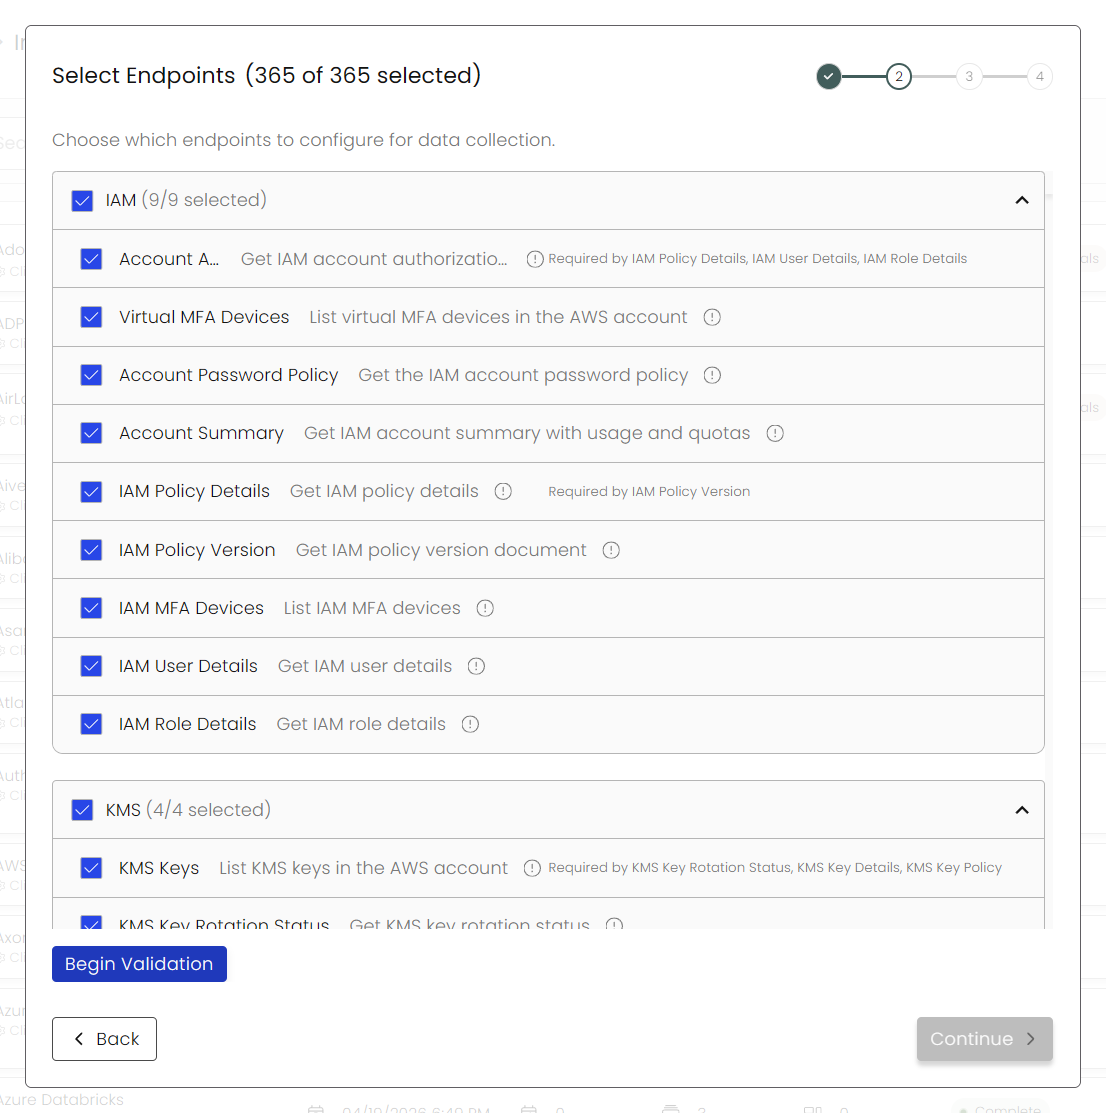
Choose your Endpoints and Begin Validation to validate your connection.
-
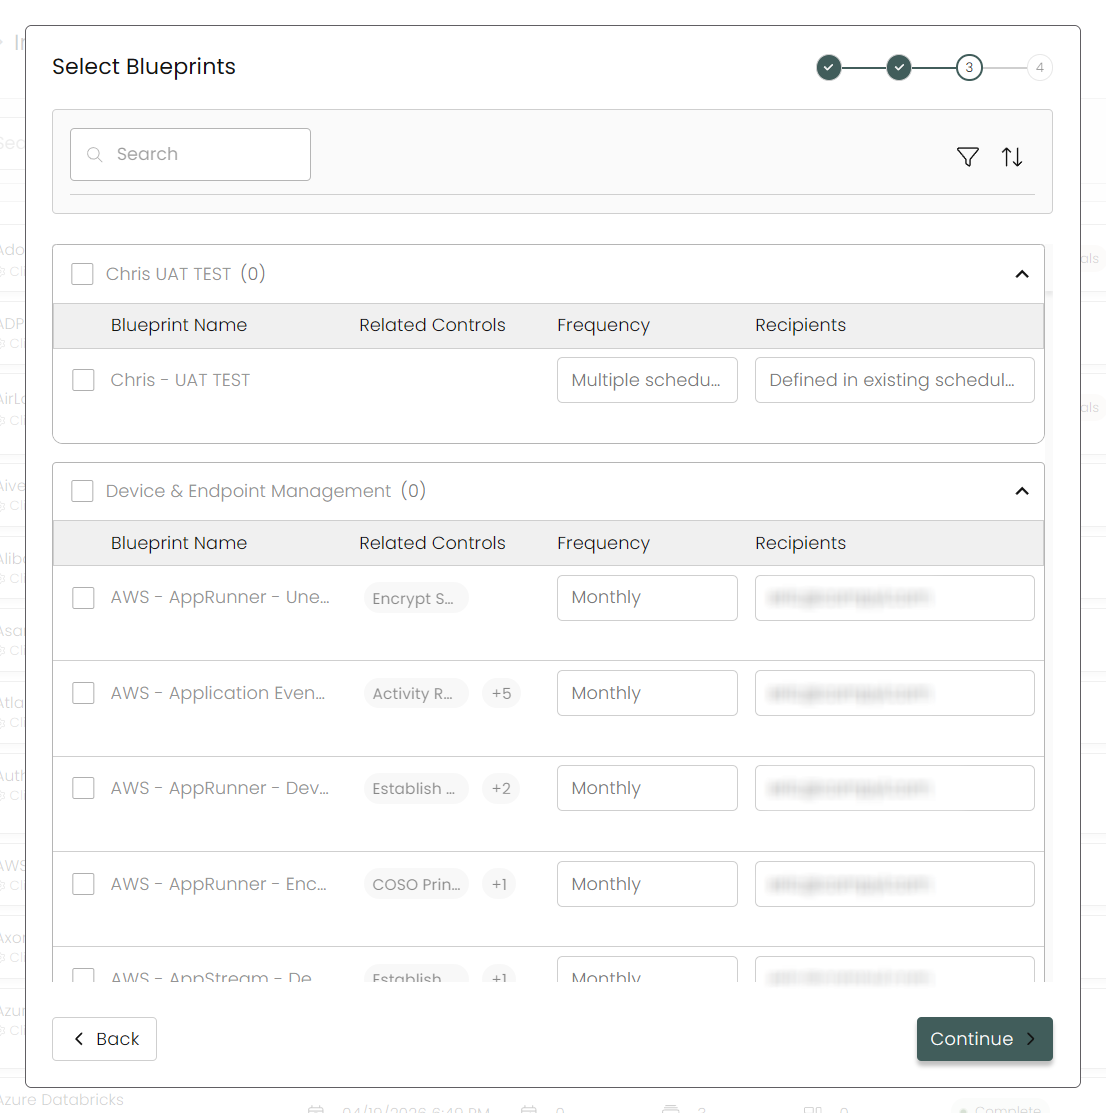
Select any Blueprints you wish to associate with this integration.
-
After you hit Continue, you'll see a summary screen. Click Return to Integrations to complete the configuration.
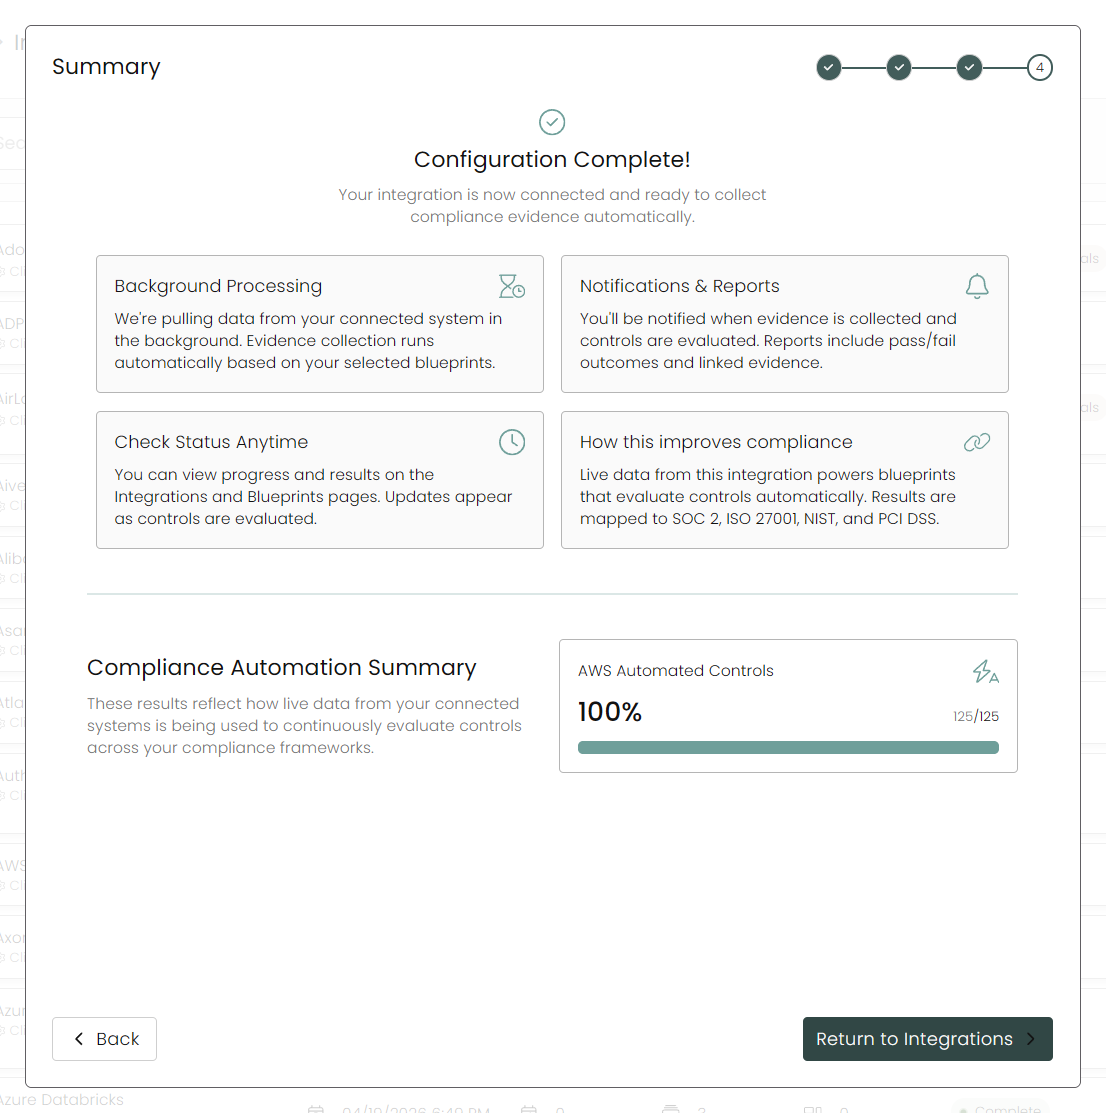
Once you have completed filling out the form click Return to Integrations.
You'll know the integration is successfully added when the status updates to Complete.

Data is synced on a recurring schedule configured by your Compyl administrator. Each sync pulls the latest data from all enabled endpoints.
To query the data from the integration, refer to the Blueprints article.
Updated 17 days ago