
Managing Question and Answer Sets
Question and Answer Sets
You can view and manage your Question and Answer sets by clicking on the gear icon.

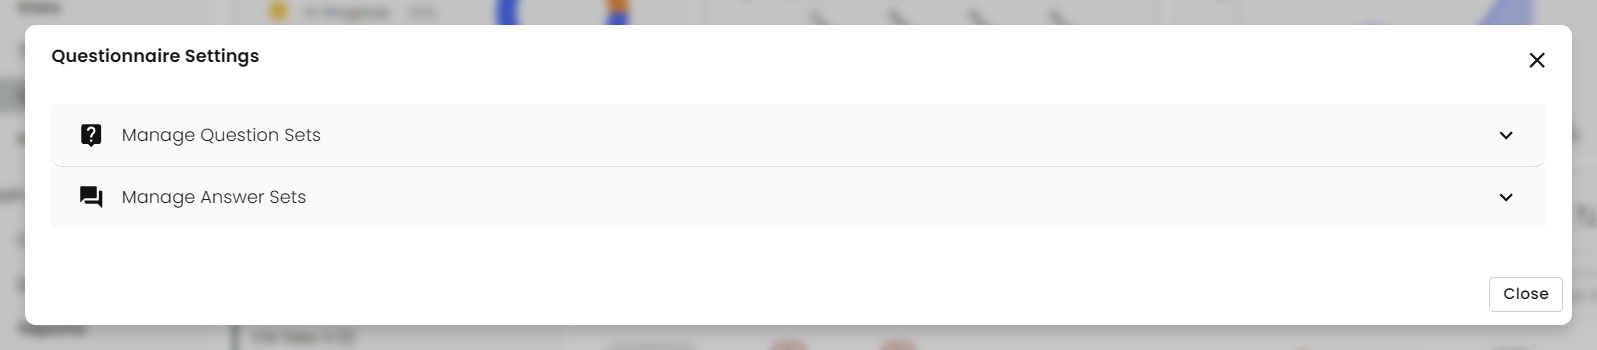
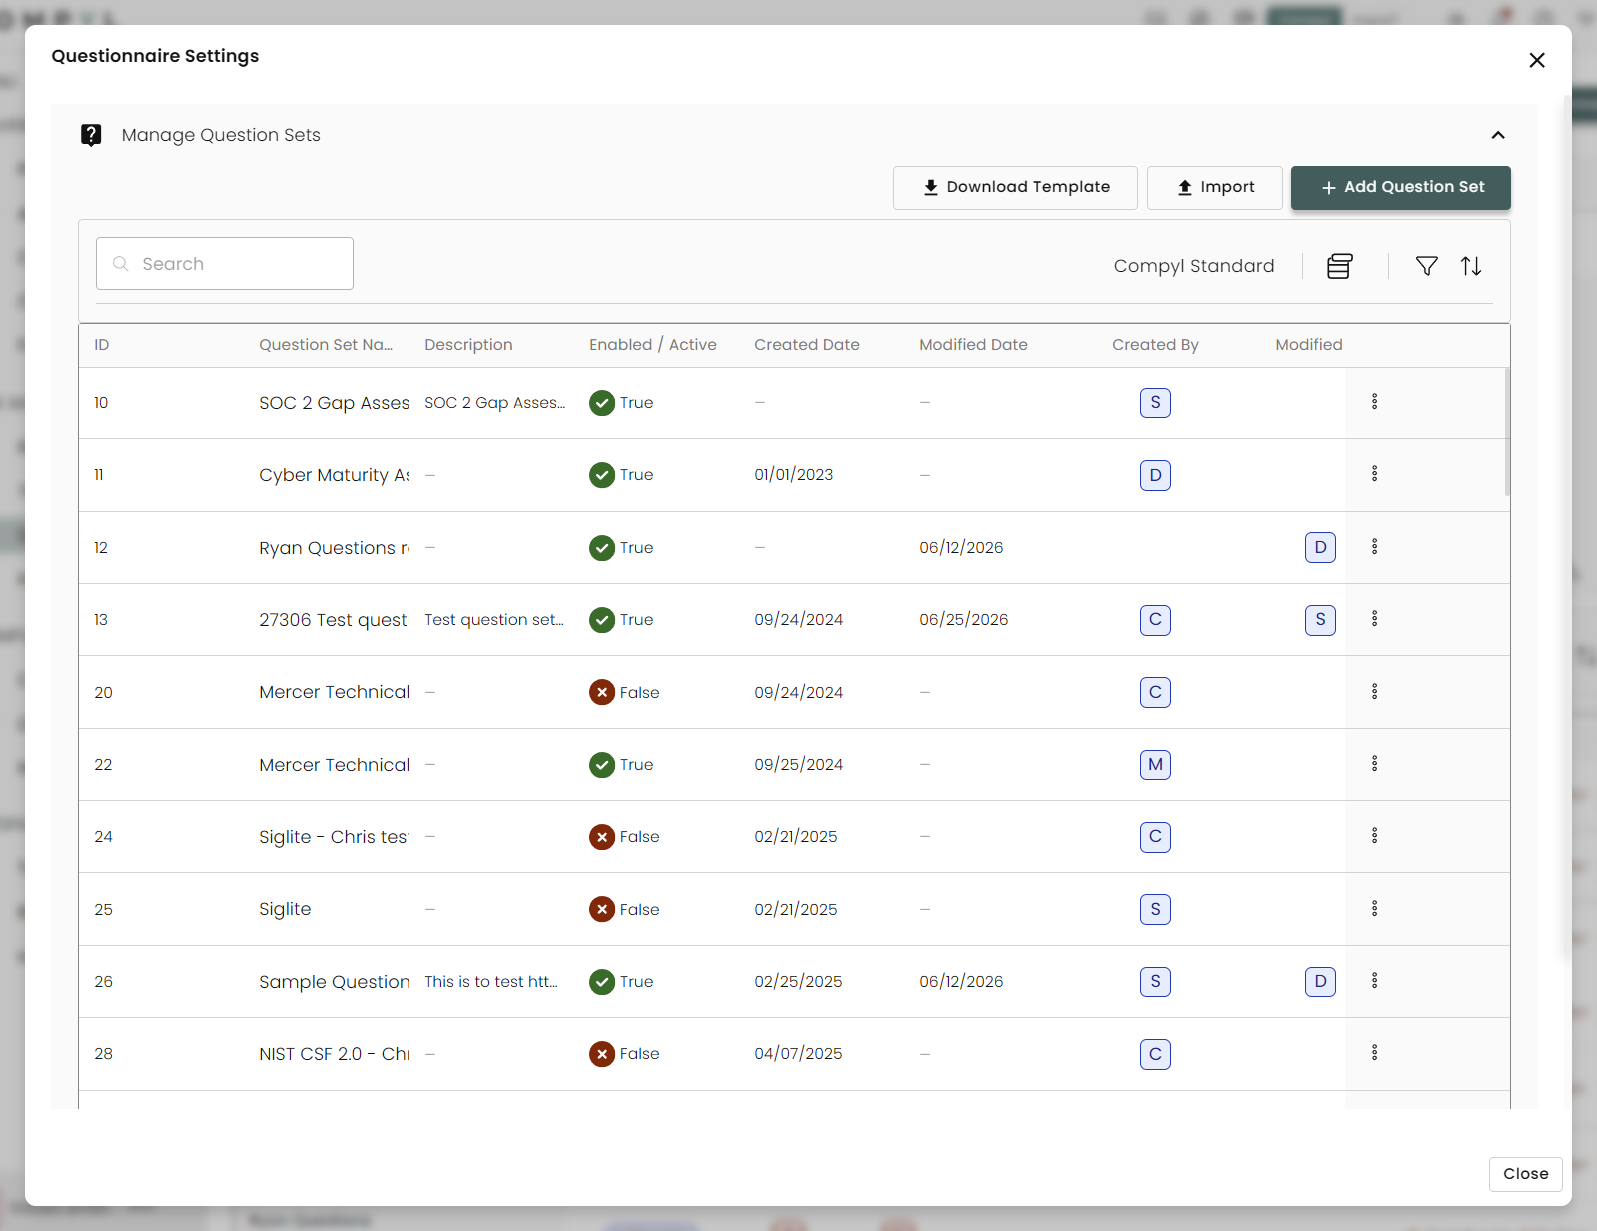
Expanding each section will show you all the available sets allowing you to search through and sort them. Additionally you can add new sets or import them (as a .CSV file).
Importing a Question Set
-
Download the template by clicking on Download Template.

-
Fill out the template in your CSV editor of choice.

- Name: The name of the question.
- Description (optional): A description of the question.
- Short Question Code (optional): An identifier for the specific question.
- Section: Which section does the question reside in (this allows you to create multiple sections easily).
- Question Set: Enter the name you are using for this import.
- Default Answer Set (optional): If there is an Answer Set that already exists that you wish to use, enter it here.
- Branch To: If this question branches to another section, enter that section here.
- Branch Question Name: Enter in the name of the question it will branch to.
-
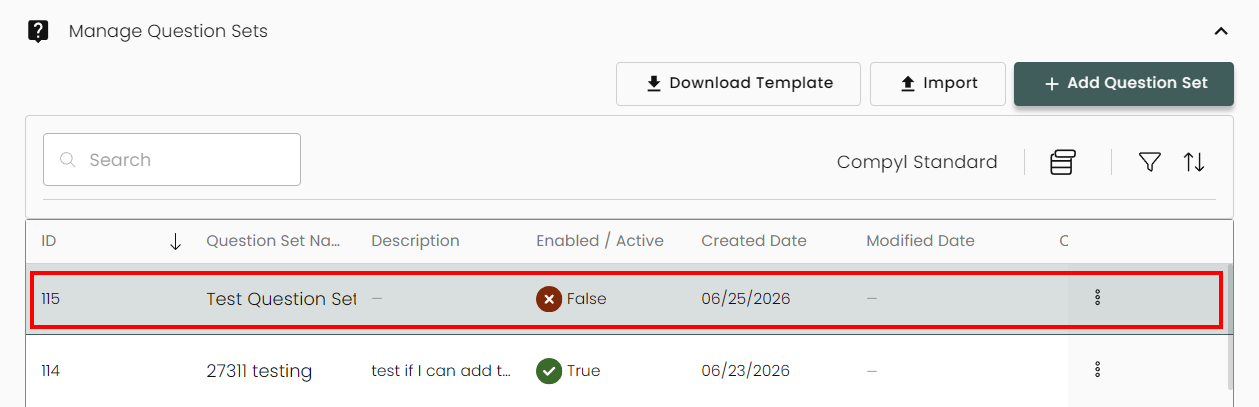
Now click Import and upload your CSV. It will now show in your list of Question Sets.
-
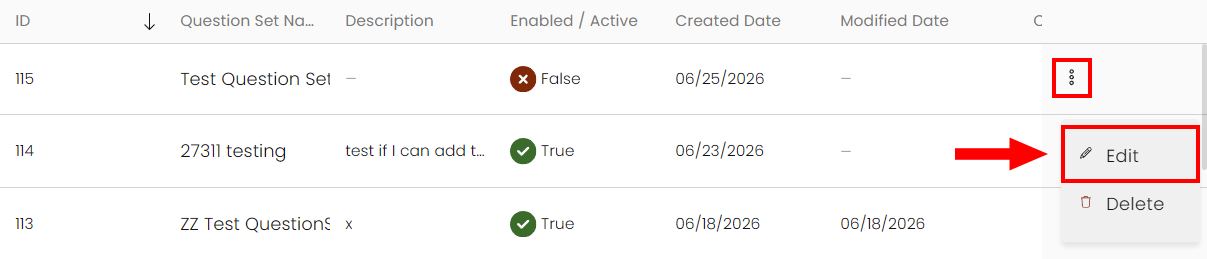
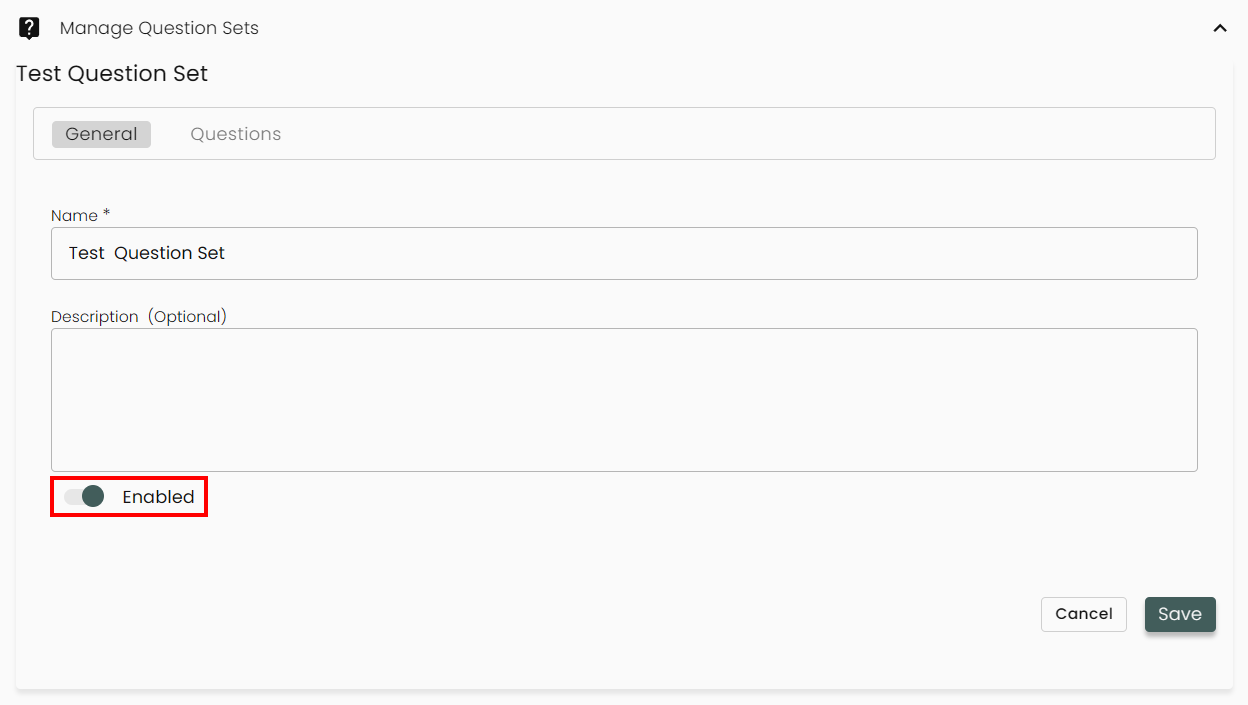
To enable your new question set, click on the 3-dot menu and select Edit.
-
You can now toggle the Enabled switch as well as edit the questions themselves.
Manually Add a Question Set
-
Click on + Add Question Set.

-
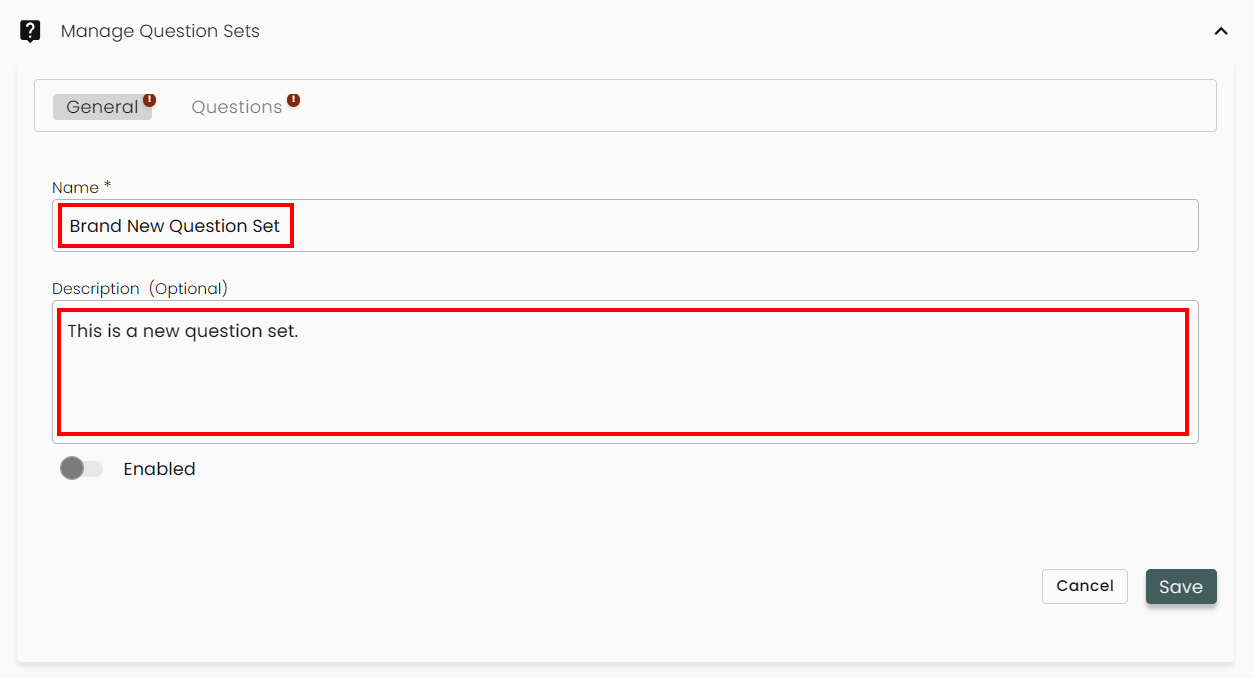
Give your new Question Set a Name and an optional Description. Toggle the Enabled switch if you wish this to be usable right away.
-
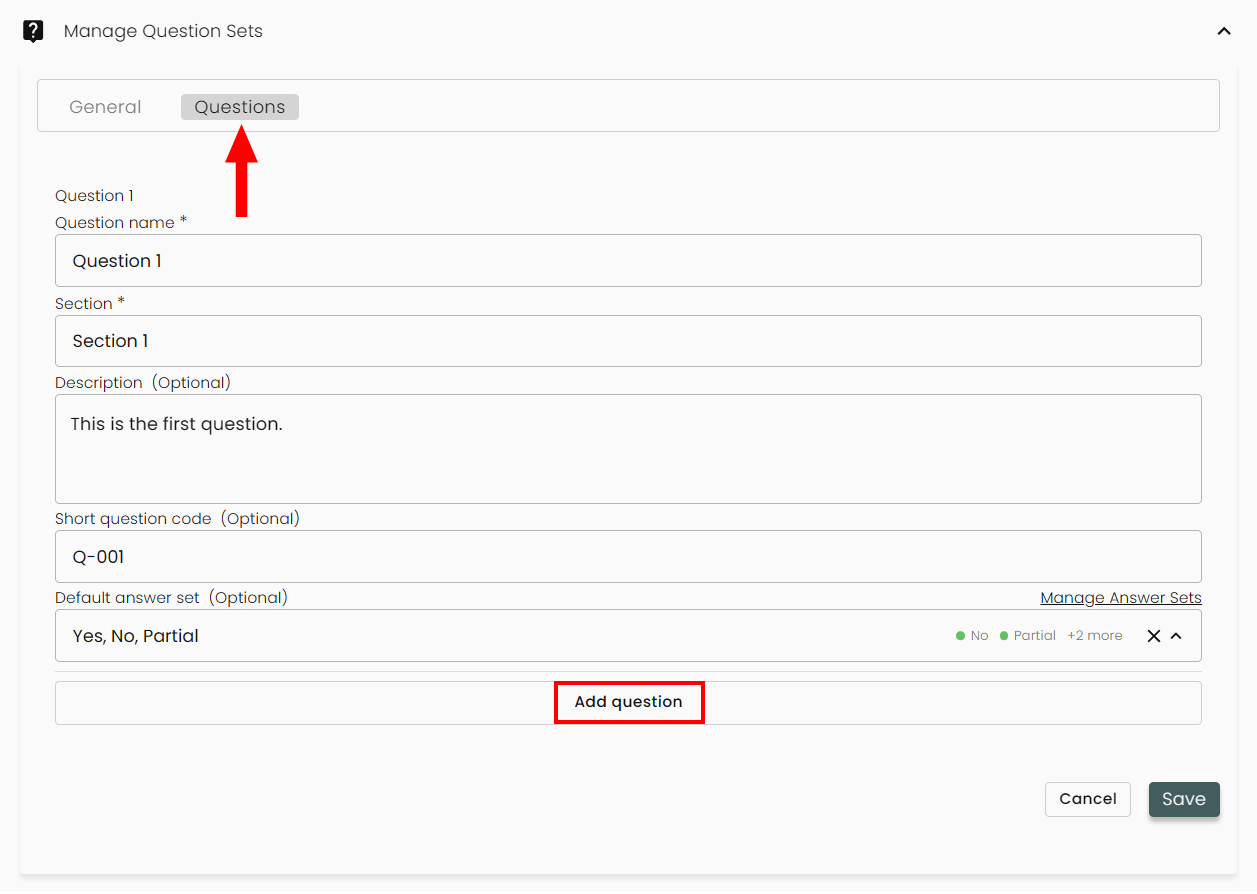
Next, click on the Questions tab and enter in your first question. You can add additional questions by clicking on Add question. Once done, hit Save.
-
Your new Question Set will now appear in the grid.

Importing an Answer Set
-
Download the template by clicking on Download Template.

-
Fill out the template in your CSV editor of choice.
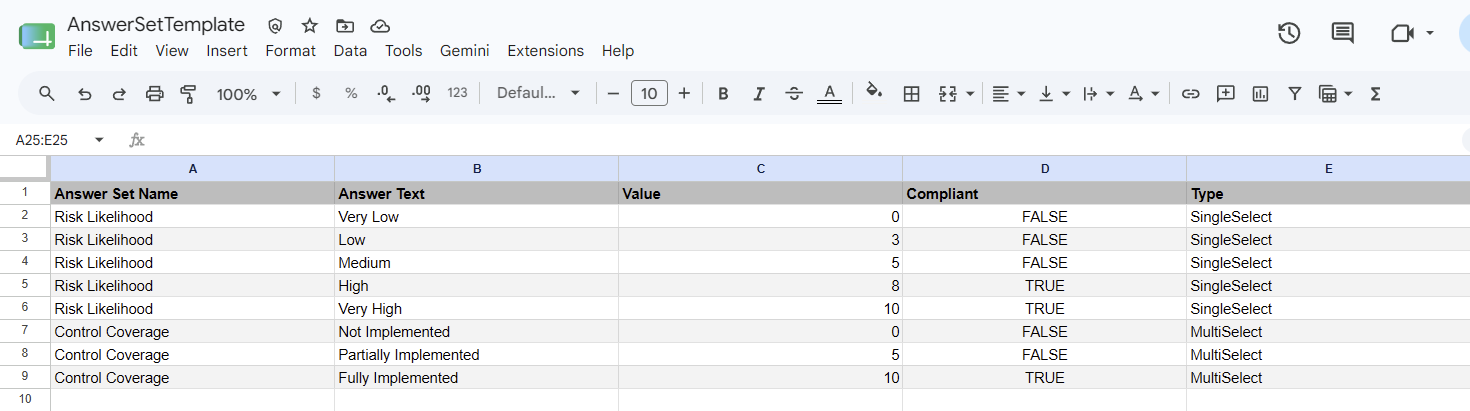
- Answer Set Name: The name of the answer set.
- Answer Text: The text for this answer option.
- Value (optional): The score of the answer (between 0 and 100).
- Compliant: Is this answer compliant in the questionnaire (TRUE or FALSE).
- Type (optional): Whether this is a single answer or supports multiple answers.
-
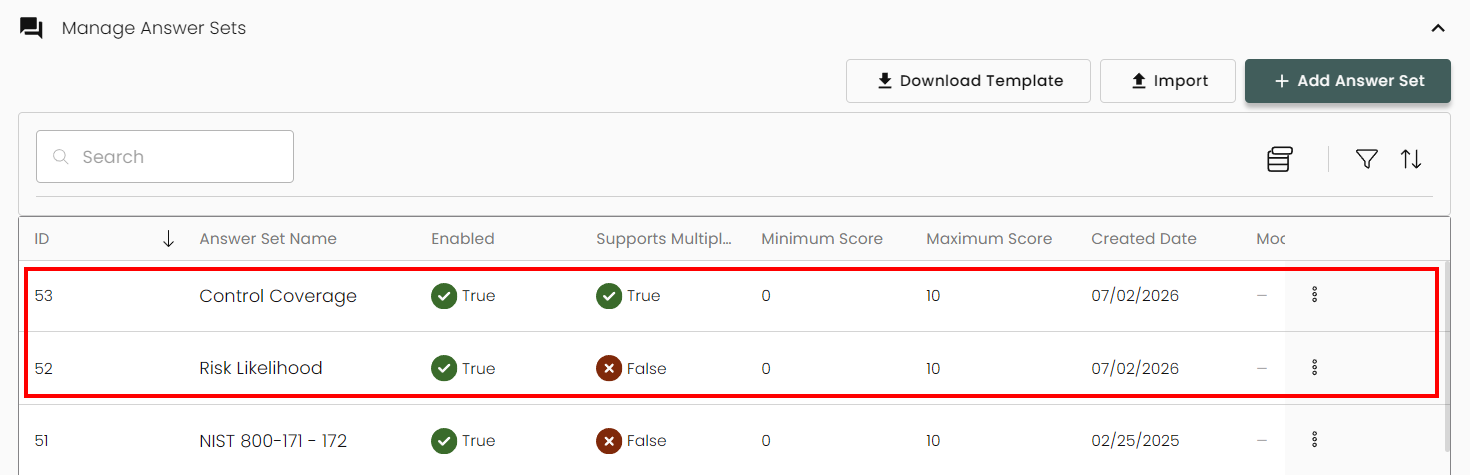
Now click Import and upload your CSV. It will now show in your list of Answer Sets.
-
To enable your new answer set, click on the 3-dot menu and select Edit.

-
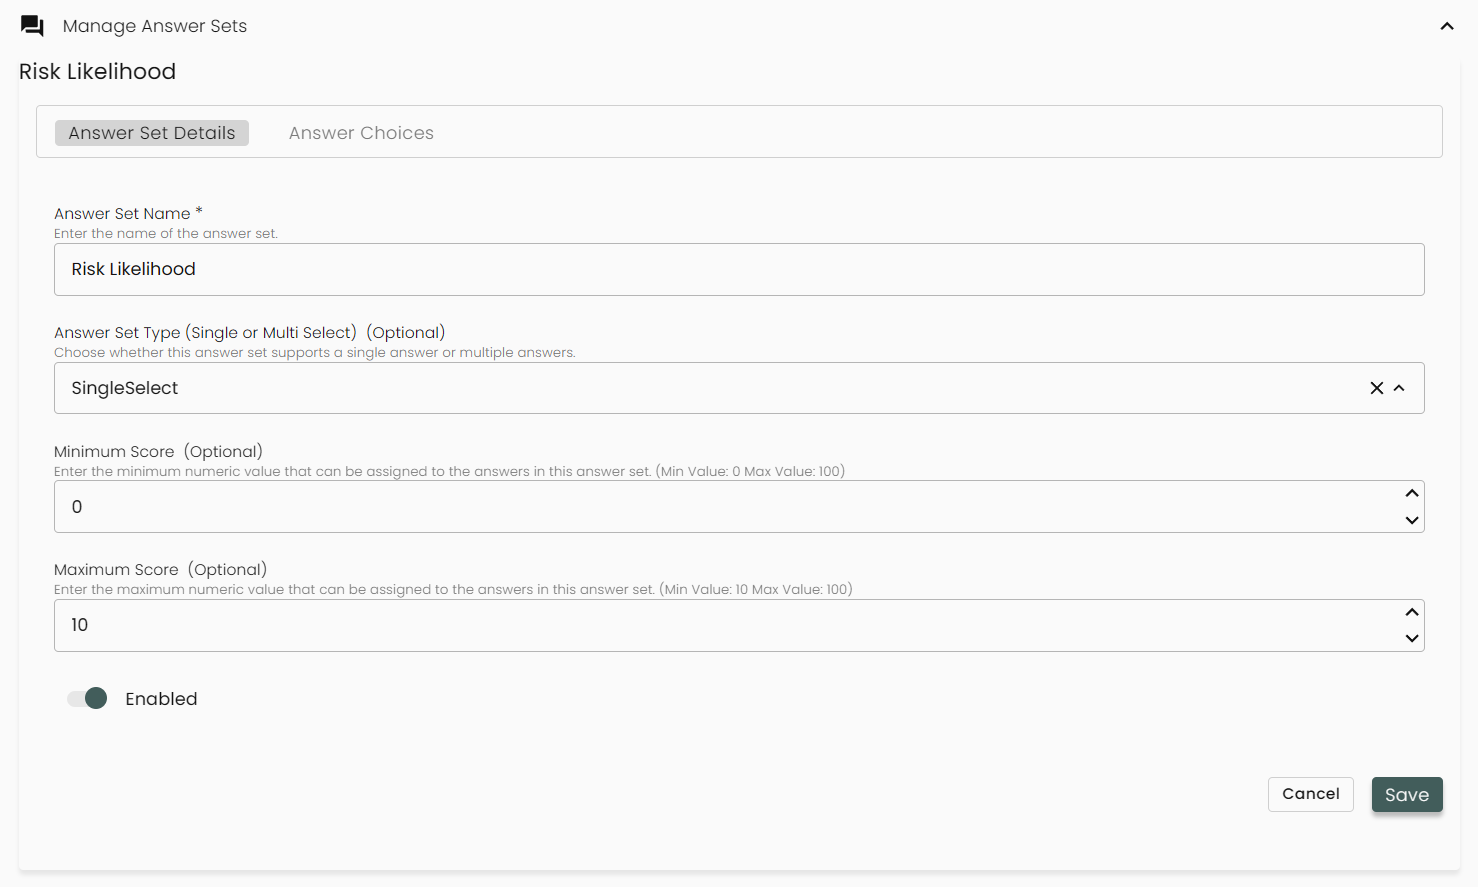
You can now toggle the Enabled switch as well as edit the answers themselves.
Manually Add an Answer Set
-
Click on + Add Answer Set.

-
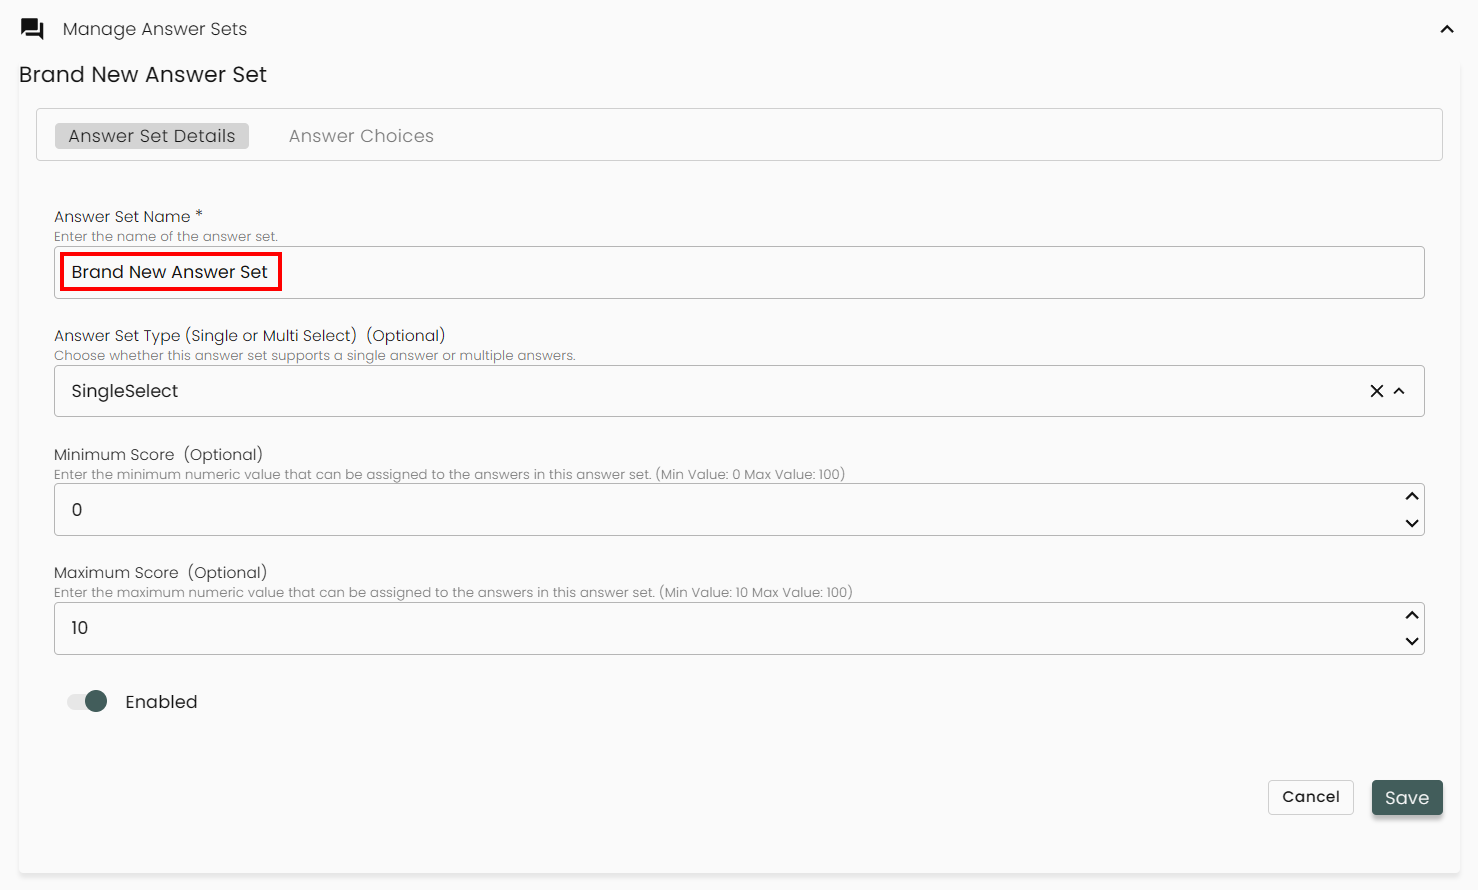
Give your new Answer Set a Name and, optionally, select the Answer Type and add a minimum and maximum score. Toggle the Enabled switch if you wish this to be usable right away.
-
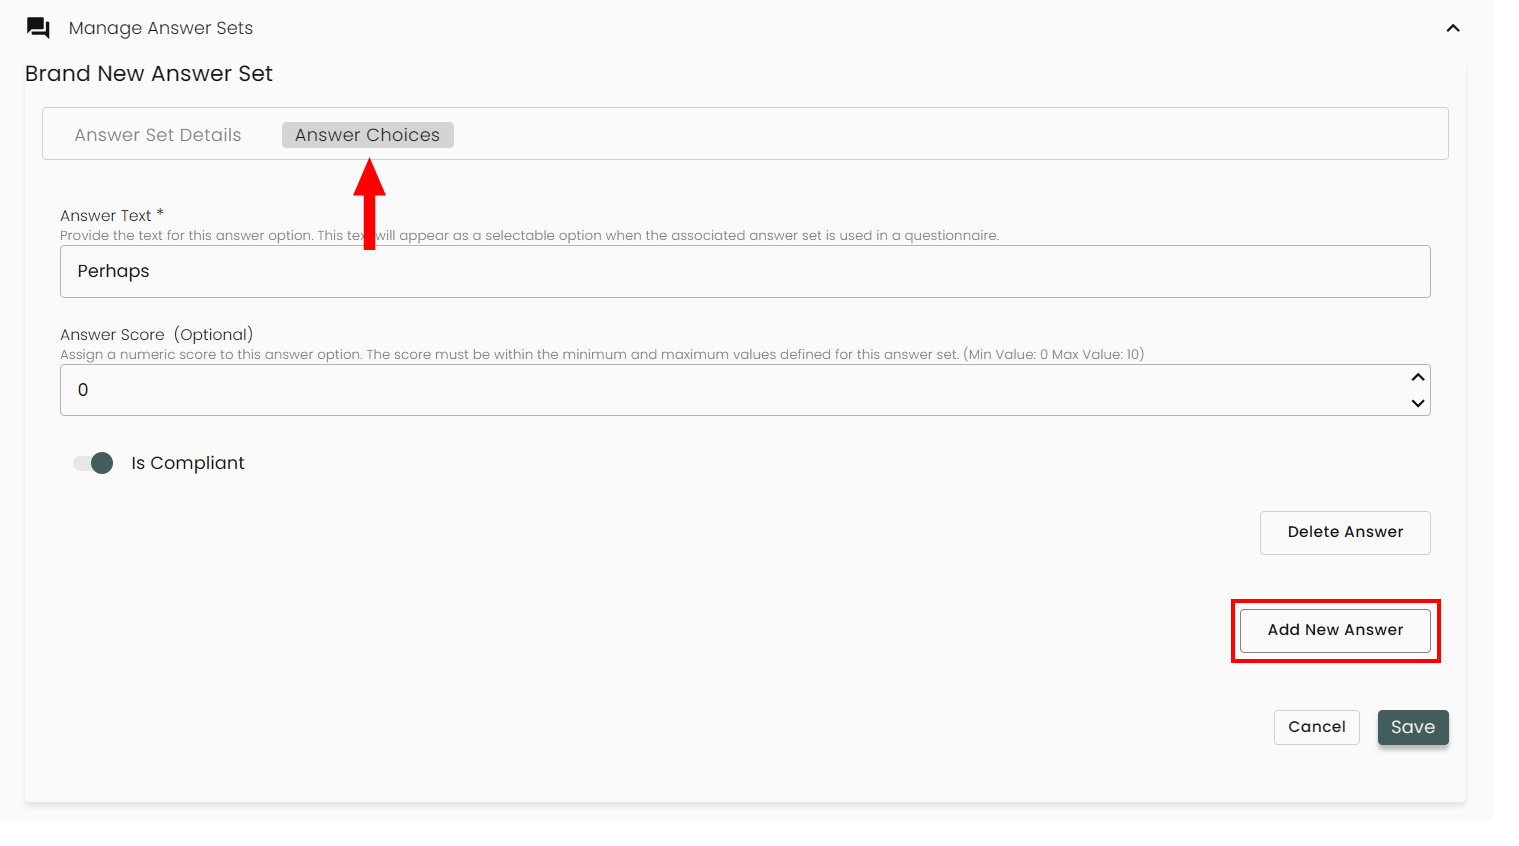
Next, click on the Answer Choices tab and enter in your first answer. You can add additional answers by clicking on Add New Answer. Once done, hit Save.
-
Your new Question Set will now appear in the grid.

Updated 3 months ago