
Okta Integration
Okta app integrations are configured connections between Okta features and external applications that provide a service.
Choosing How to Access Okta
- If you wish to access Okta via an API Token, pick Creating an API Token.
- If you, instead, want to use Role-Based Authentication, choose the Okta Role-Based Authentication tab.
ImportantYou can only pick one way to access Okta - attempting to use both will result in the integration failing.
Create a Network Zone
When accessing Okta via an API Token, you will need to create a new Network Zone. Reach out to your Compyl Customer Success Manager or to support to help you define an IP Zone. Once done, you can continue below.
-
Please reach out to Compyl first to help define your Network Zone.
-
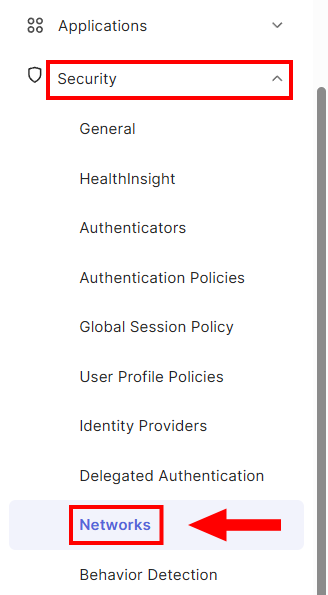
Once done, select Security and then Networks.
-
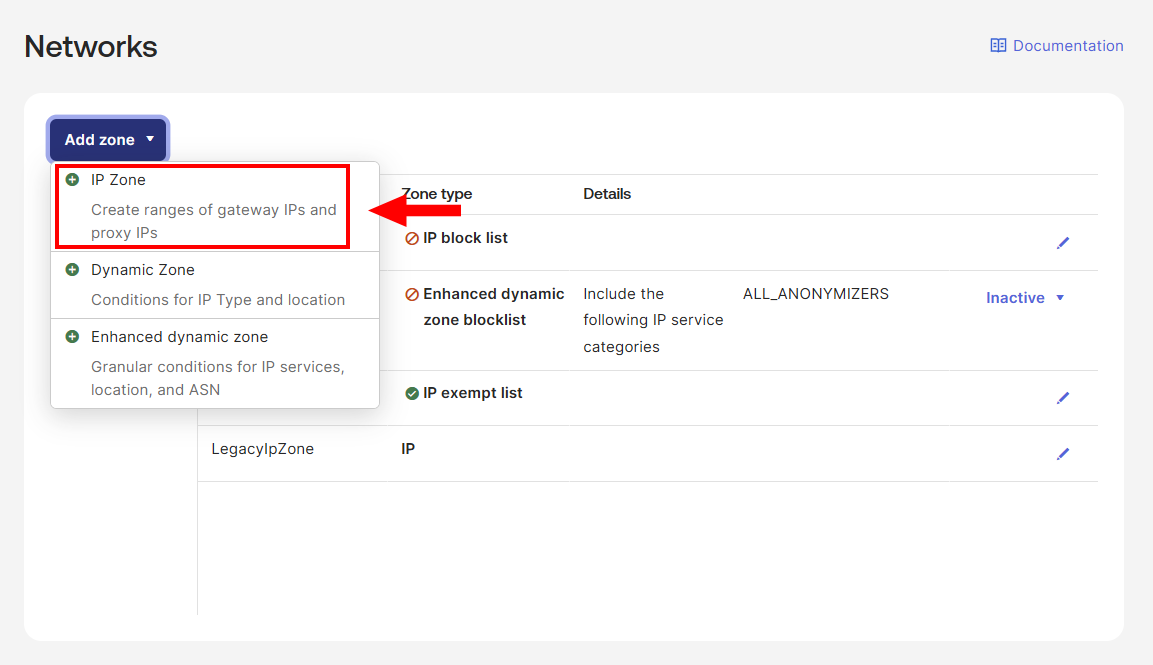
Select Add zone and then IP Zone from the dropdown.
-
On the next screen, give the Zone a name and enter in the IPs as provided by Compyl. Then click Save.
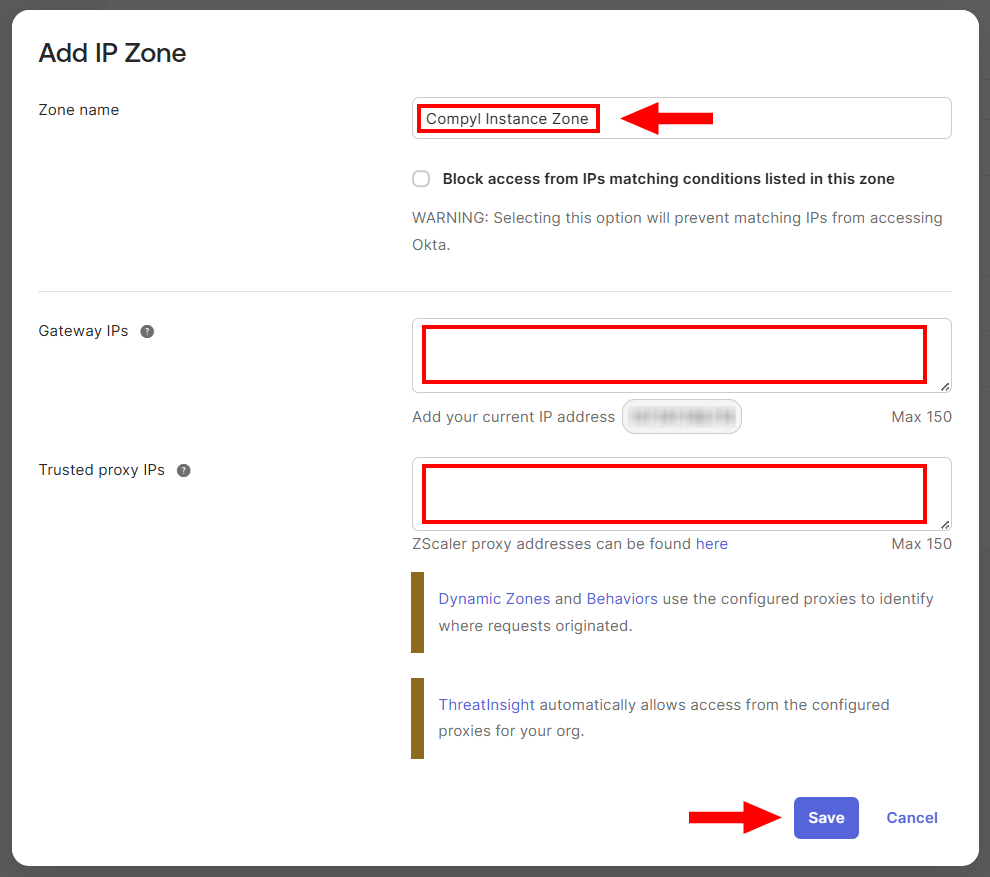
Network Zone IPs 4.157.212.210 20.242.163.35 4.236.51.95 20.242.165.243 20.118.138.140 20.242.166.24 20.125.104.155 20.242.201.239 20.125.104.156 20.242.202.216 20.125.104.212 20.242.203.199 20.125.105.4 20.242.203.79 20.125.105.94 20.242.204.149 20.125.80.147 20.242.204.199 20.185.65.138 40.71.11.185 20.185.70.106 51.8.36.110 20.185.70.108 137.135.105.187 20.185.70.66 137.135.106.26 20.185.70.74 137.135.107.235 20.231.251.144 137.135.109.71 20.242.163.34 137.135.96.244
-
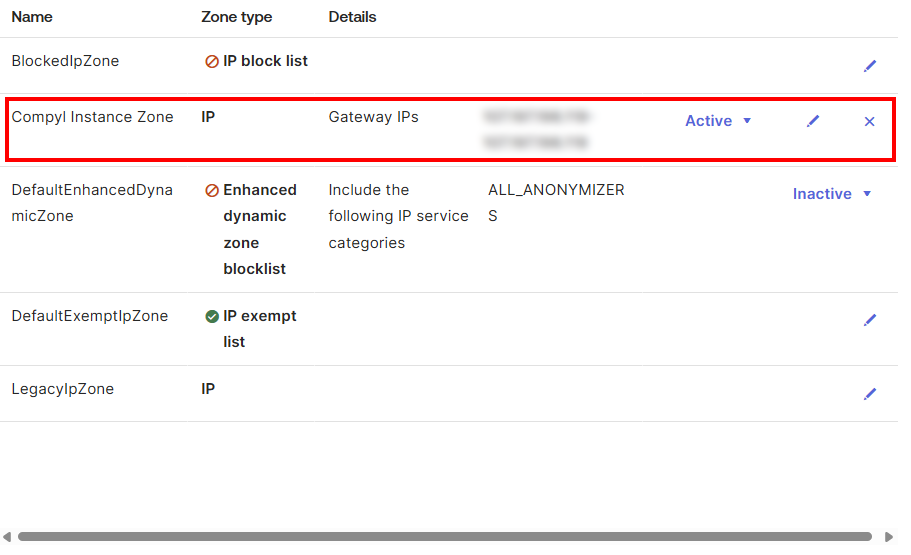
Your new Zone should now be added to the list and visible. You'll use this during the API Token creation.
How To Create an API Token in OKTA
-
Sign in to your Okta organization as a user with administrator privileges (opens a new window). API tokens have the same permissions as the user who created them, and if the user permissions change, the API token permissions also change.
-
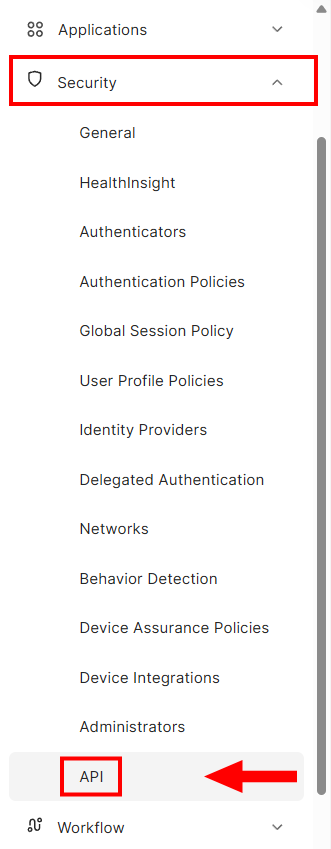
In the Admin Console, select Security and then API.
-
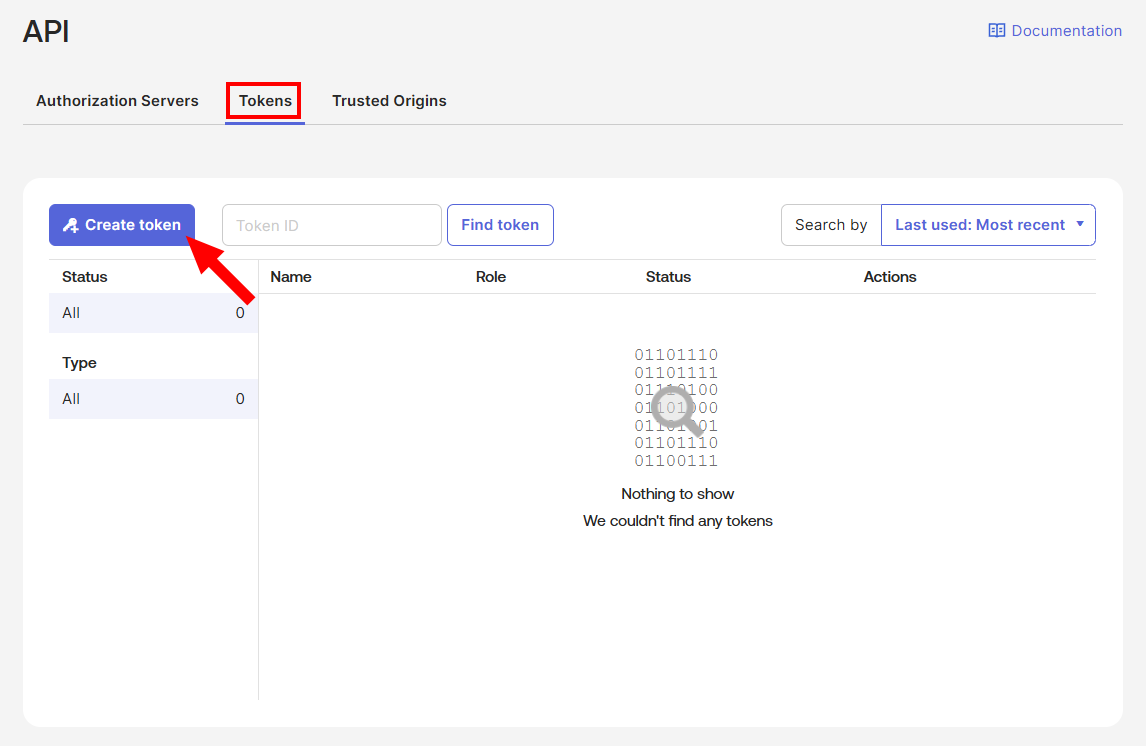
Click on Create Token button.
-
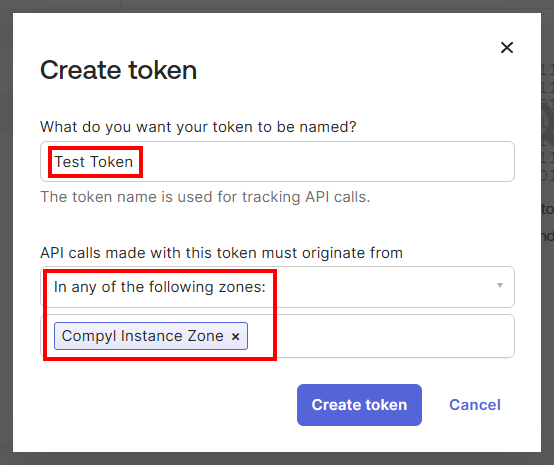
Name your token and then pick In any of the following zones. Select the newly created Zone from the steps above . Alternately you can also pick In any network zone defined in Okta.
-
Click Create token and copy the token value to a secure location.
CautionThis is the only time the token will be visible. If you lose it you will need to generate a new one.
Add Configuration
-
Navigate to the Integrations tab using the left-hand menu, find Okta, and select +Add Configuration.

-
Next, fill in the details below and select Continue.
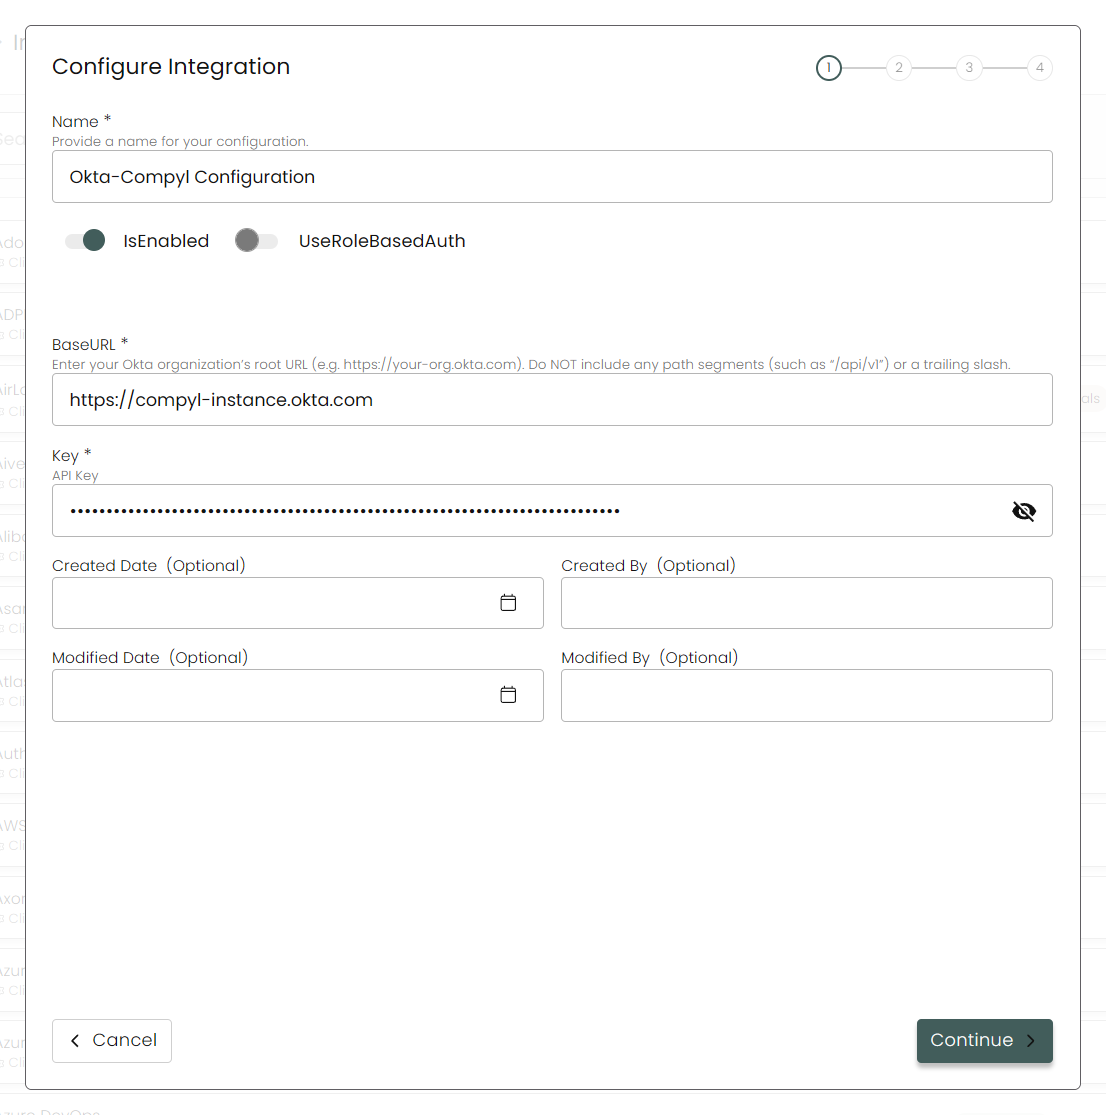
Name: Enter the name of the integration.
is Enabled: Toggle button to ensure data is populated into Compyl.
Use Role Based Auth: Ignore unless you wish to use Role-Based Authentication instead .
-
If choosing Role-Based Authentication, toggle the button and fill in your generated Client ID and upload your Private key:
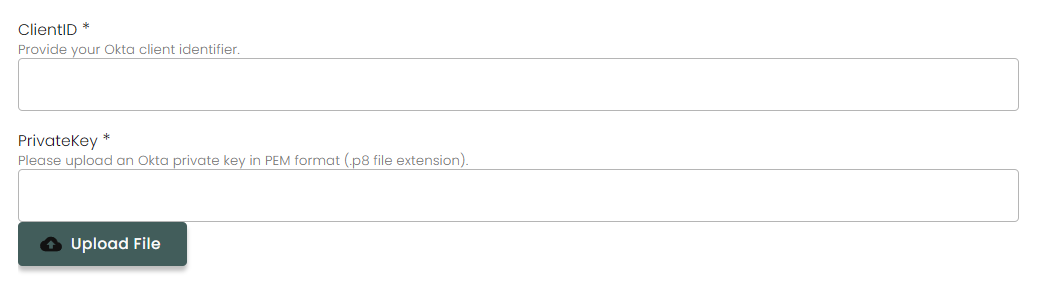
Base URL: The API URL is being used by the client for Okta.
Key: This can be generated on the Okta web app. Please take a look at the instructions above on how to create an API Token.
-
-
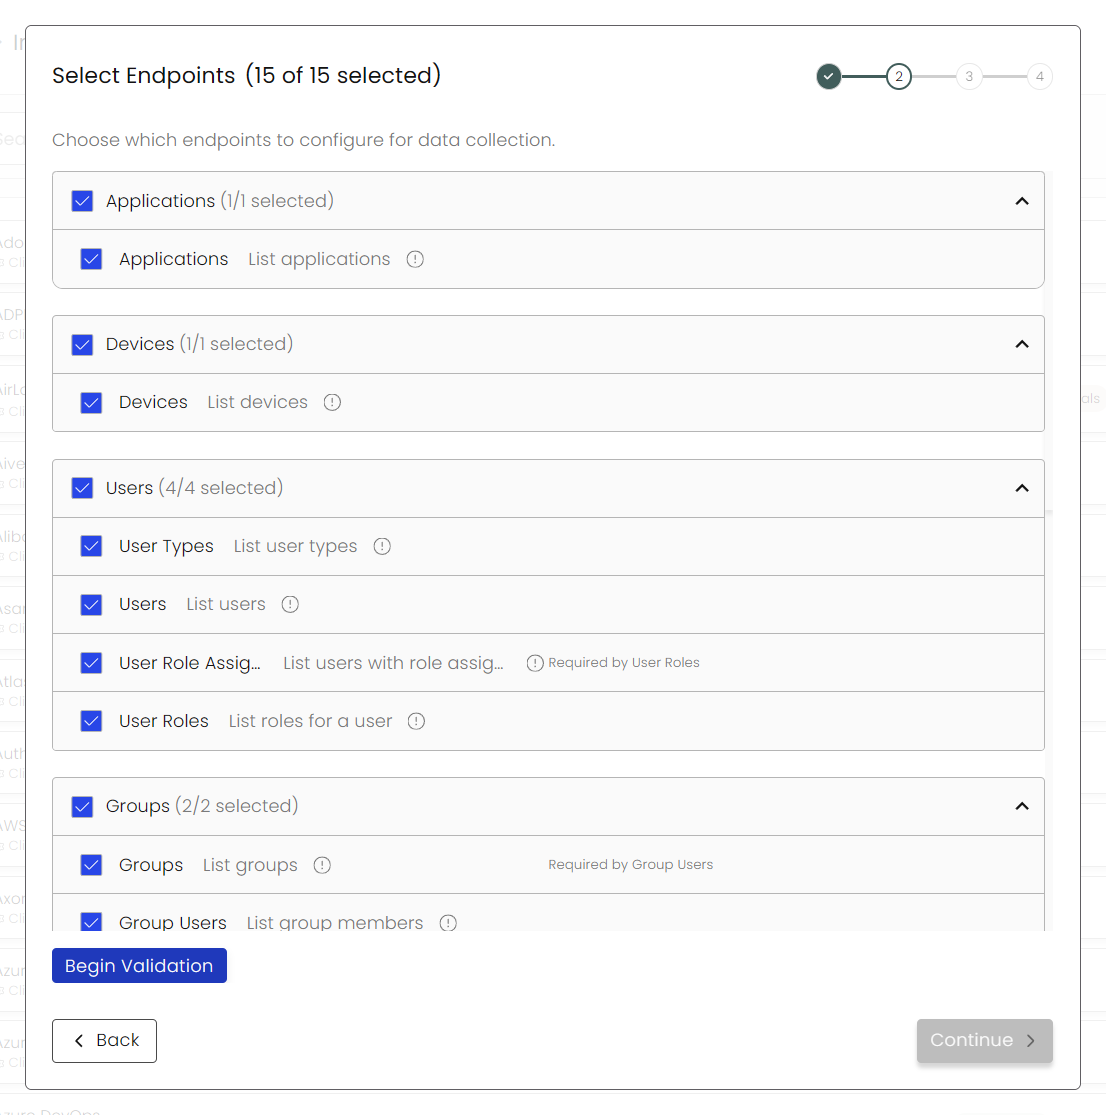
Choose your Endpoints and Begin Validation to validate your connection.
-
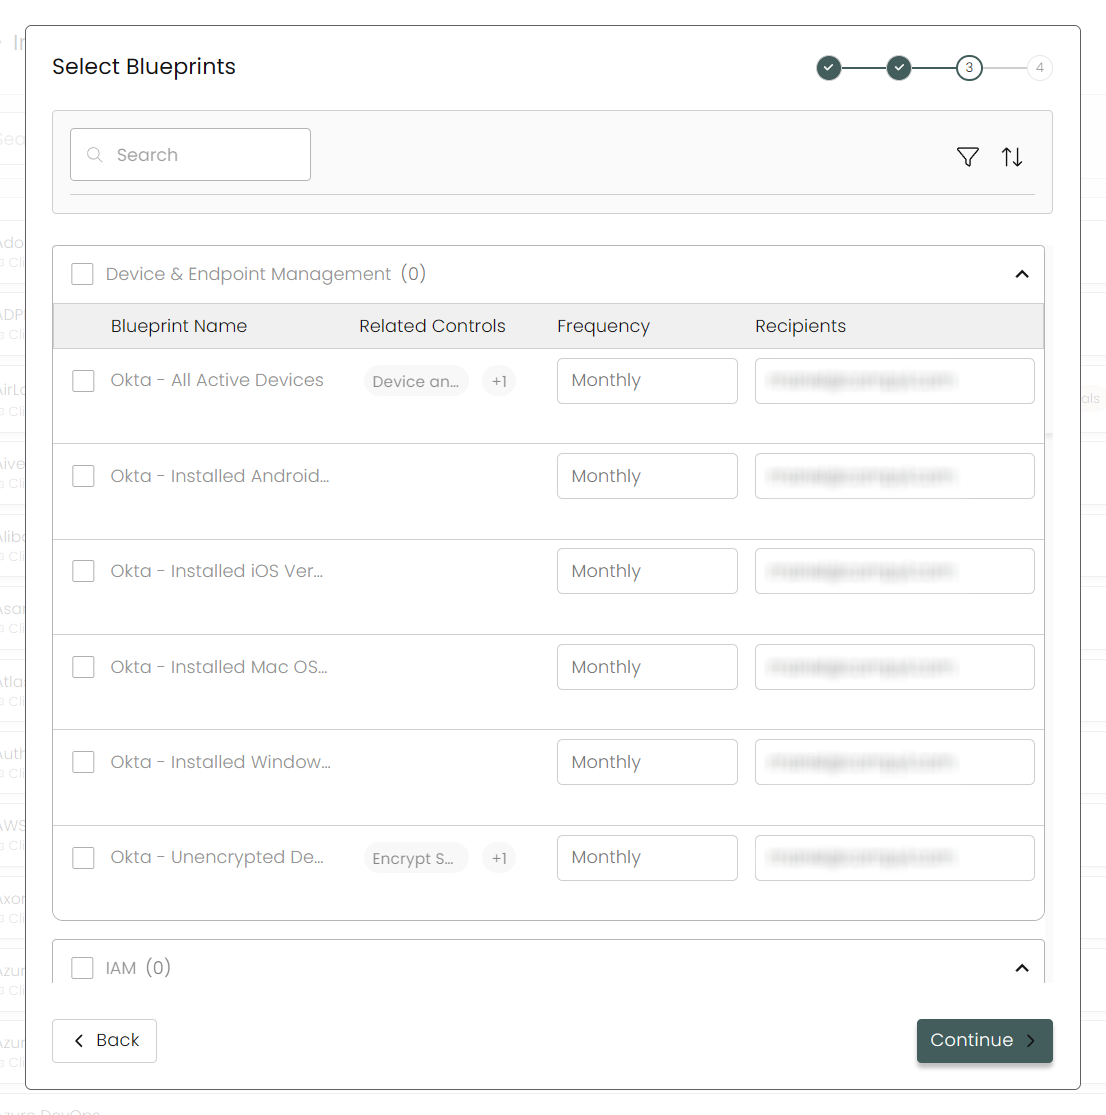
Select any Blueprints you wish to associate with this integration.
-
After you hit Continue, you'll see a summary screen. Click Return to Integrations to complete the configuration.
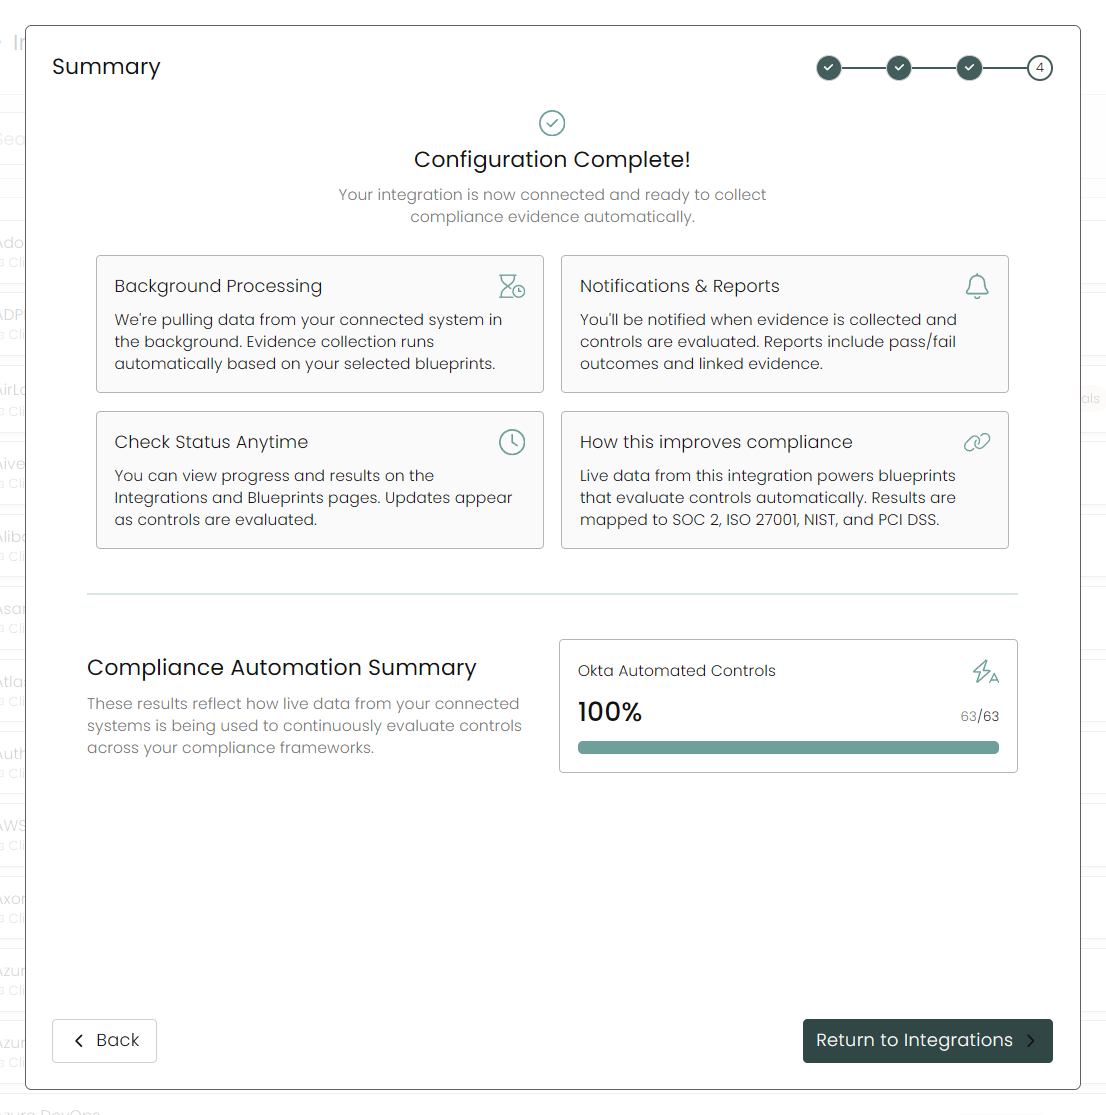
Once you have completed filling out the form click Return to Integrations.
You'll know the integration is successfully added when the status updates to Complete.

PopulateOktaPolicies EndpointIf you are attempting to access the PopulateOktaPolicies endpoint, the
Policy Type = OAUTH_AUTHORIZATION_POLICYwill return an error. This is an issue with the Okta API itself and not an issue with your integration or configuration.
This integration syncs daily.
To query the data from the integration, refer to the Blueprints article.
Updated 2 months ago