
DocuSign Integration
Integrating your application with DocuSign requires several steps, including setting up both a developer account and configuring your application for production use. This document provides a detailed guide on how to complete this process effectively.
PrerequisiteBefore starting, ensure you have a DocuSign admin account for production use. This account is critical for managing your application's integration and for performing administrative tasks in a live environment.
Obtaining DocuSign Credentials
Step 1: Create a Developer DocuSign Account
-
Register for a Developer Account: Visit the DocuSign Developer Center and sign up for a developer account.
-
Navigate to My Apps & Keys: Once logged in, click on your profile image in the upper right of the screen and choose My Apps & Keys.
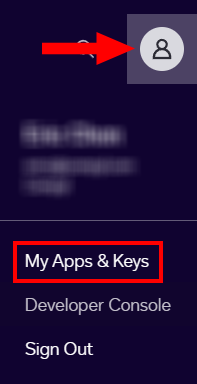
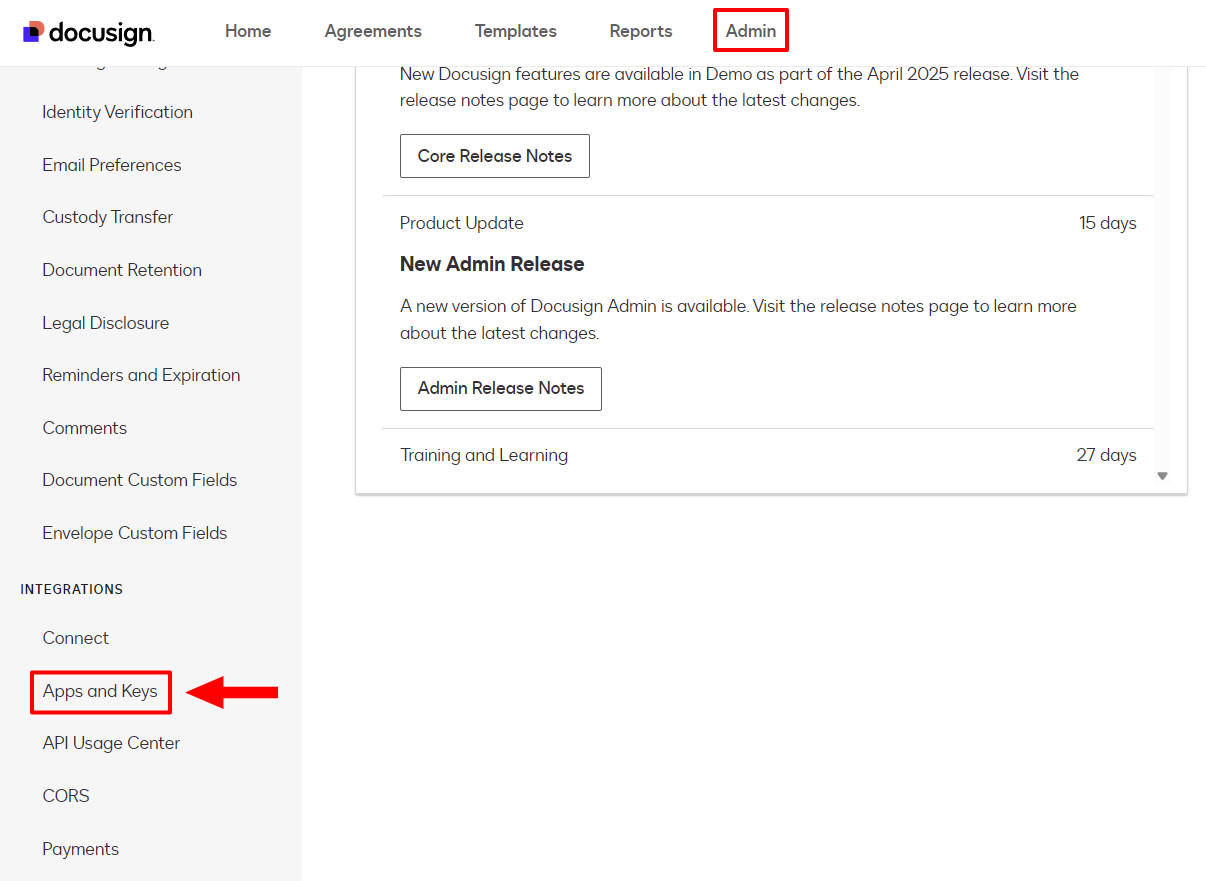
Alternately, if you are already in the App Development page, click on Admin and scroll down to Apps and Keys:
-
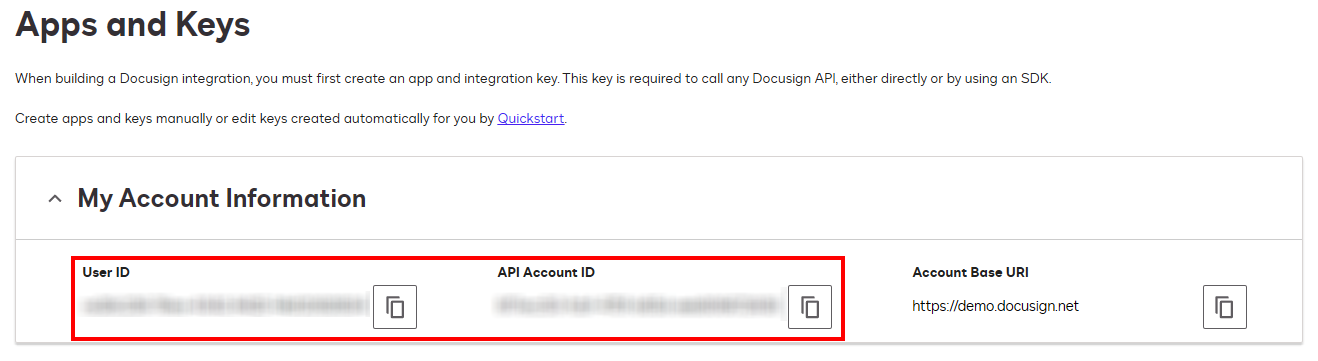
Locate API Credentials: Here, you will see your User ID and API Account ID. Make a note of these as they are required for setting up your application.
Step 2: Register Your Application
-
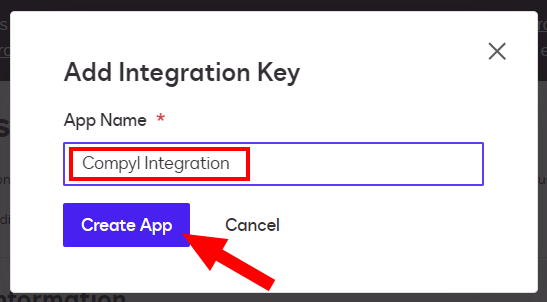
Add an Application: Click on the Add App and Integration Key button located below My Account Information and name your application as desired in the pop-up. Then click Create App.
-
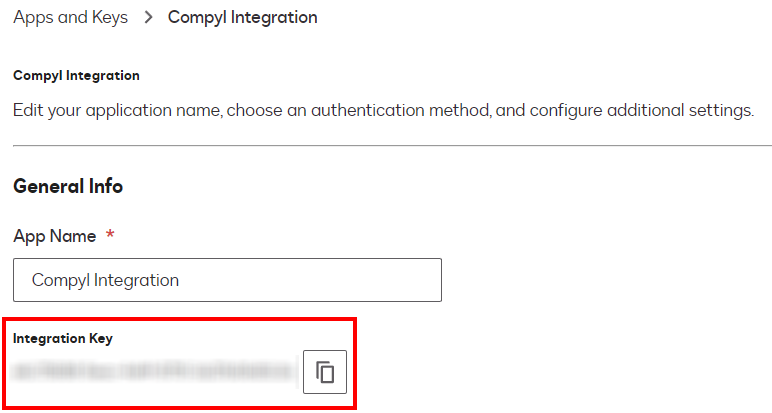
Obtain Integration Key: After creating the app, a new page will load showing your Integration Key under General Info. Copy this for later use.
-
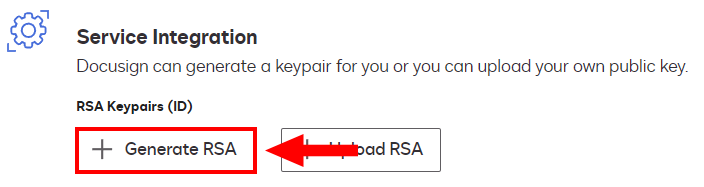
Generate RSA Private Key: Within the application settings, generate an RSA private key. This key is crucial for secure communication with DocuSign's API.
-
Scroll down to the Service Integration section of the page and click the Generate RSA button.
-
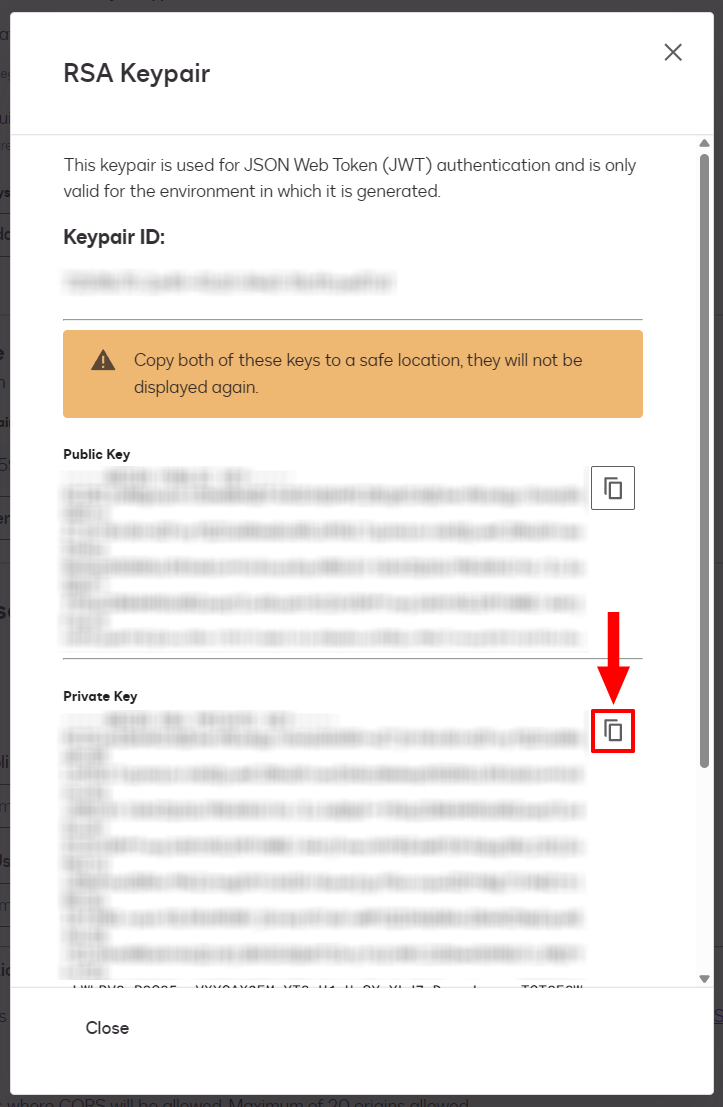
Copy the PRIVATE key to a secure location as these are only ever displayed once. If lost, you will need to generate a new one.
-
-
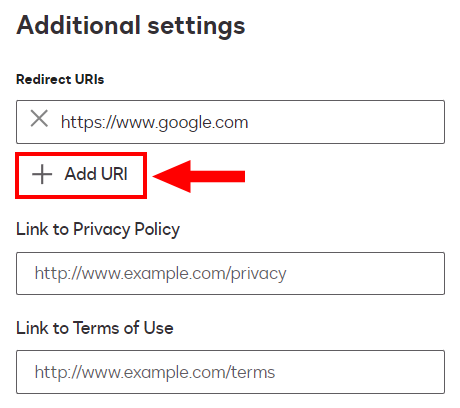
Configure Redirect URI: Specify a Redirect URI for OAuth authentication flow. This URI is where you will be redirected after authenticating with DocuSign. This doesn't need to be anything specific (you can use Google if you'd like).
-
Save Configuration: Ensure all settings are correctly entered and save your application configuration by clicking the blue Save button at the bottom of the page.
Step 3: OAuth Consent URL
-
Create a Consent URL: Construct a URL for requesting user consent using the following pattern, replacing the
client_idwith your Integration Key and theredirect_uriwith your specified Redirect URI. It may take several minutes for your url to work correctly.https://account-d.docusign.com/oauth/auth?response_type=code&scope=signature%20impersonation&client_id=[YOUR_INTEGRATION_KEY]&redirect_uri=[YOUR_REDIRECT_URI] -
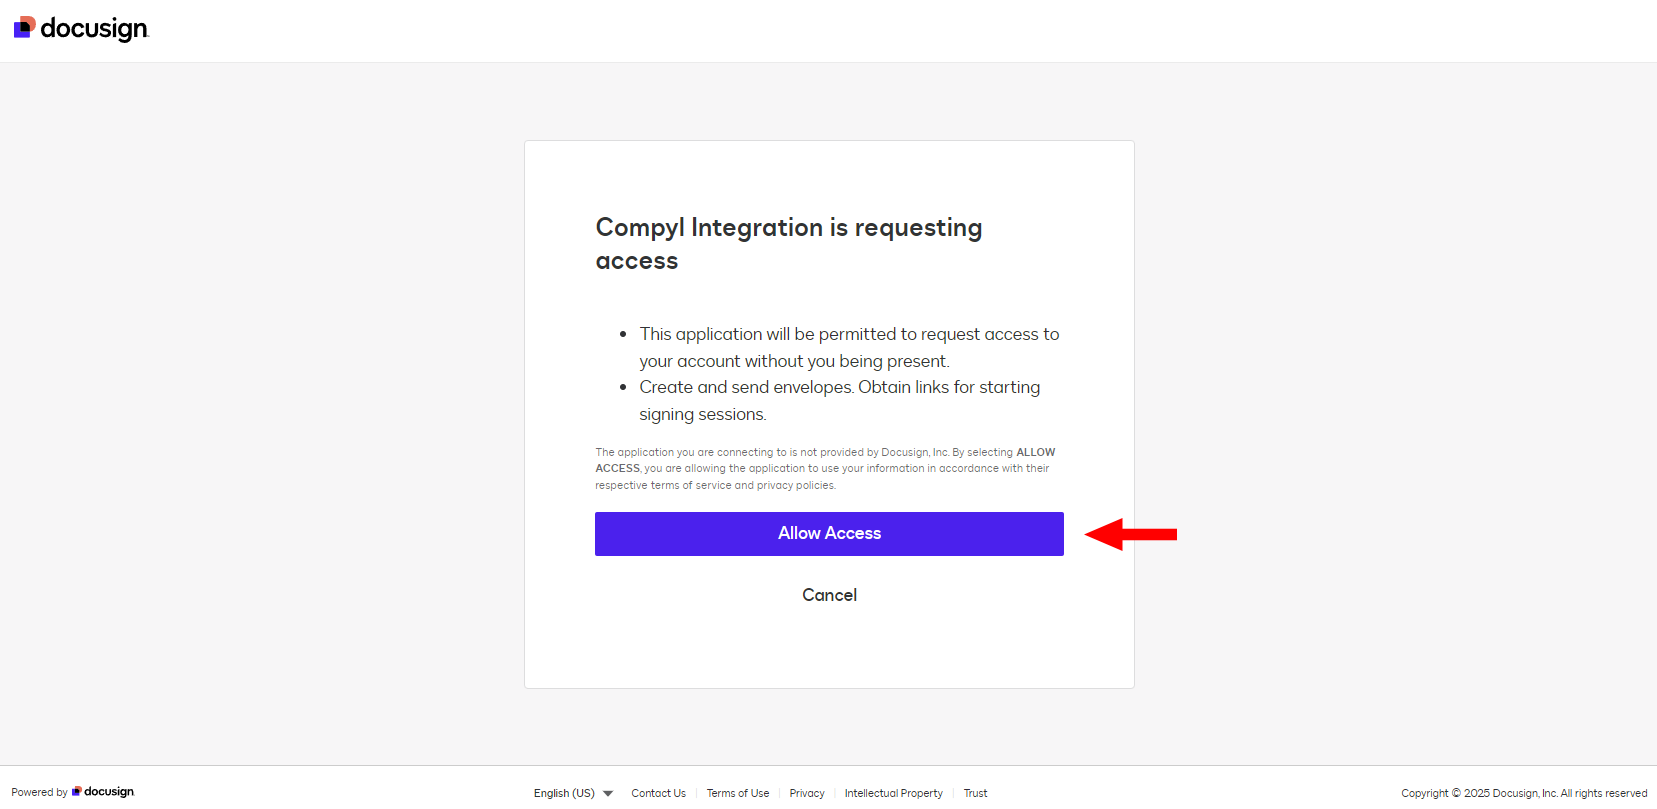
Grant Consent: With the consent URL created, paste that in your browser where you’ll get a message asking for consent and authorization. Click Allow Access and use your developer account login info to consent if requested.
-
Enable Integration Config: Follow the steps to get to and add a DocuSign configuration as outlined below , and enter in the following information:
Name: Enter the name of the integration
is Enabled: Toggle button to ensure data is populated into Compyl
is Production Approved: do not toggle this on
Integration Key: As generated above in Step 2
Demo Account ID: This is your DocuSign Account ID as seen in Step 1
Demo User ID: This is your DocuSign User ID as seen in Step 1
Demo RSA Key: The RSA Secret Key generated in Step 2
Admin User ID: This can be the same as the Demo Account ID if that account is also an Admin
The next step requires at least 20 successful API requests, so you will need to allow for some time to pass before proceeding.
Step 4: Application Approval
- Monitor API Requests: Check your DocuSign application dashboard (the Apps & Keys page as mentioned in Step 1) for at least 20 successful API requests to qualify for submission. This should happen automatically after enabling the integration in Compyl. If some hours have passed and you still don’t see 20 requests contact Compyl Support for assistance.
- Submit for Review: Once you've reached the minimum API usage, submit your application for review. This typically takes about 20 minutes.
- Go Live: After passing the review, select Go Live for your account from the actions menu. Log in with your production admin account and choose the application you've registered.
- Approval Process: The application will undergo a final approval process, which may take up to 48 hours.
Step 5: Production Setup
- Access Production Application: When you receive your approval email, navigate to the View in Production section in your developer dashboard. Log in using your admin credentials.
- Gather Production Credentials: Similar to Step 1 and Step 2, record the User ID, Account ID, and generate a new RSA private key and redirect URI for production use.
- Update Integration Config: Enter these details into your application's integration configuration (in the fields marked “Prod” and verify 'Is Production Approved' is toggled. Save.
Step 6: Final OAuth Consent for Production and Data Fetch
Generate Production Consent URL: Create another consent URL and navigate to it as before but log in with your admin credentials to authorize your application fully.
https://account.docusign.com/oauth/auth?response_type=code&scope=signature%20impersonation&client_id=[YOUR_INTEGRATION_KEY]&redirect_uri=[YOUR_REDIRECT_URI]
NoteThis is a different url from the first one we created. Notice it is account.docusign and not account-d.docusign
If you’ve granted consent with your admin credentials, you can now fetch data from your production Docusign account. You can check your admin API dashboard to make sure requests are successful or query some Docusign tables within Compyl.
Add Configuration
-
Navigate to the Integrations tab using the left-hand menu, and select DocuSign

-
Click the Add Configuration button and fill in the details below:

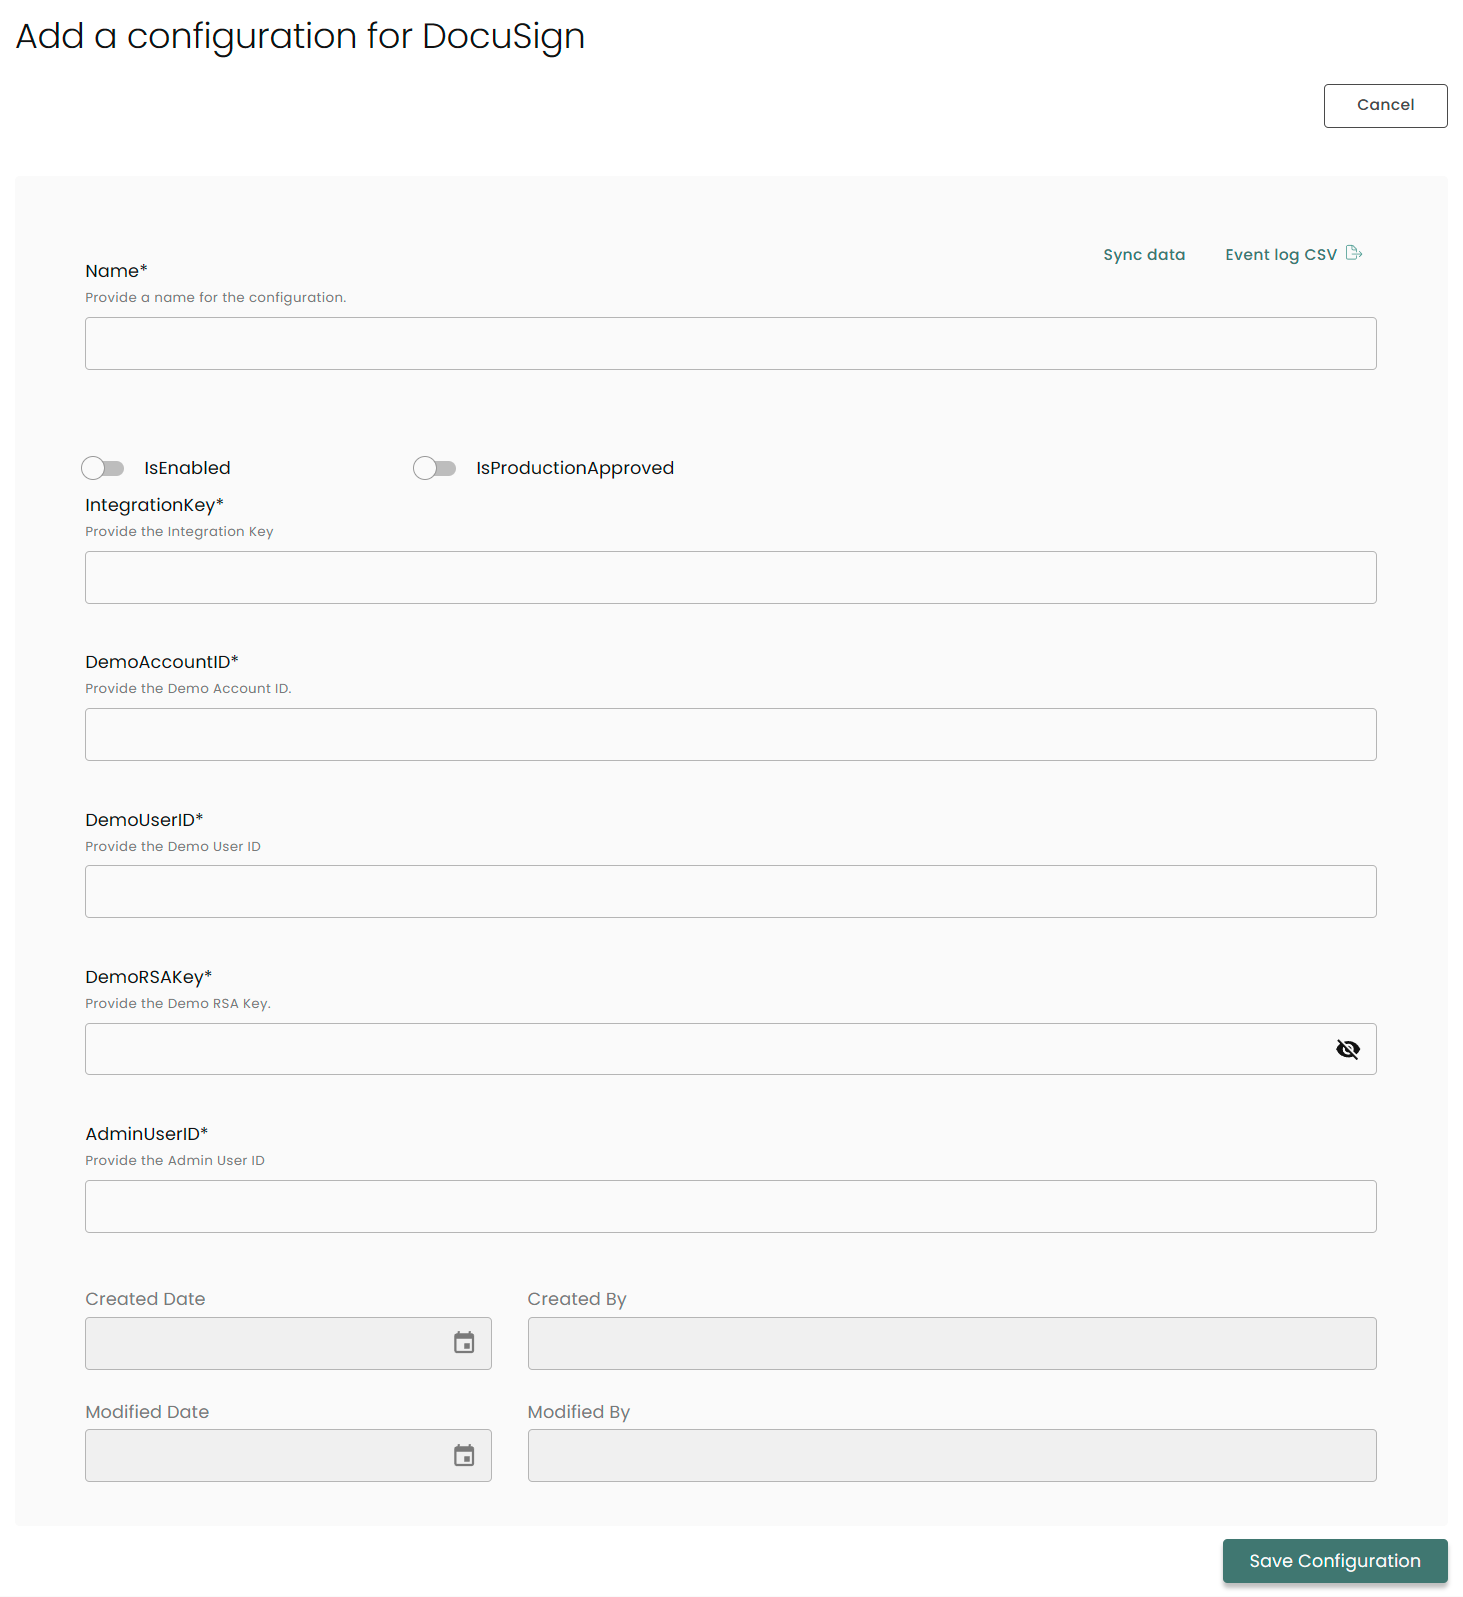
Name: Enter the name of the integration
is Enabled: Toggle button to ensure data is populated into Compyl
is Production Approved: missing data (not in old doc)
Integration Key: As generated above in Step 2
Demo Account ID: This is your DocuSign Account ID as seen in Step 1
Demo User ID: This is your DocuSign User ID as seen in Step 1
Demo RSA Key: The RSA Secret Key generated in Step 2
Admin User ID: This can be the same as the Demo Account ID if that account is also an Admin
Once you have completed filling out the form click Save Configuration.
NoteTo check if the integration is connected, navigate to the Integrations page in Compyl. If the Status icon shows an unbroken link in the right-hand corner, your integration is properly connected.

This integration syncs daily.
To query the data from the integration, refer to the Query Builder article.
Updated 2 months ago