
Blueprints
Compyl Blueprints are reusable logic-based automations that define how controls are tested across active systems
Compyl Blueprints drive the integration and presentation of data within Compyl, enabling you to build structured compliance workflows directly on top of that data. Blueprints can be used to surface data pulled from integrations or to run reports and workflows against data native to Compyl, such as Risks and Assets.
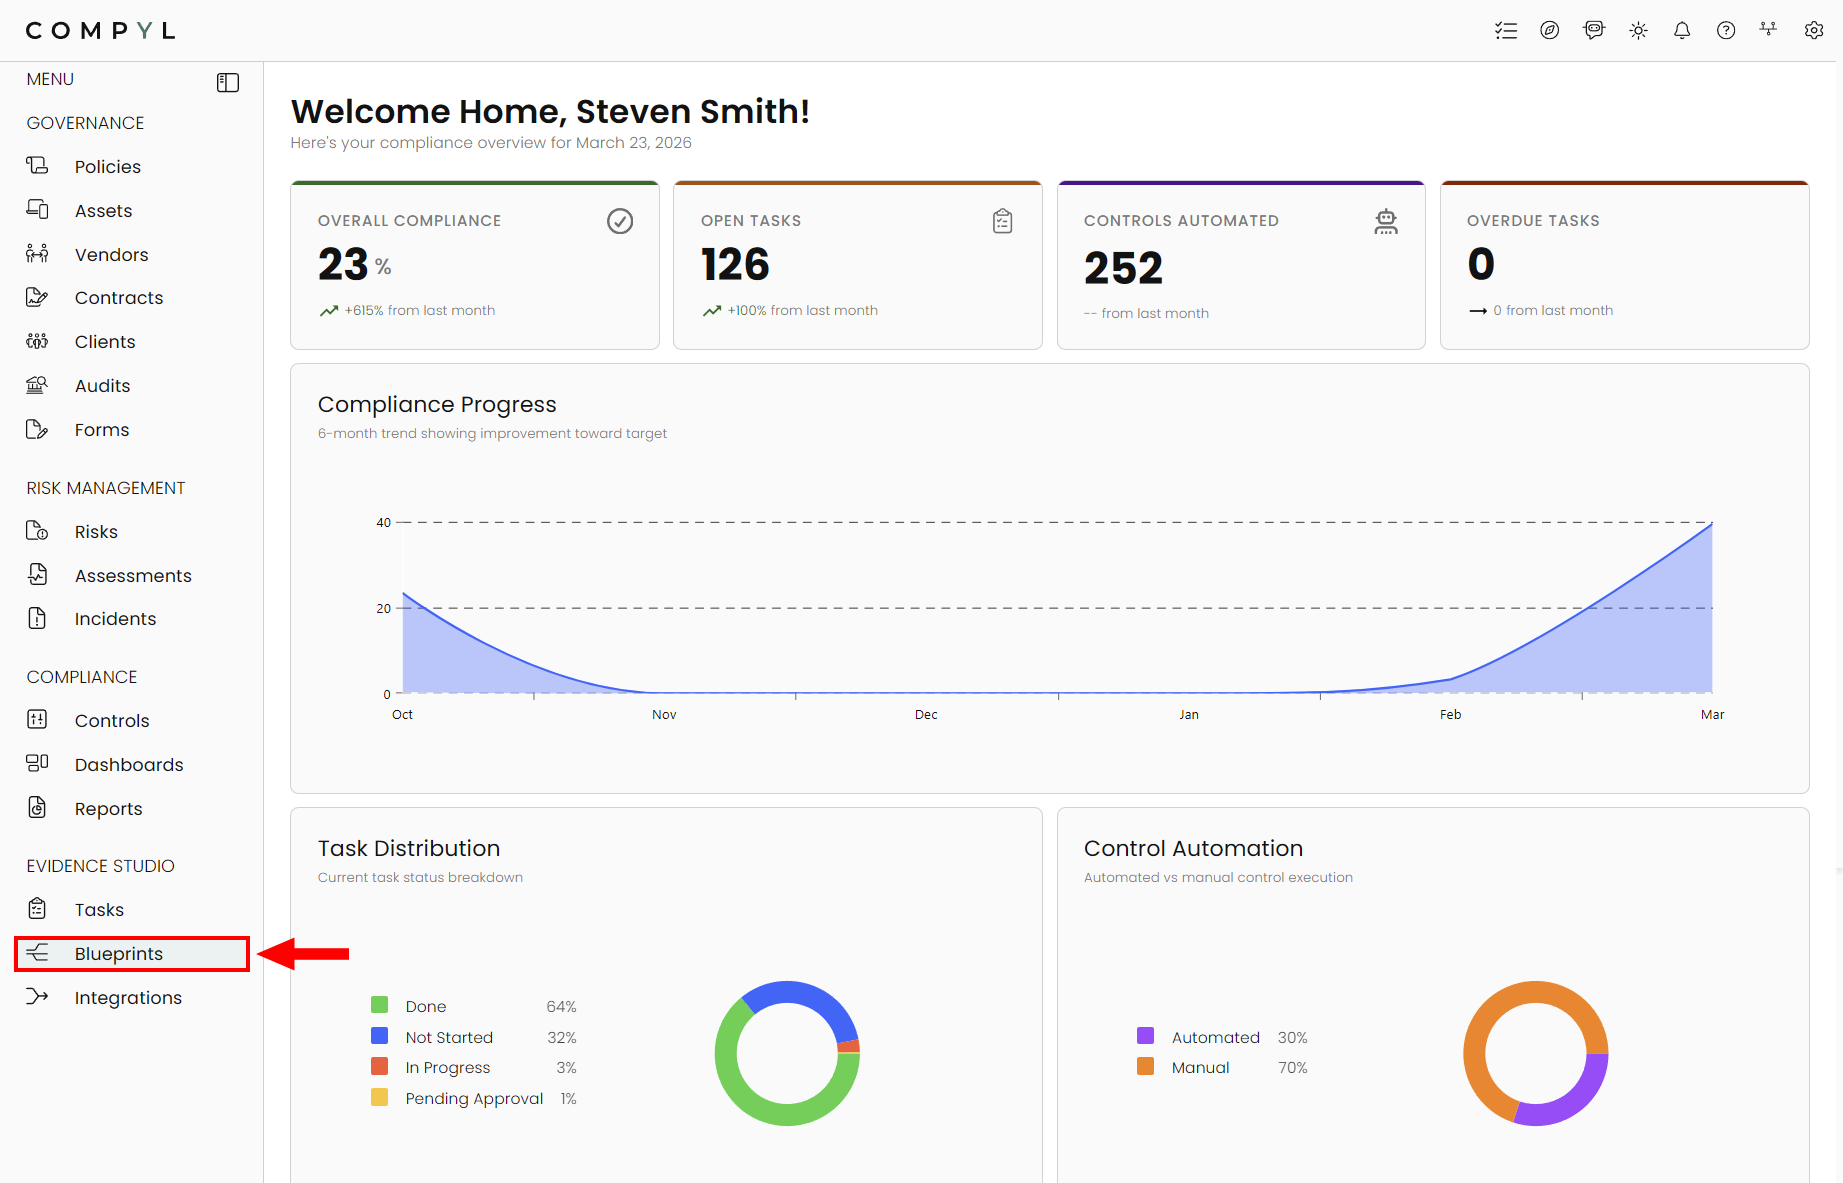
Blueprints Home Page
The Blueprints home page gives you a high-level overview of the status of your current running blueprints as well as braking down which ones you have that are associated with your Control Sets and Integrations, making it easy to find the correct one for your scenario. Below that we showcase our entire library of blueprints available to automate control validation.
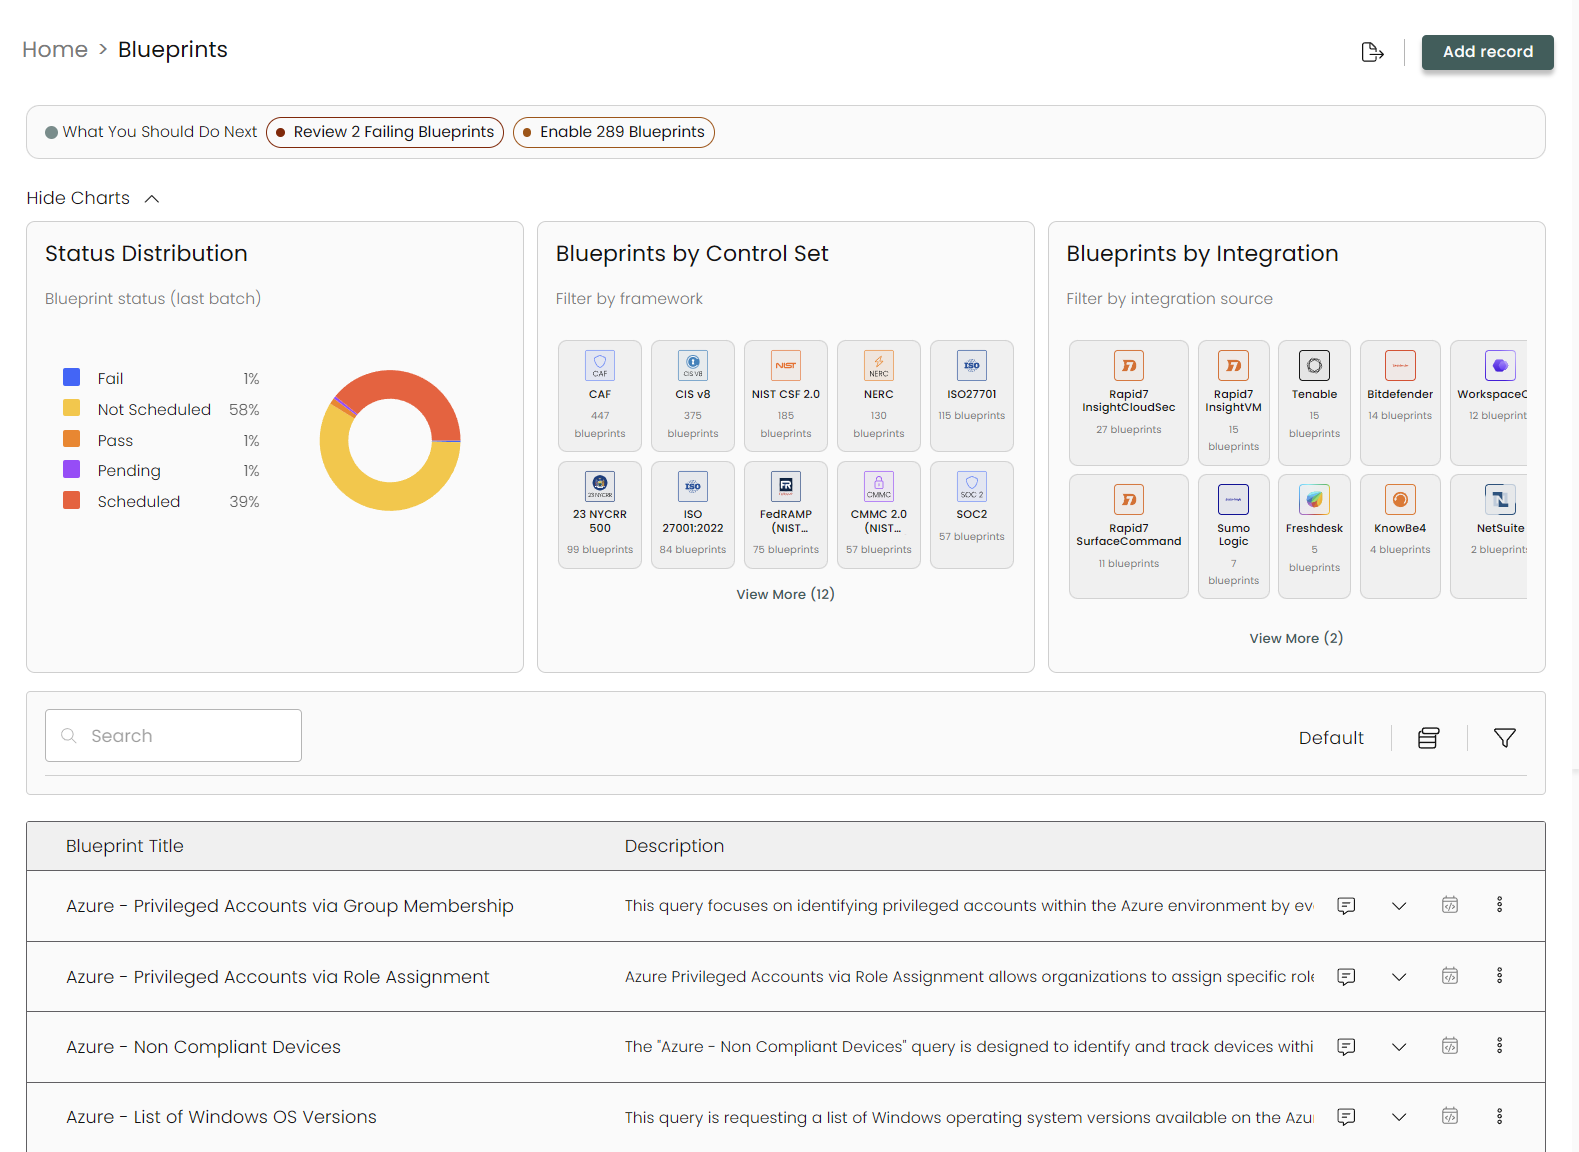
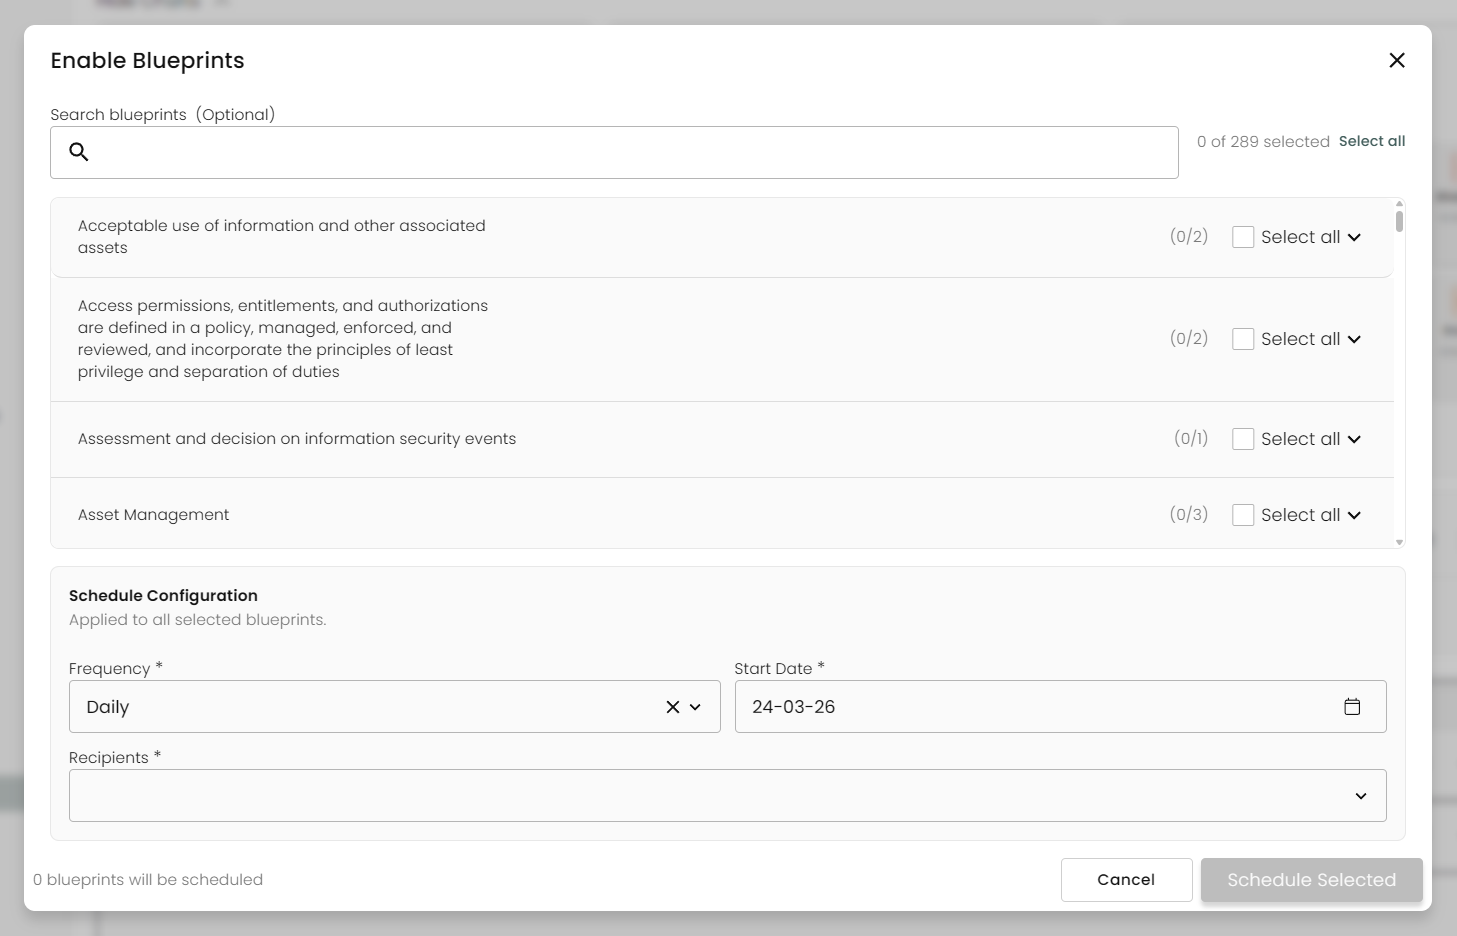
What You Should Do Next gives you specific suggestions to improve your data collection. Clicking on them will bring you straight to where they need attention.

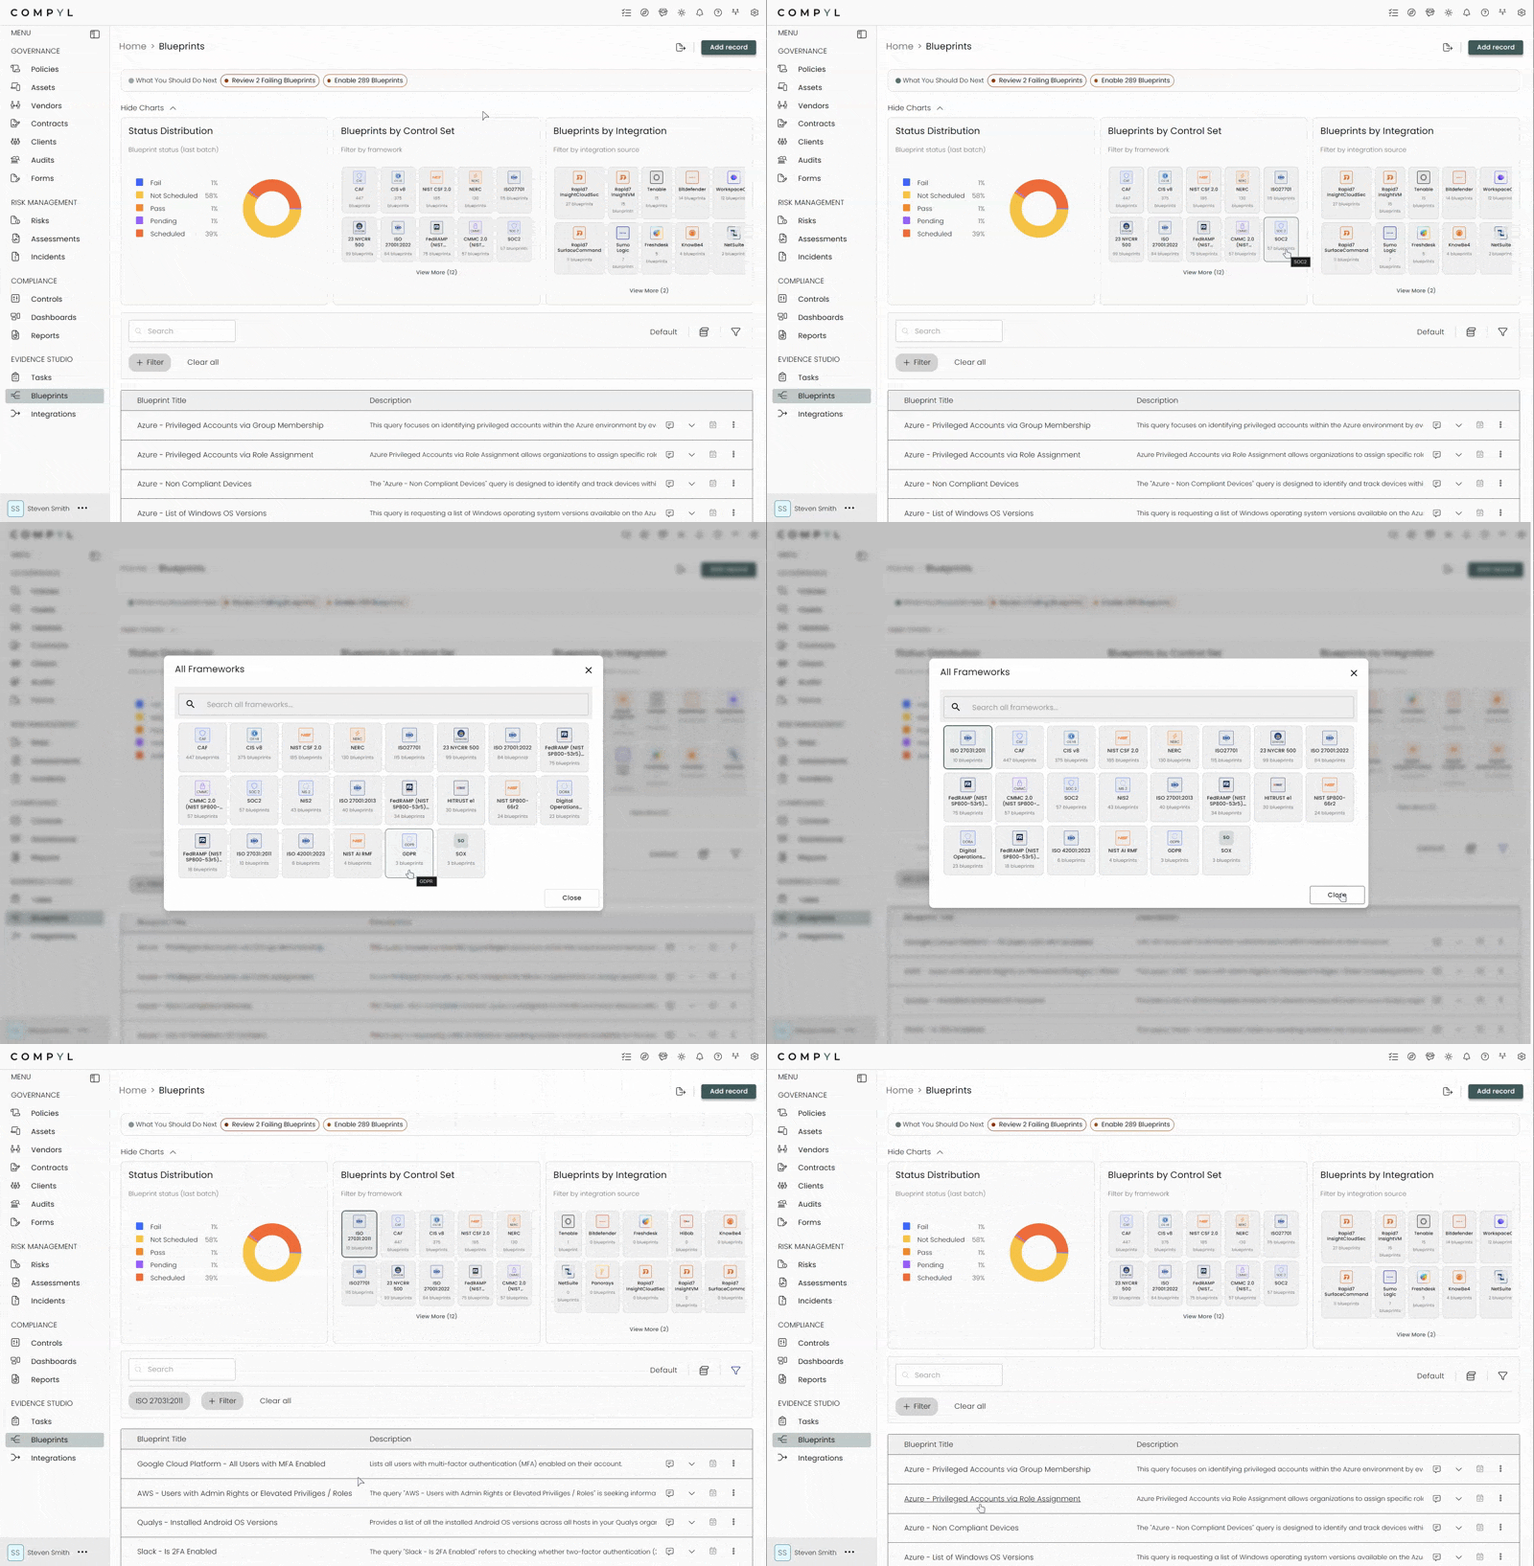
Each Control or Integration displayed is a pre-built filter, allowing you see all the blueprints for that specific one.
To Edit, Delete, or Duplicate a Blueprint, click on one to open it.
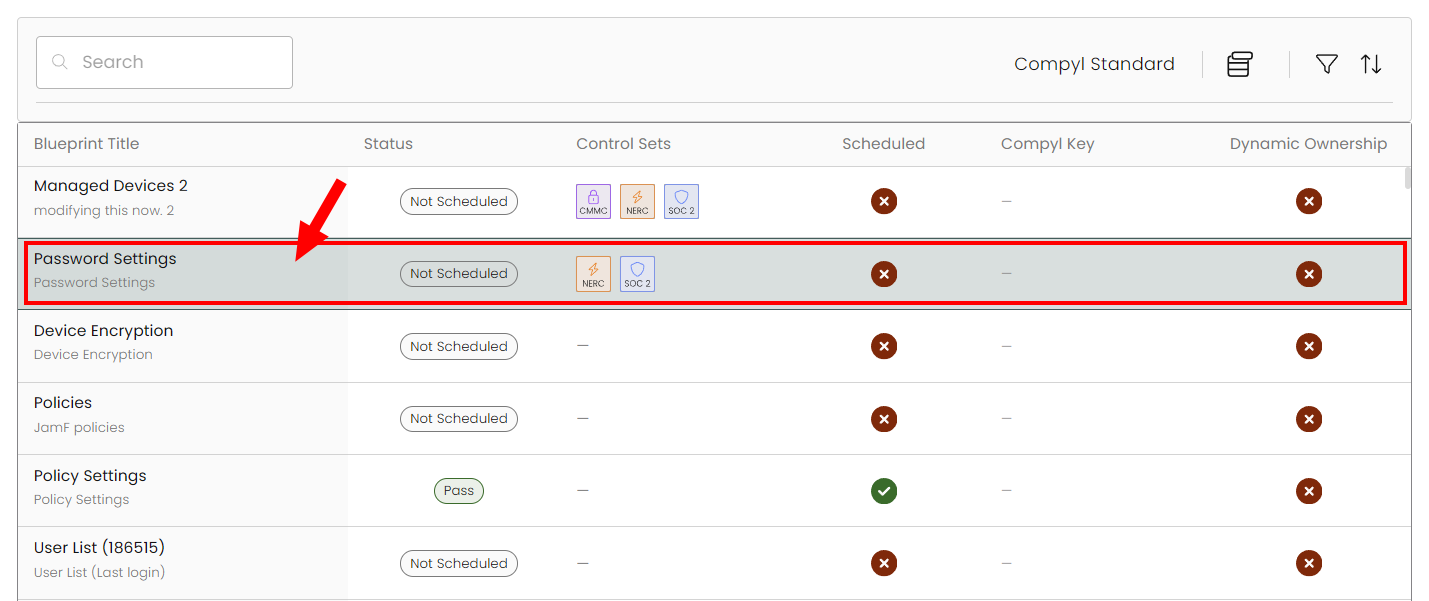
The slide-out shows you all of the details of the blueprint including description, pass/fail condition, linked control sets, and schedule. You can delete it from here or toggle from view to edit to modify or update the blueprint.
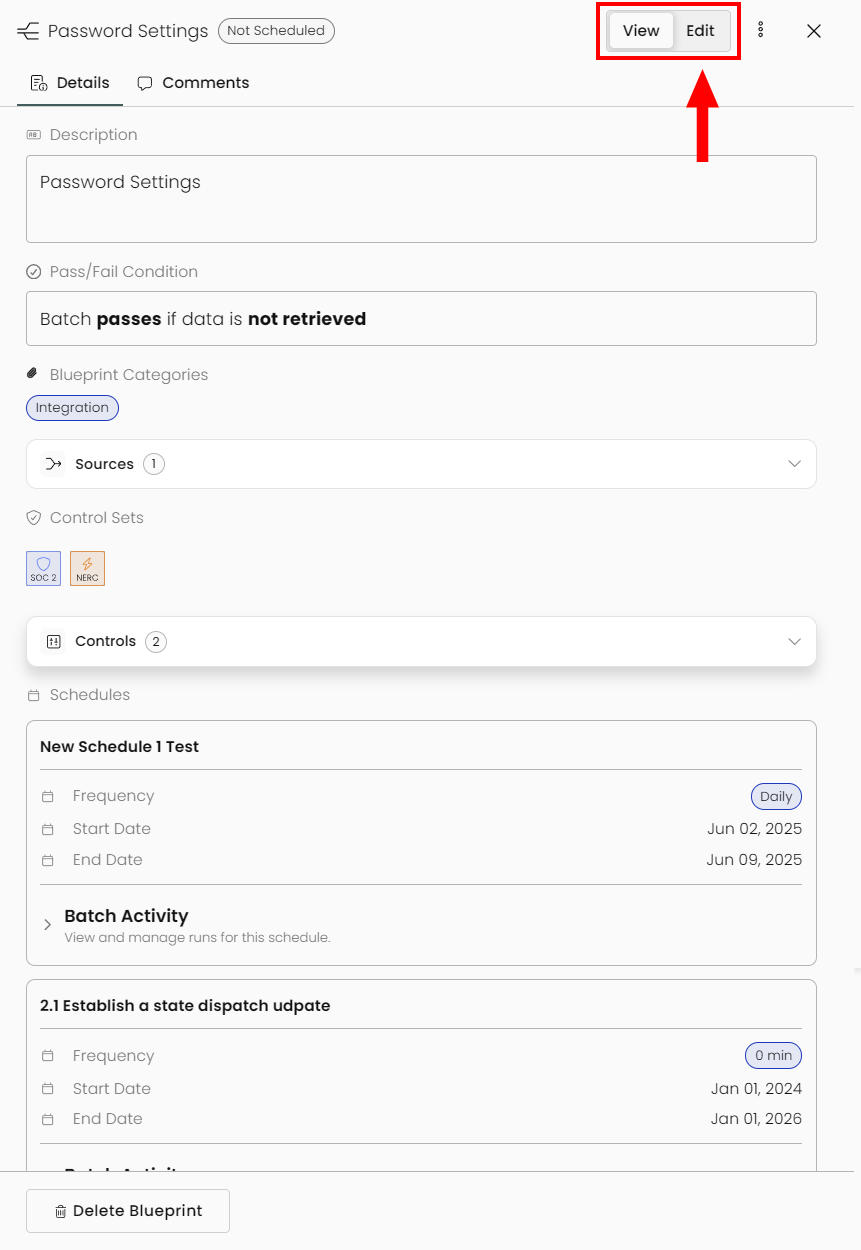
Editing a blueprint uses the same interface as adding one, so you can follow the steps below.
Adding a Blueprint
If you'd like to learn how to build Blueprints with CompylAI, check out our article here.
-
Select Add record above the grid view

-
Fill in the Query Title, Description, the Pass/Fail Condition as these are required.
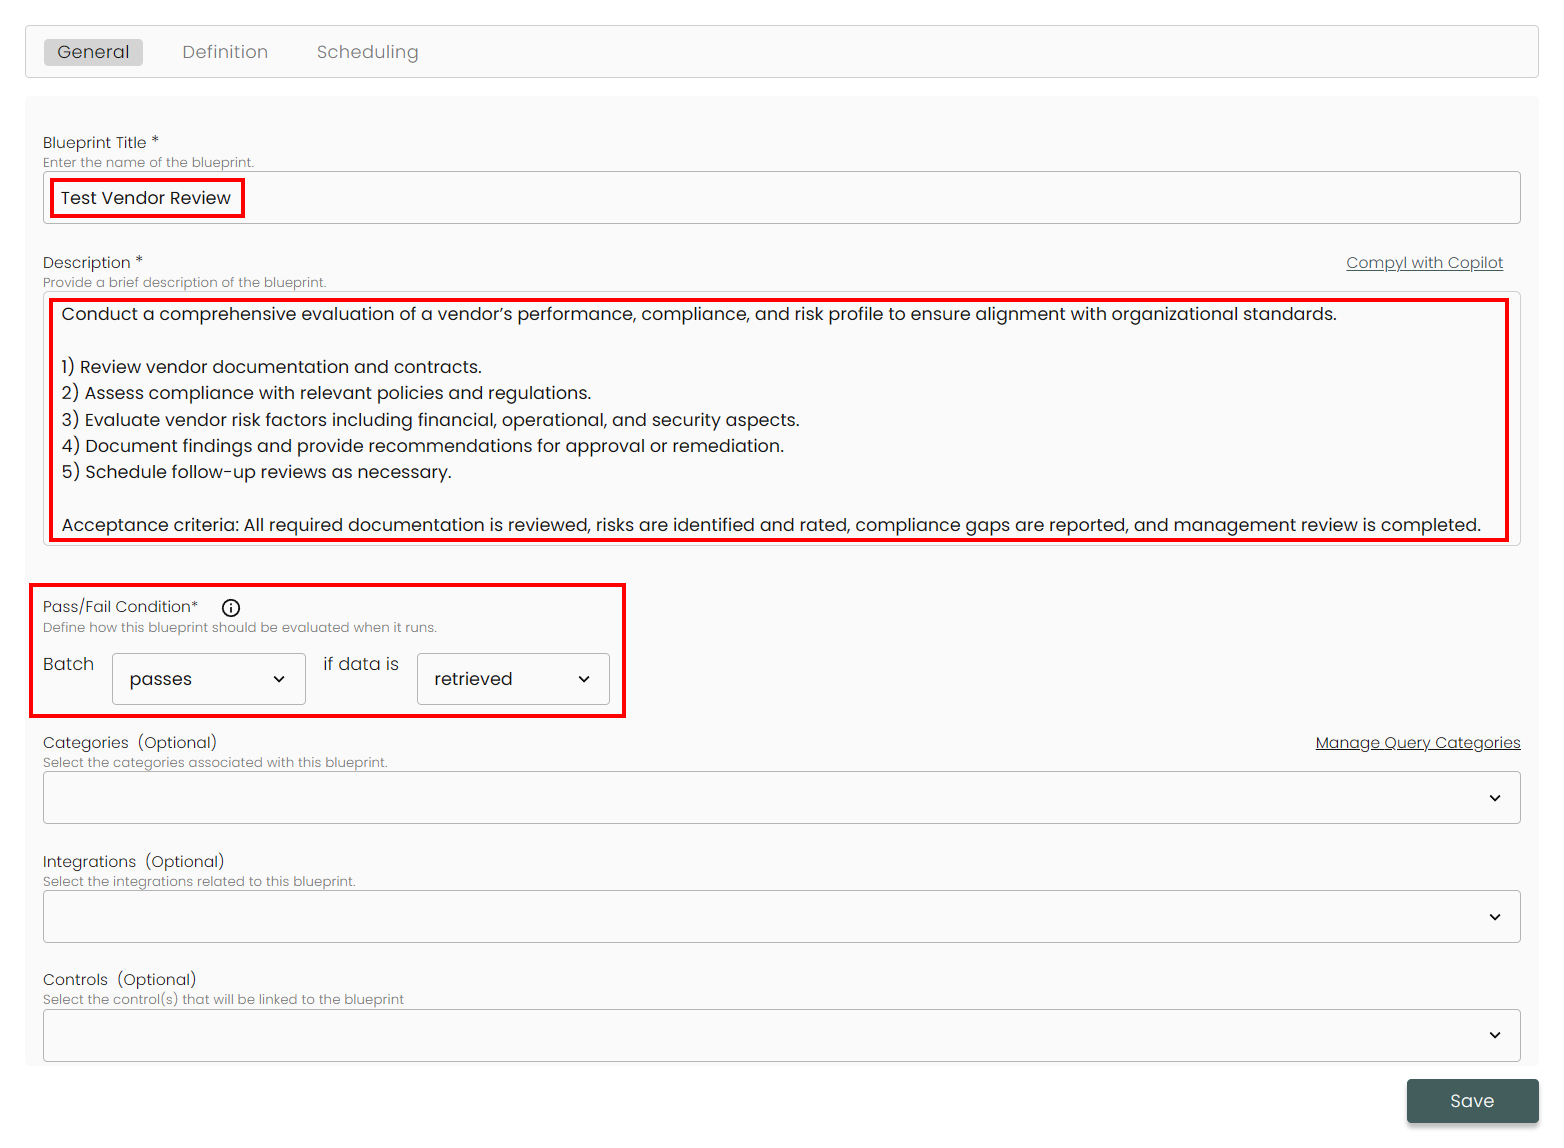
-
You can also attach this blueprint to Categories (as defined under Manage Blueprint Categories in Settings ), Integrations, and Controls.
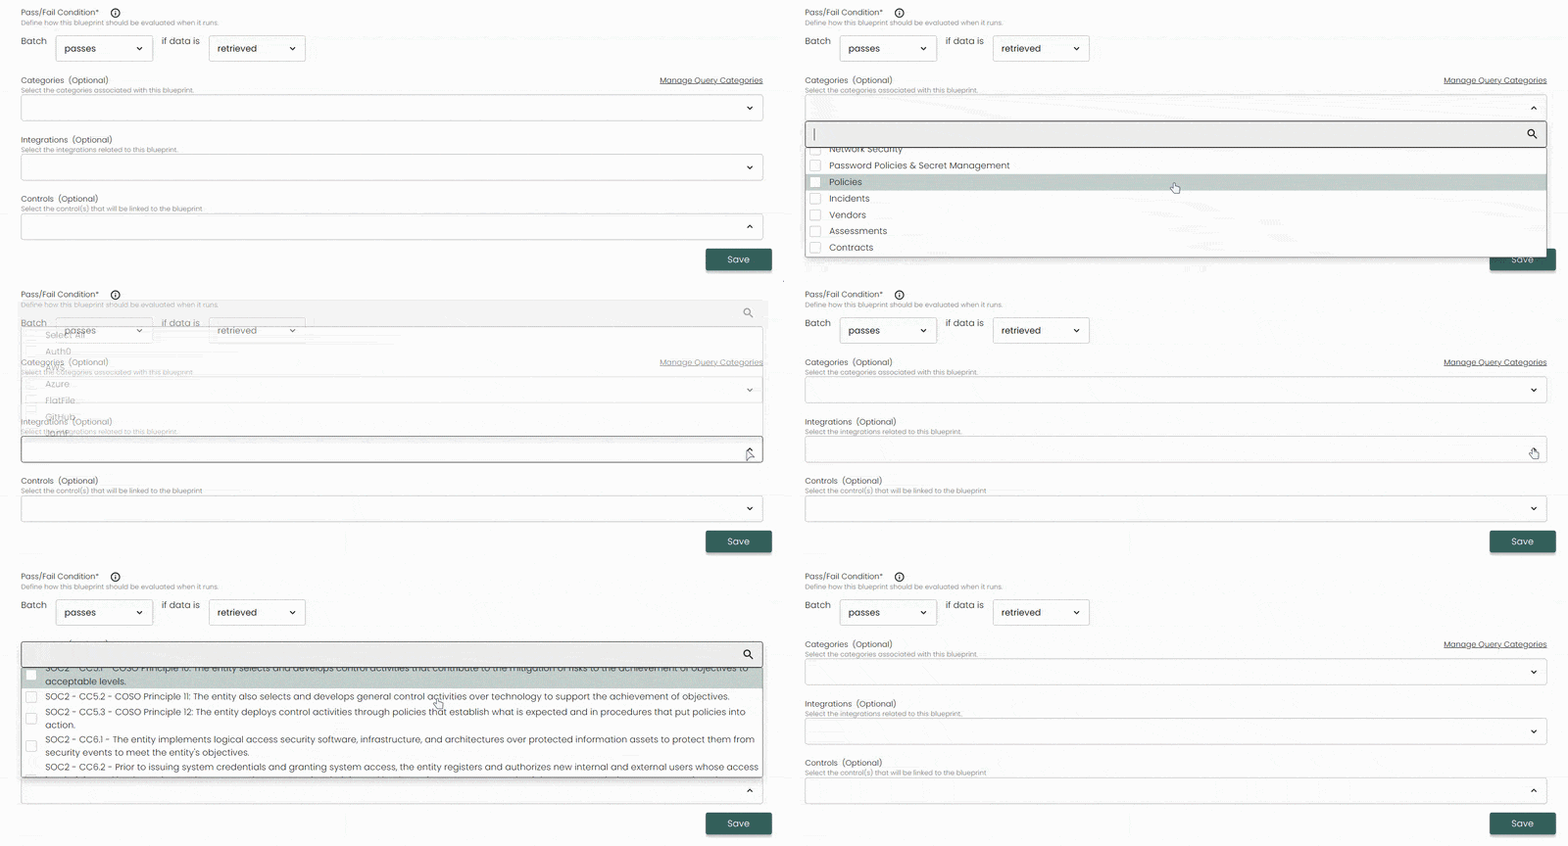
-
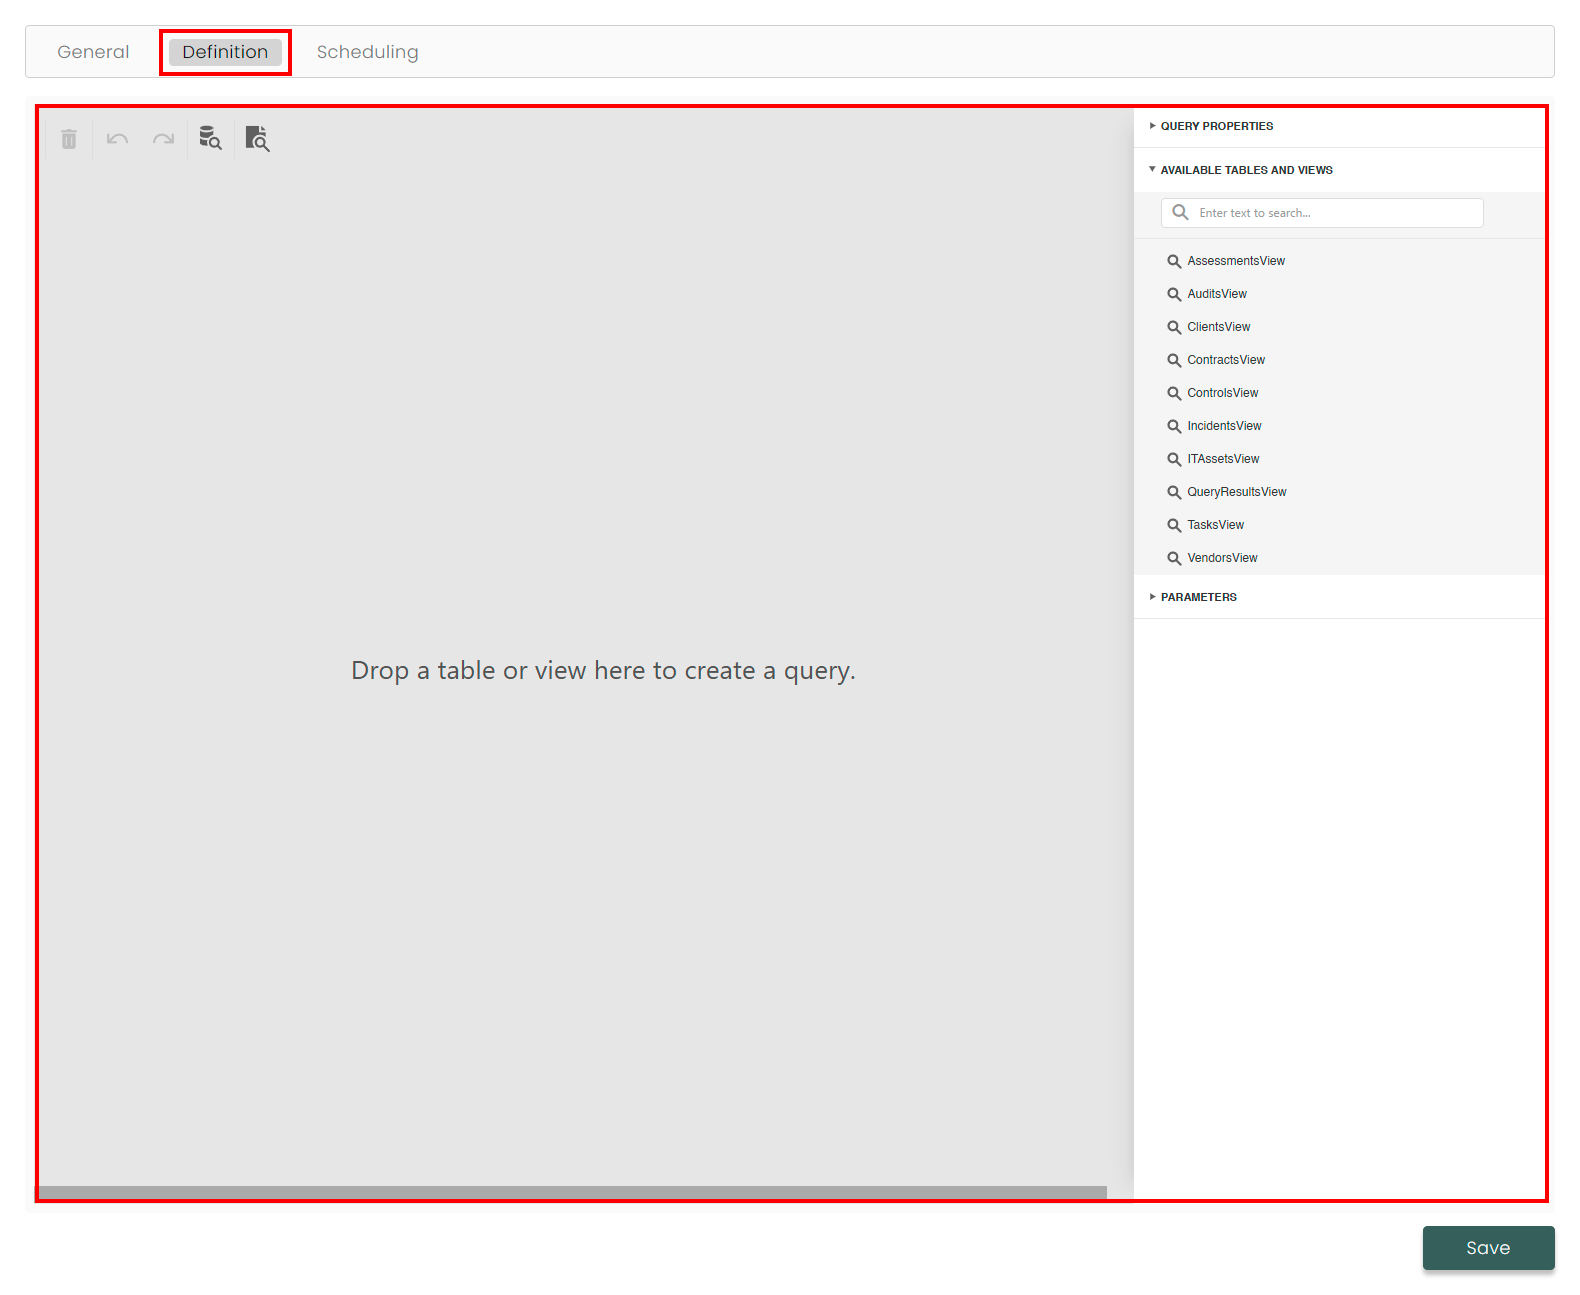
Move to the Definition tab.
-
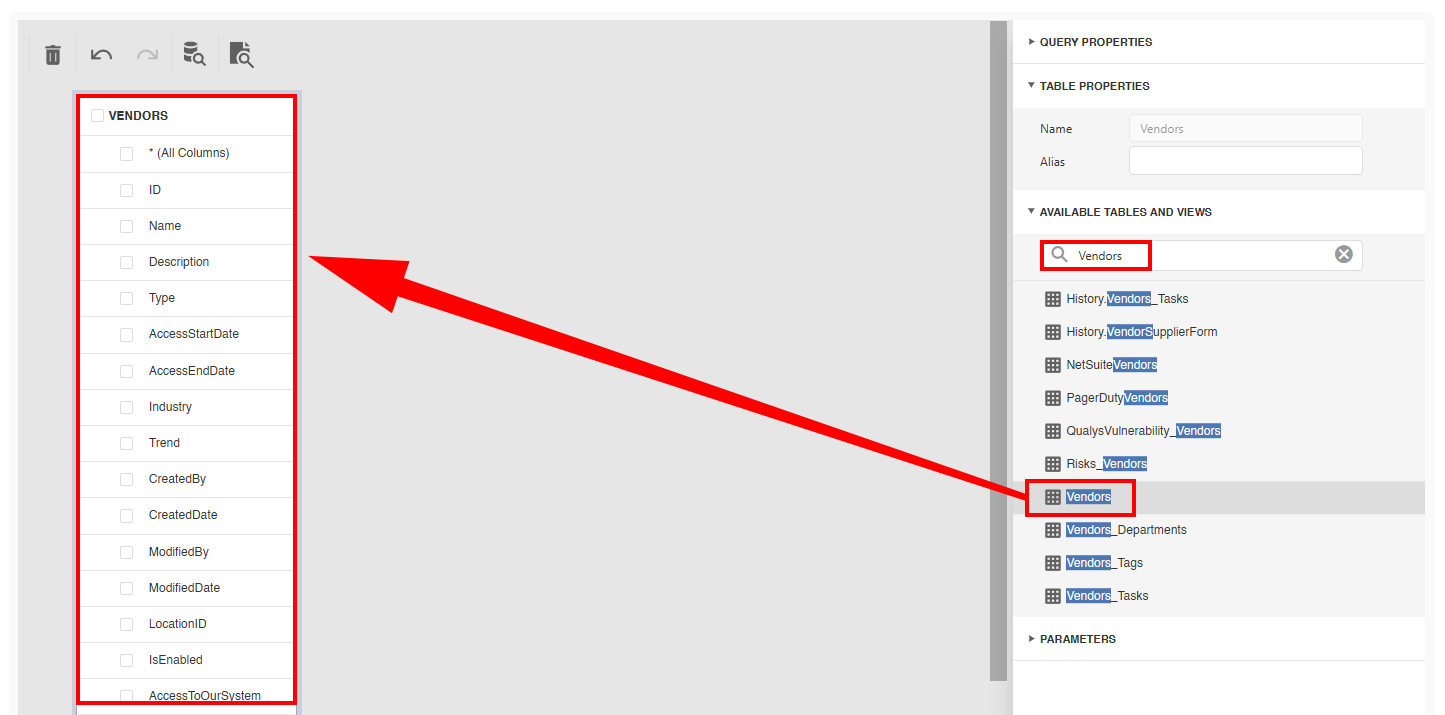
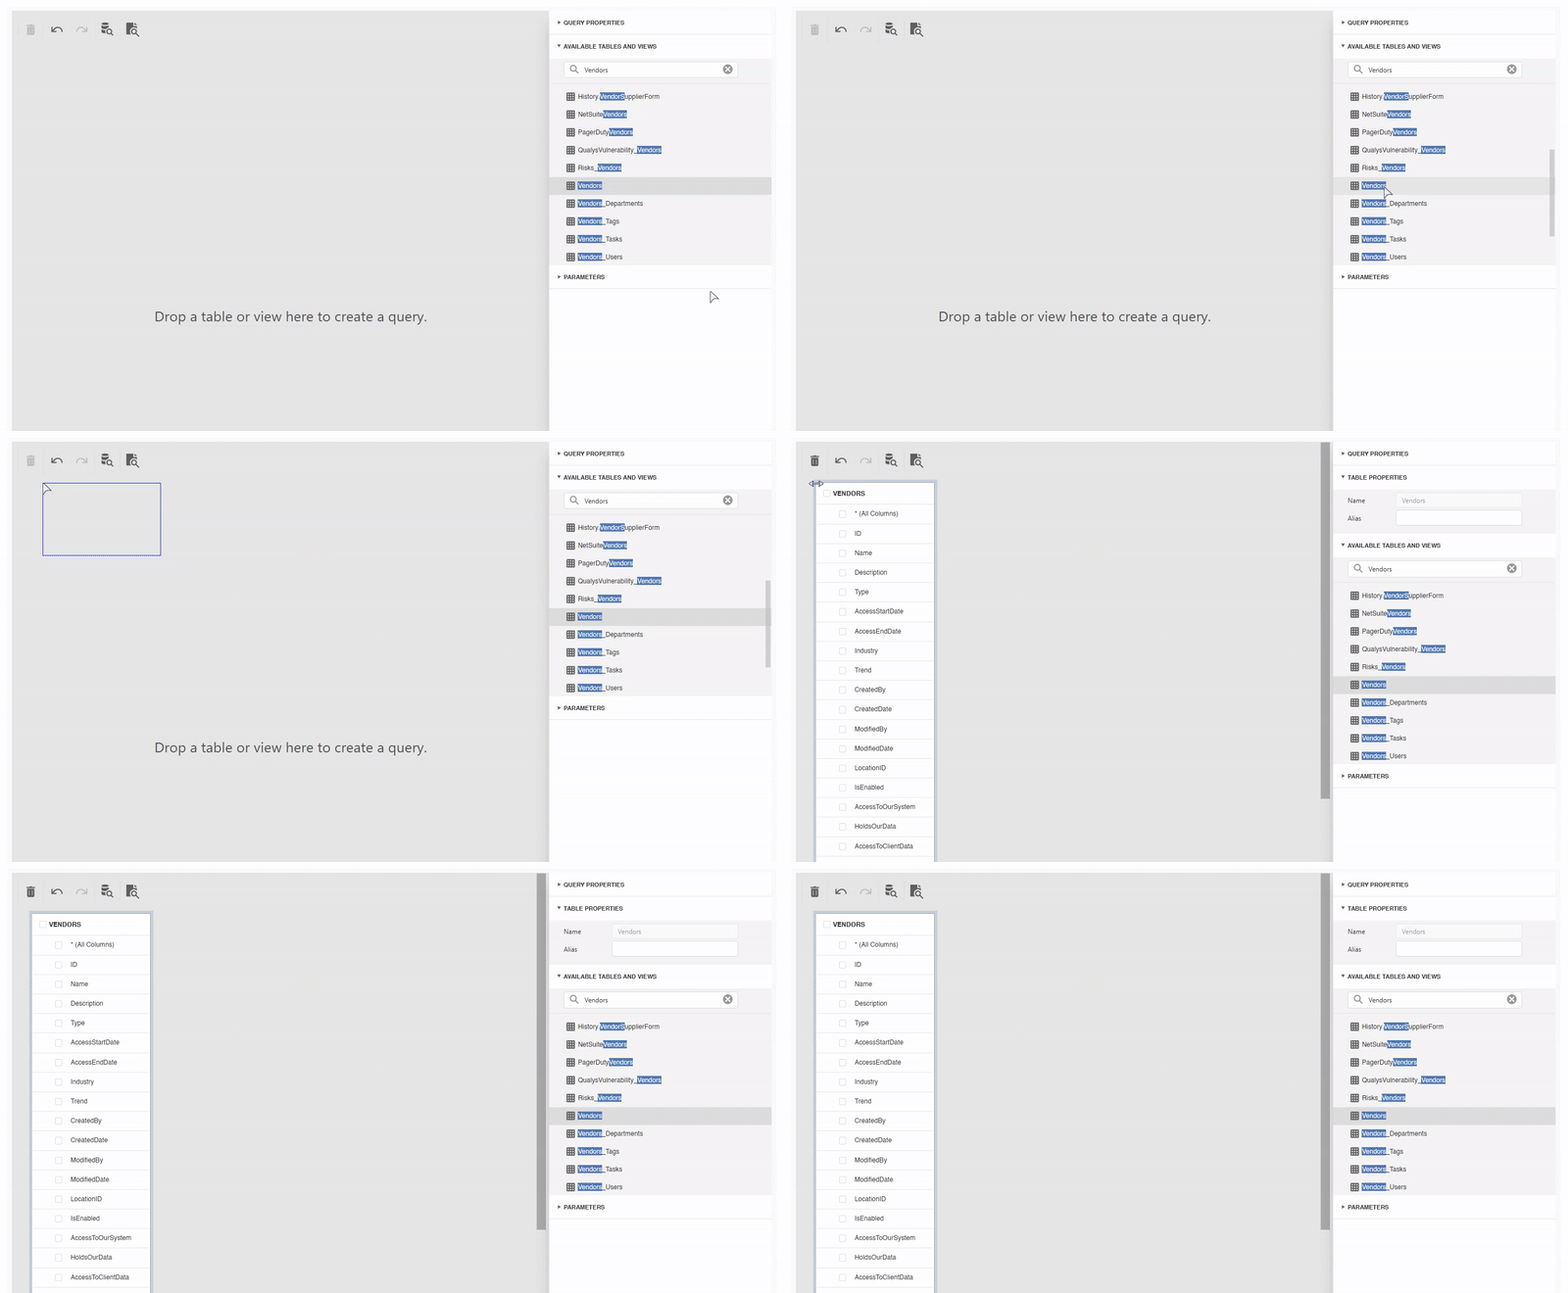
Search for the query table you would like to select in Available Tables and Views. Double Click or drag the table into the query visualizer window.
-
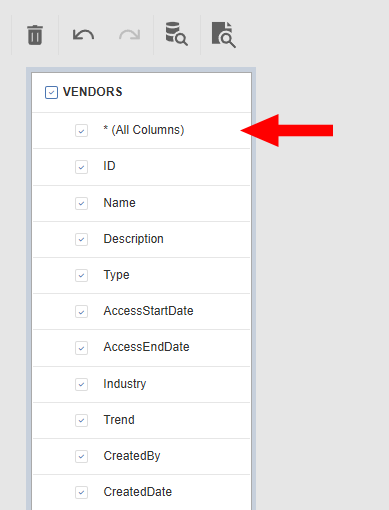
Then, identify the fields you would like to include using Check Boxes. To see all fields, select the top check box or the field All Columns with the table name.
-
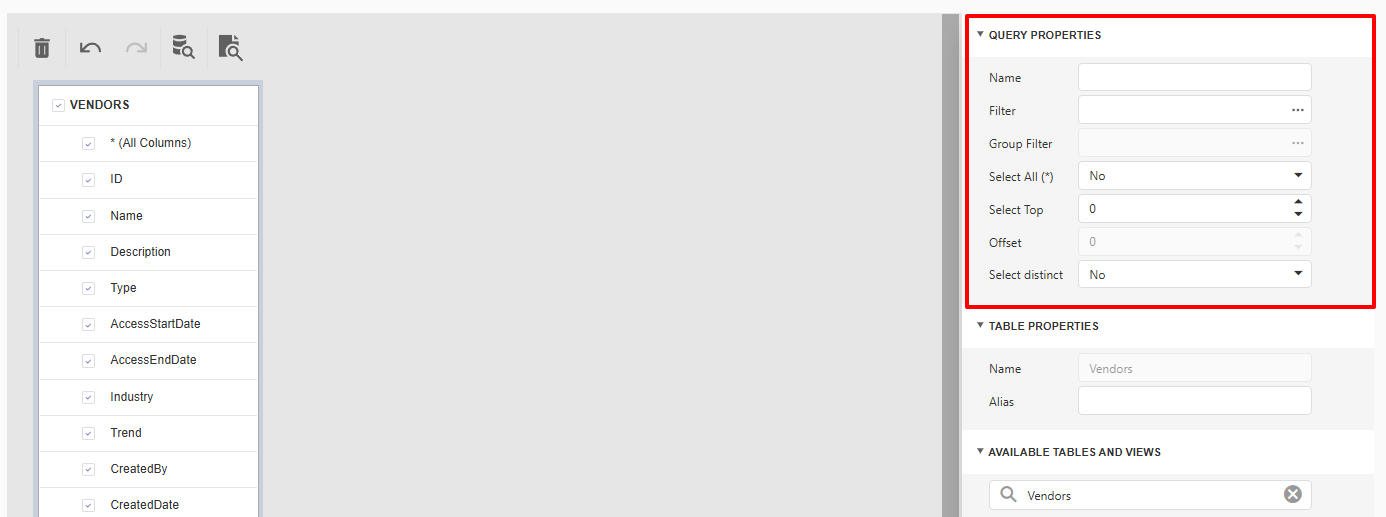
To add a filter, click the Query Properties drop down on the right side menu. Then, provide the filter or other parameters with what you would like to filter for. It is not a requirement to add a filter.
-
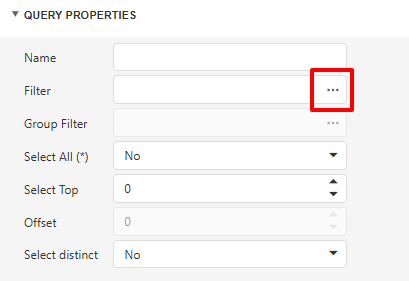
When Selecting a filter (via the 3-dot item under Filter), a window will pop up displaying a variety of filter options
Select the options in the window to meet the needs of the query being built. Hover the cursor over the And to see the + icon or other group by filters. Click Ok to finish the filter.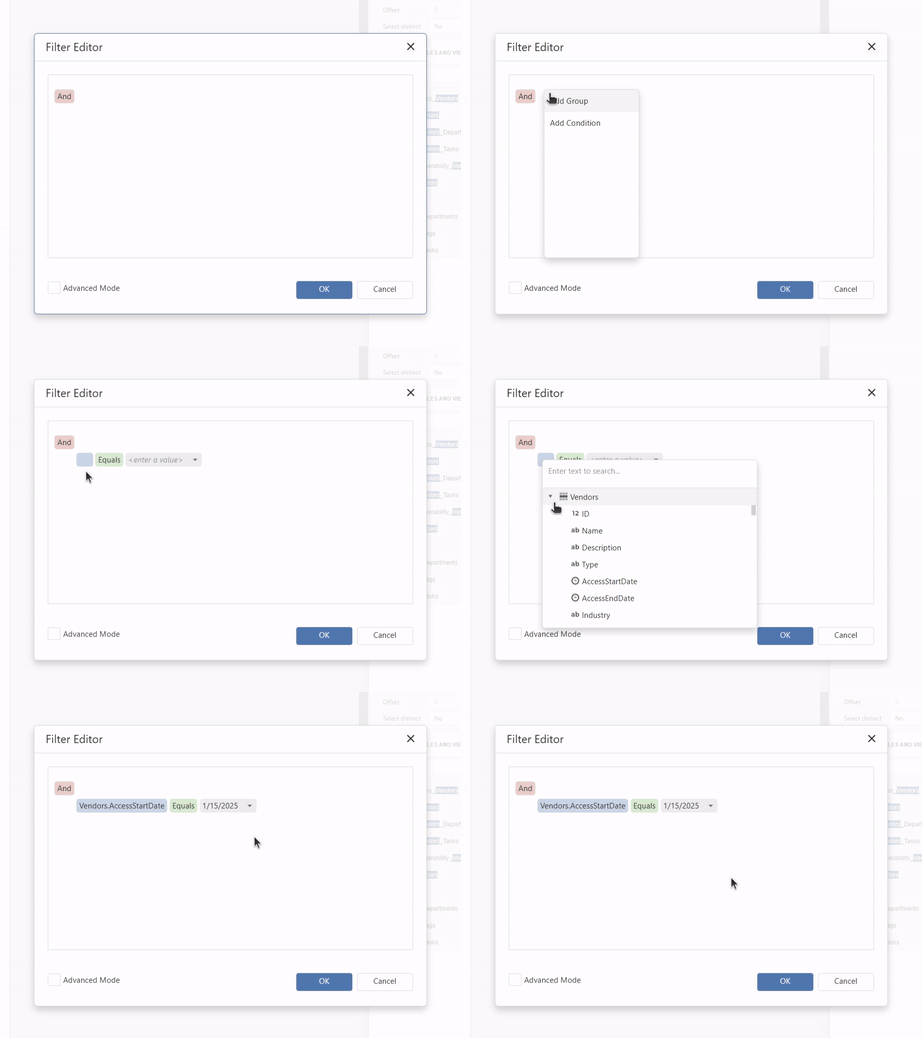
NoteIf the data is set to be partitioned and a field is chosen, this will not show up in the preview of the data in the query builder. It will only be seen in the query results when it is sent to the user to review.
-
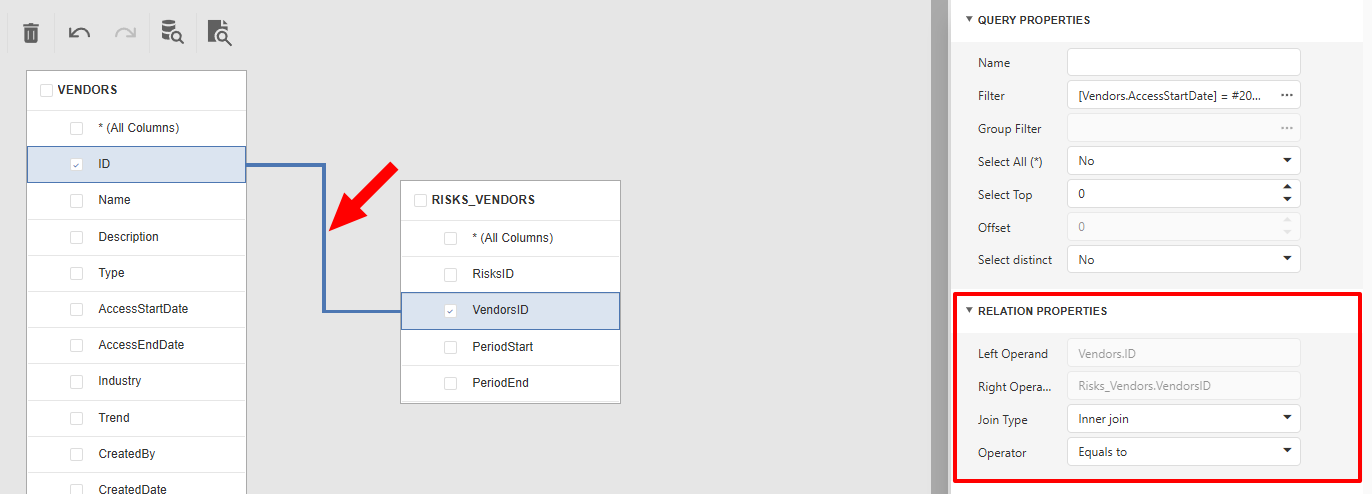
Relation Properties - if multiple tables are selected, Vendors and Risks_Vendors in this example, a join can be selected by clicking the line linking the two tables and then selecting the join type on the Relation Properties fields
-
Once the query parameters are set, click Preview Query, and you will see a preview of the data you have queried. You will also see the SQL representation of the query in the textbox above the query results. This query is not editable in this textbox and is only a representation of what is chosen in the fields above.
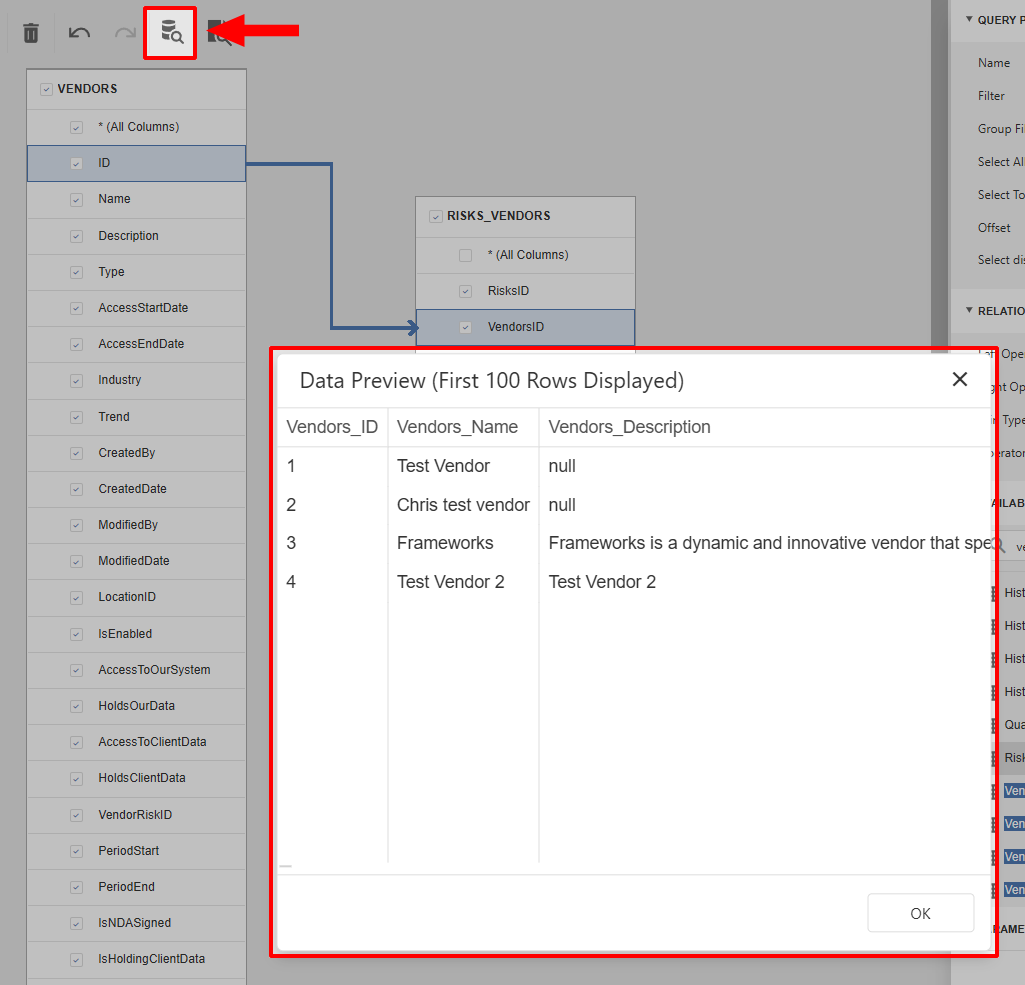
-
You can continue to modify this query by adjusting the parameters and filters to your liking.
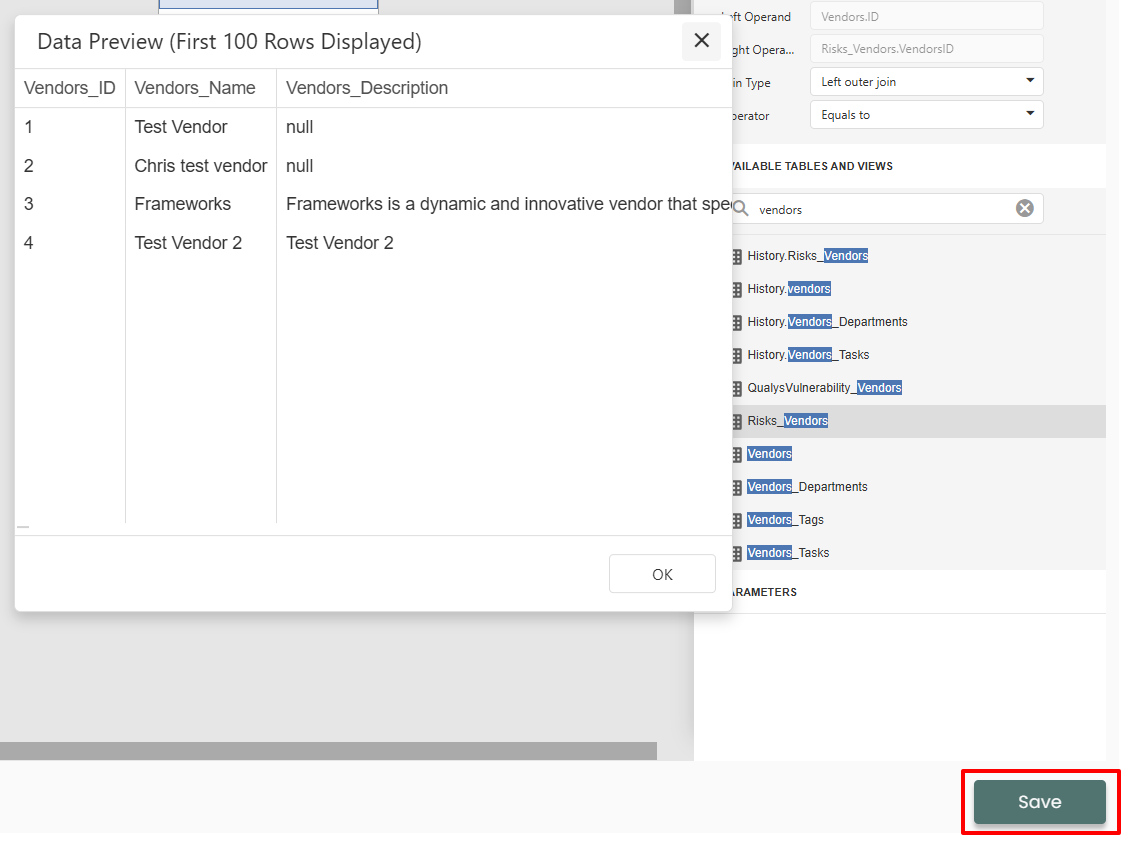
- If you want to have this blueprint run on a set schedule, click on the Scheduling tab. Otherwise you can Save it now.
Scheduling and Automating Reports
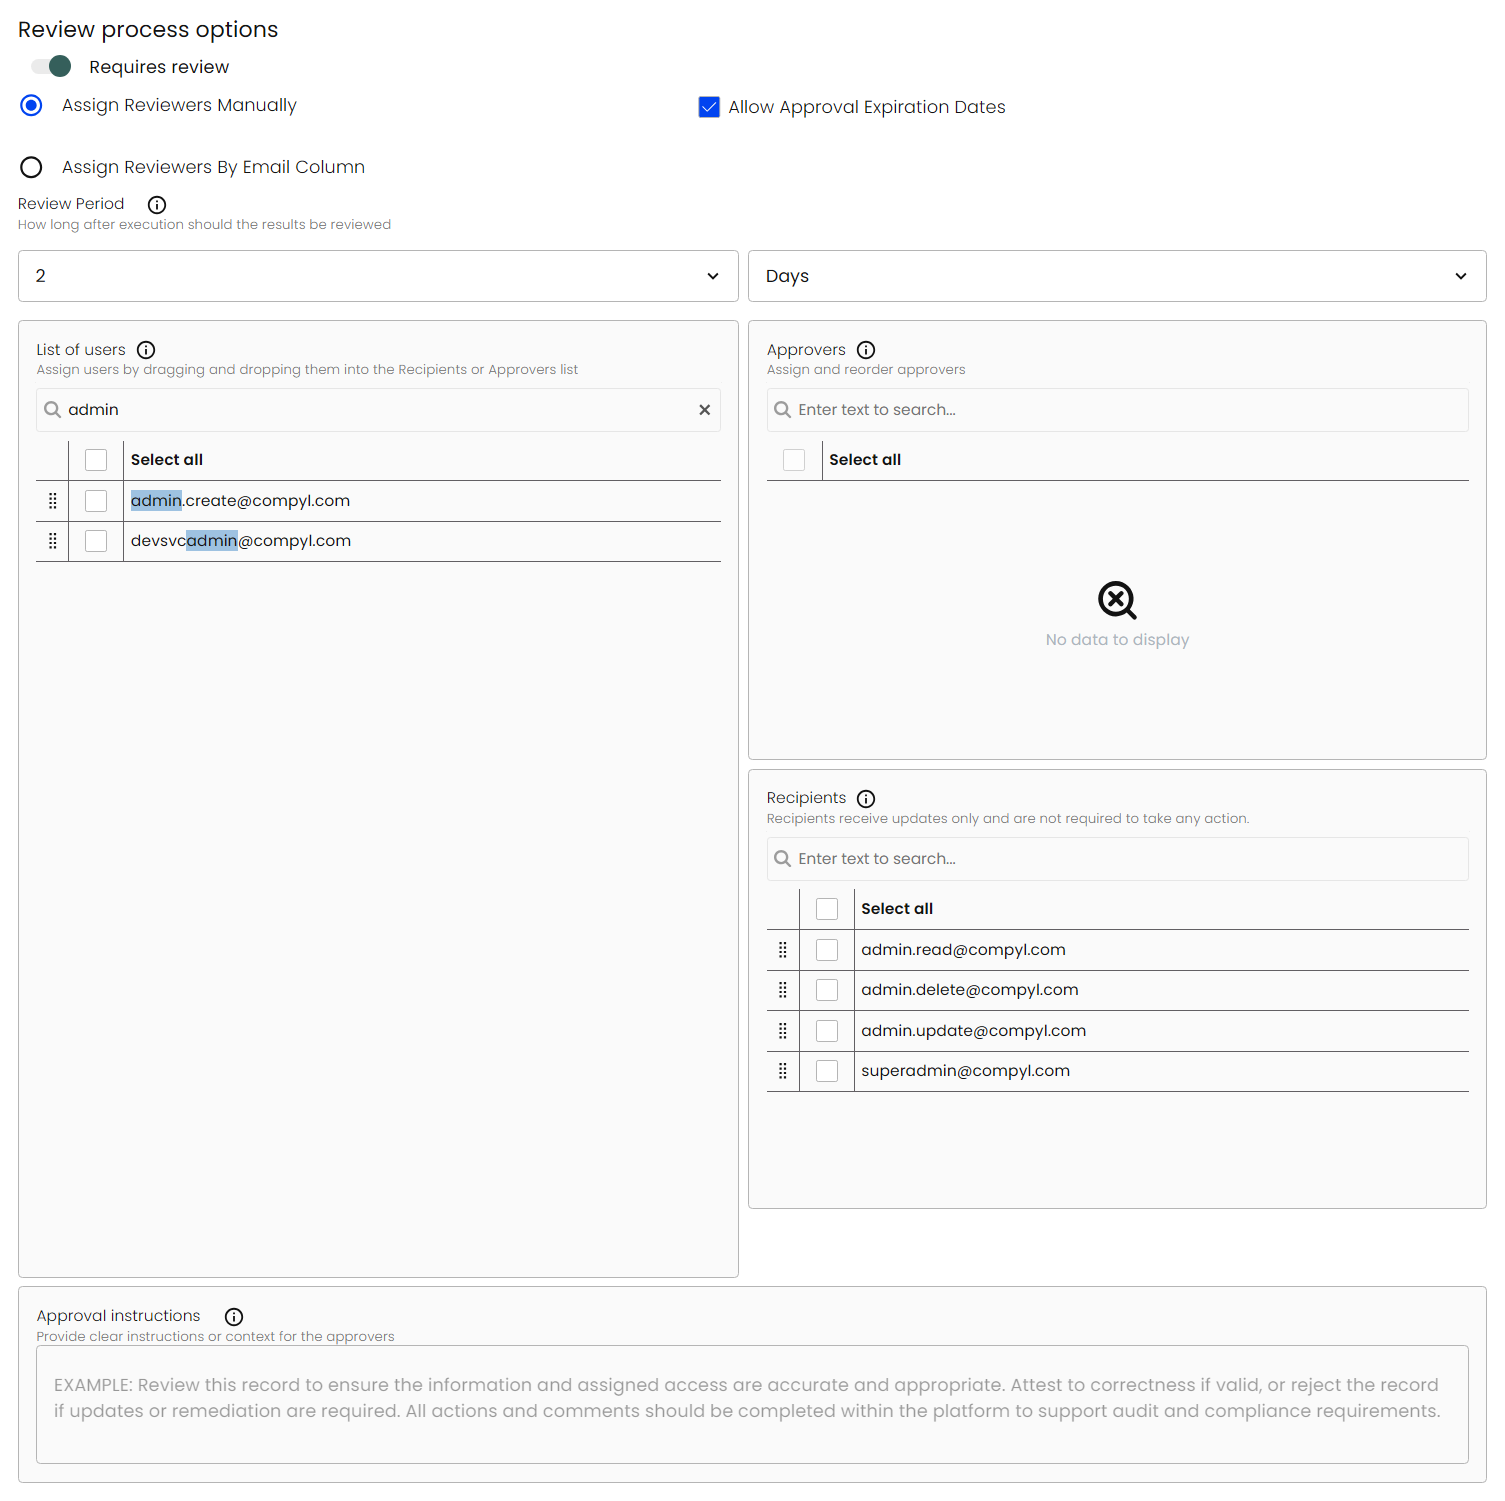
Select the Scheduling tab and click on Add Schedule. This allows you to receive a report on your blueprint at a set frequency, as well as add a review process and recipients to the report. Be sure to name the schedule and select its frequency as well as the start date.
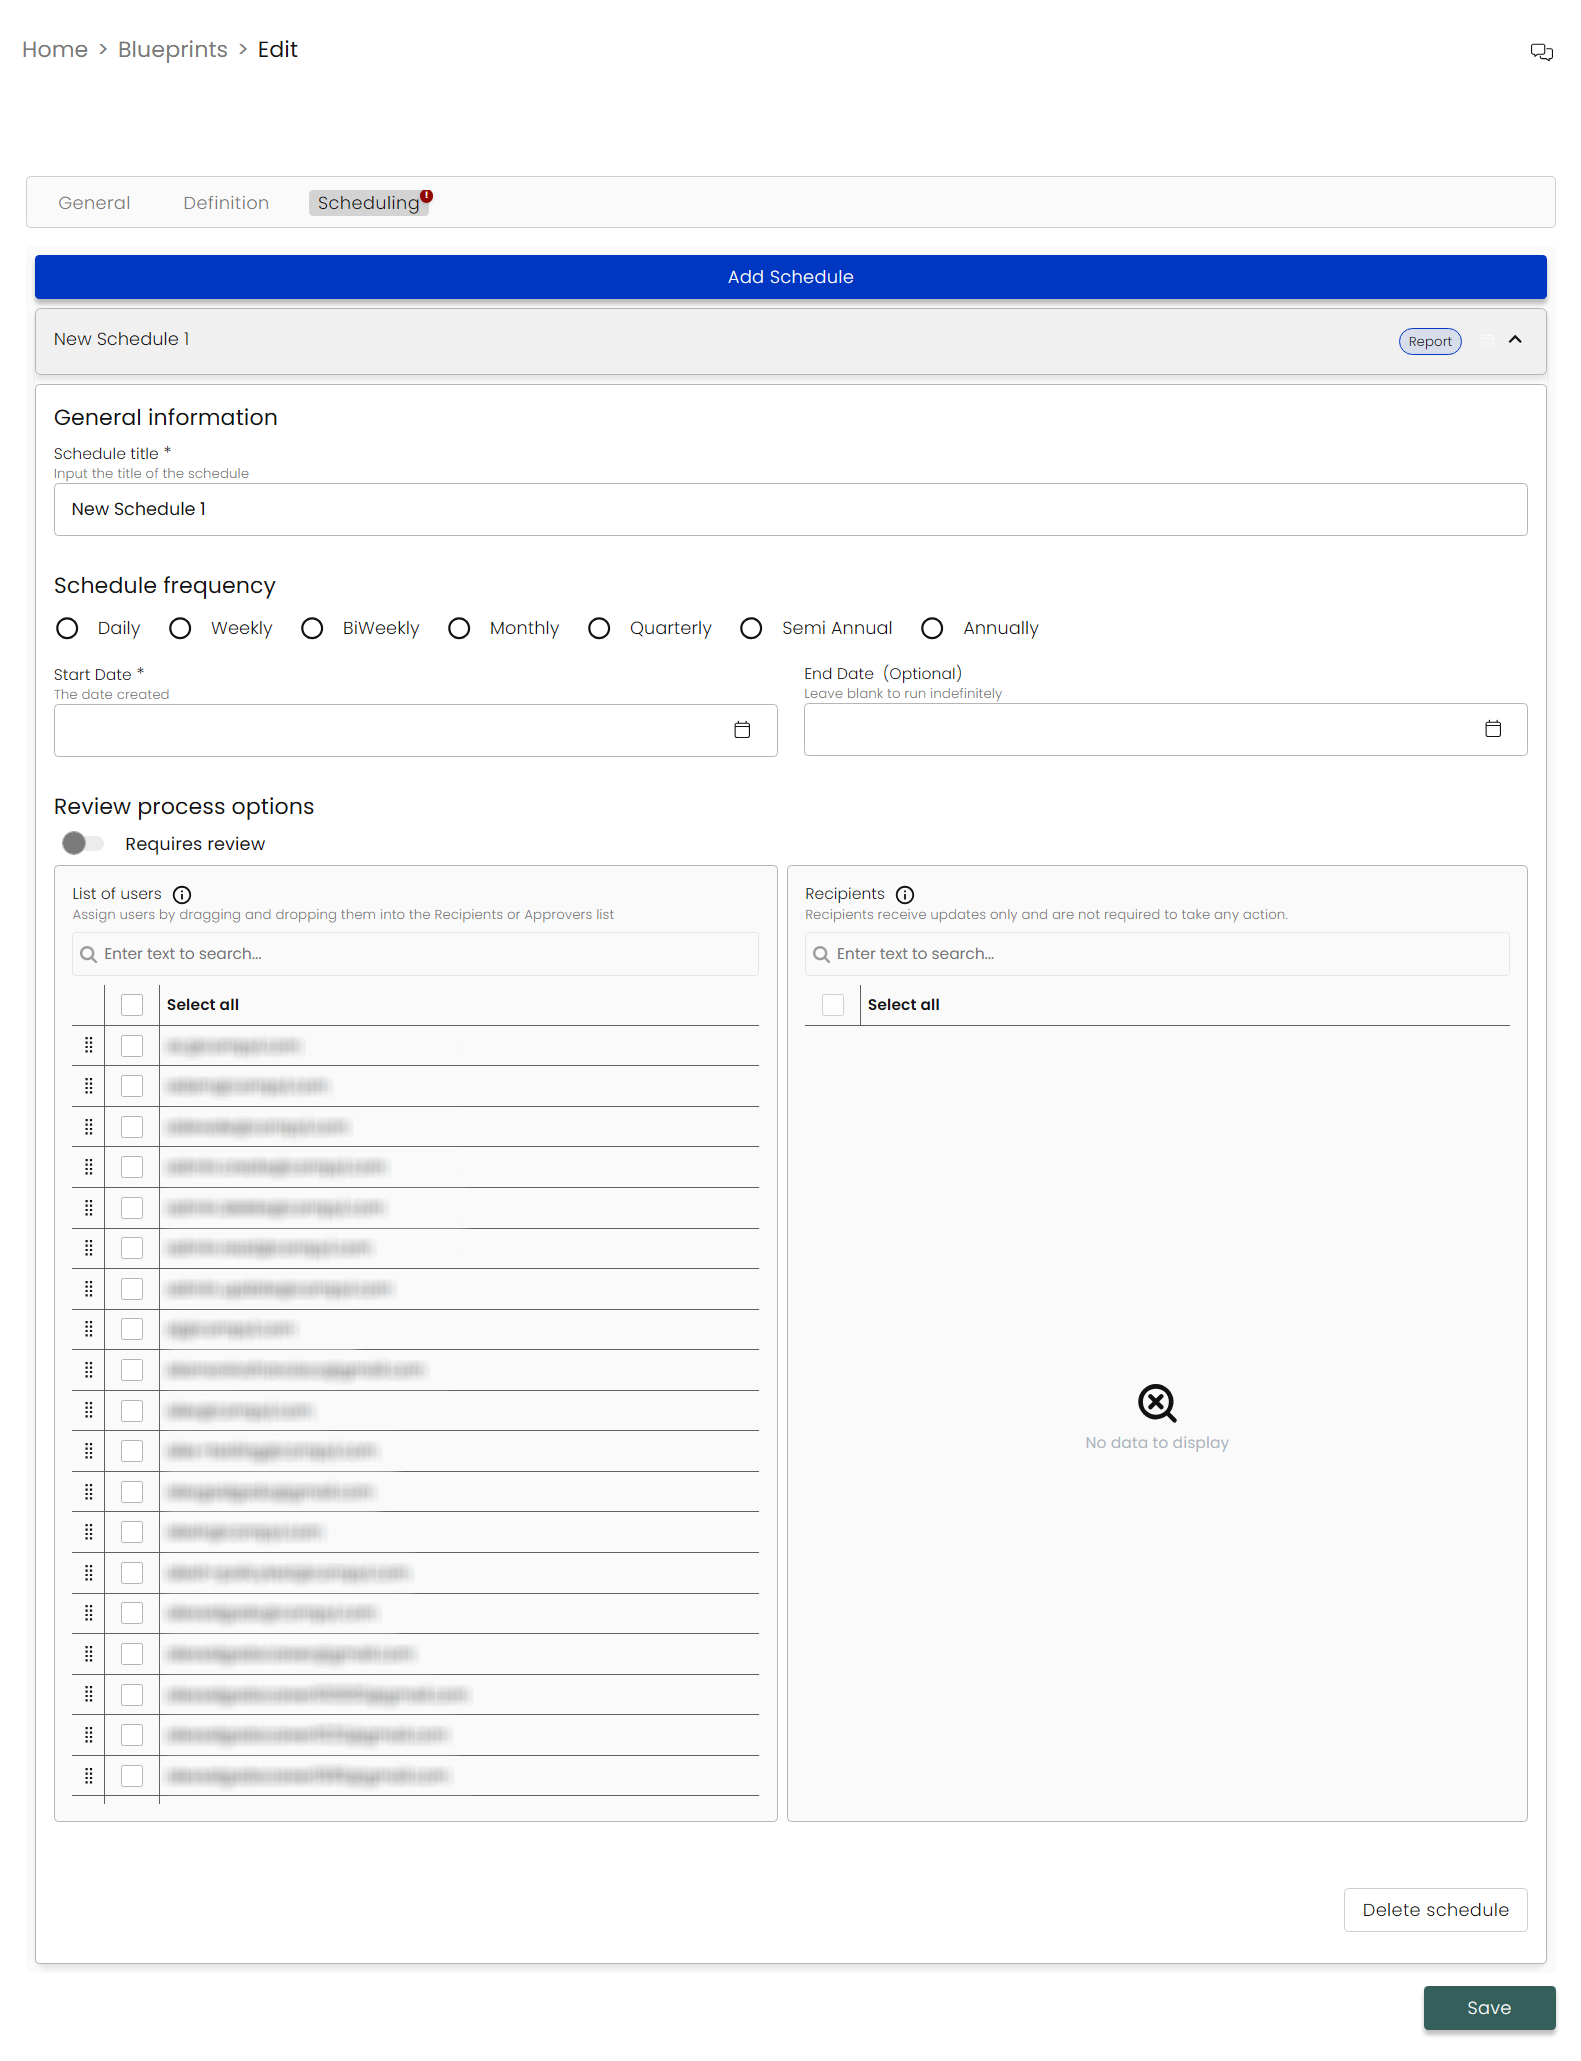
If no review is required, simply select which users/emails you wish to receive the report and then drag them from the List of Users over to Recipients. Every email selected will be brought over at the same time.
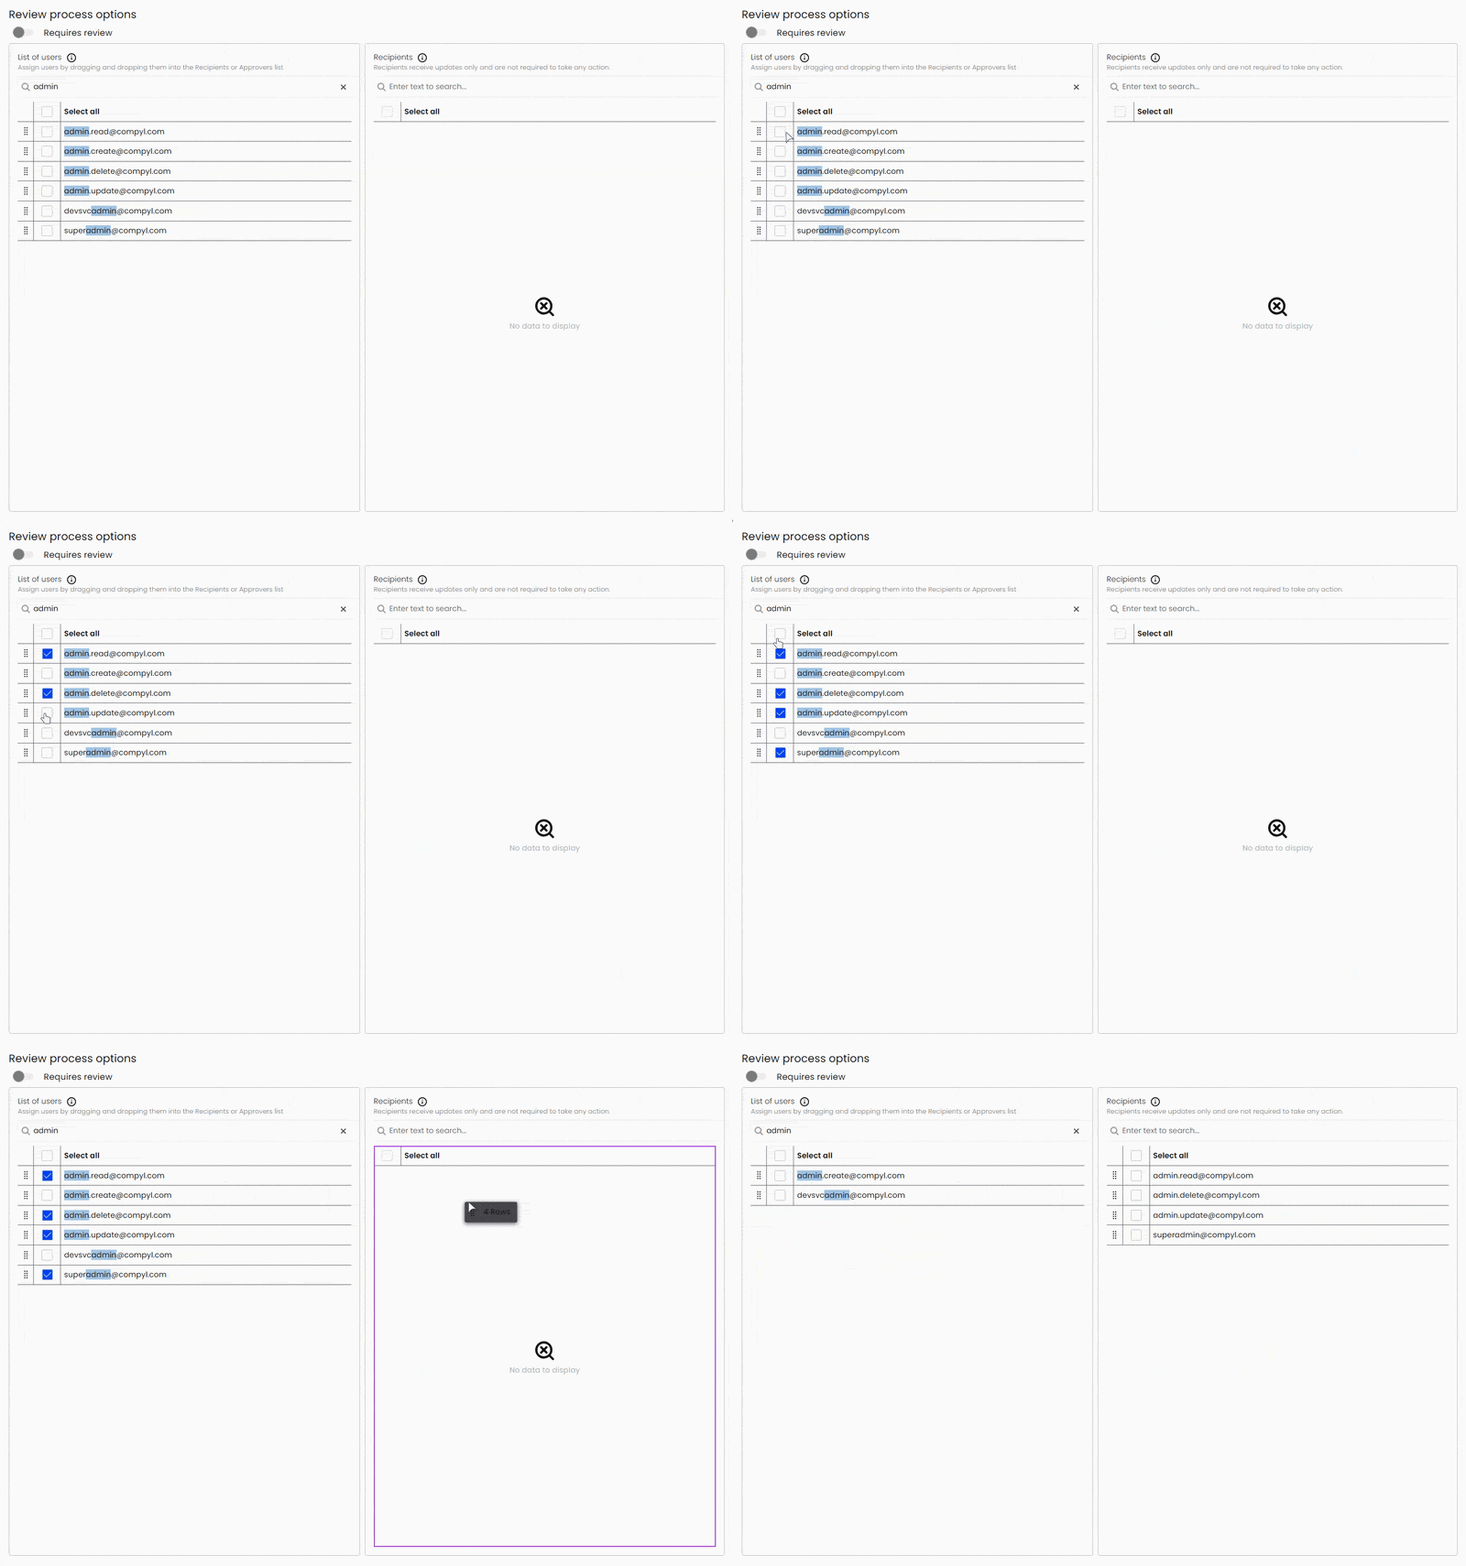
To add a review process, toggle Requires Review. Here you can:
- Assign Reviewers Manually from the List of users or from Recipients
- Assign Reviewers by Email Column by selecting a field from the data set that indicates the reviewer for each row
- Toggle on Approval Expiration Dates whereby reviewers can assign an expiration date later than the current cycle will be automatically approved.
- Set a Review Period in number of Days or Weeks
- Add instructions for your approvers
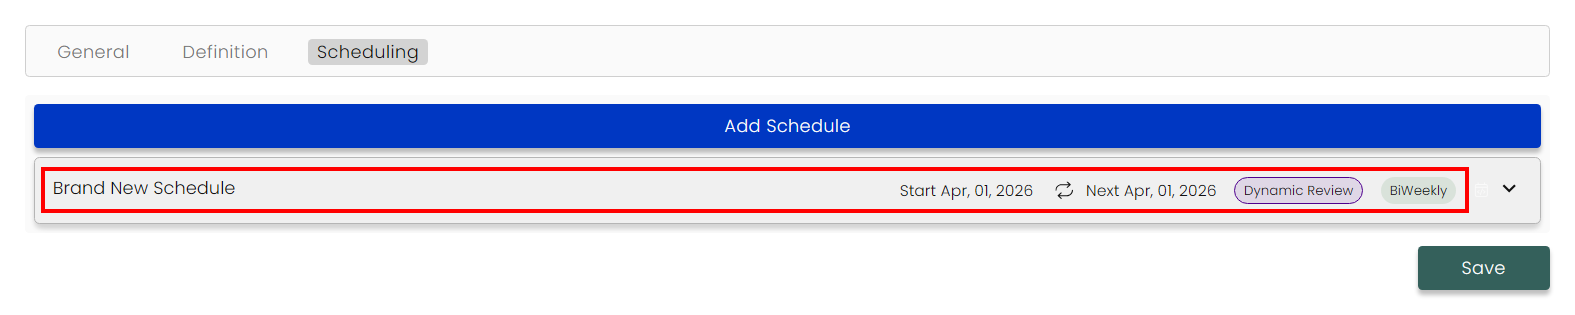
Once saved, you will see this new schedule under the Scheduling tab. Expanding it will allow you to edit or delete it.
Updated 8 days ago