
Axonius Integration
PrerequisitesTo authenticate with Axonius APIs, you need the following:
- Base URL (e.g.,
https://my-axonius-instance.com:443/)- API Key
- API Secret
- (Optional) Saved Query Folder ID (to scope which saved queries to import)
The Axonius REST API only supports HTTPS.
Generating Axonius API Credentials
Confirm API access is enabled for your role
-
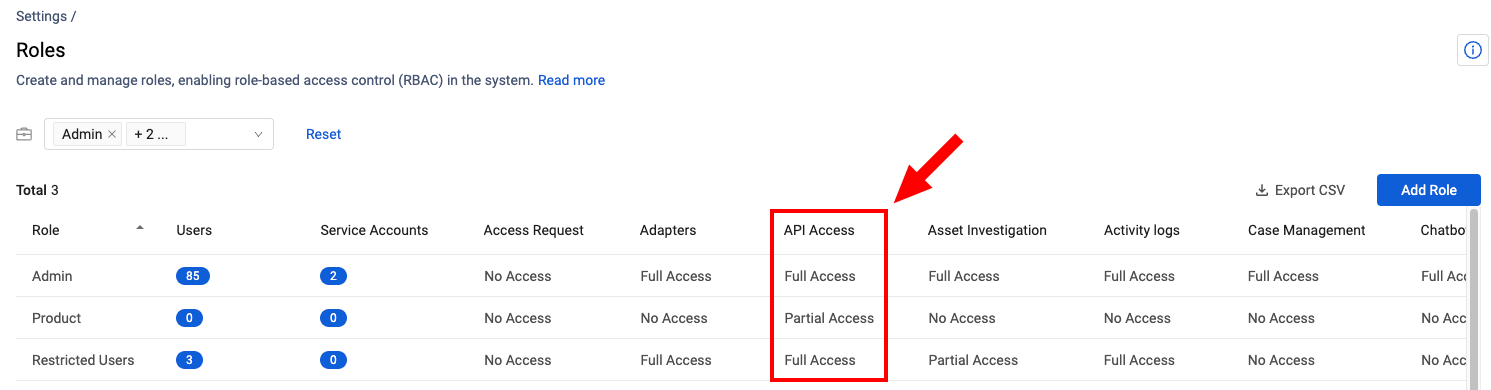
In Axonius, go to System Settings (gear icon) → User and Role Management → Roles.
-
Select the relevant role and ensure API access enabled is turned on.
-
Save.
-
Create or select an account for API use.
Get the API Key & API Secret
Individual account
Click your avatar → User Settings → API Key → Reset Key to generate a new API Key and one-time API Secret.
Service account
System Settings → User and Role Management → Service Accounts → select account → Reset to generate a new API Key and one-time API Secret.
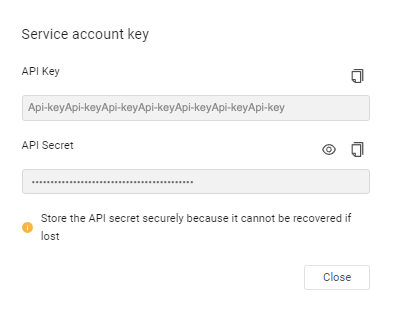
WarningThe API Secret is shown only once. Store it securely (like in a password manager). If lost, you'll need to reset the key to regenerate a new pair.
Identify your Base URL
Use the URL of your Axonius instance, including scheme and port (e.g., https://my-axonius-instance.com:443/).
Adding Permissions for Asset Inventory
Confirm API Access
-
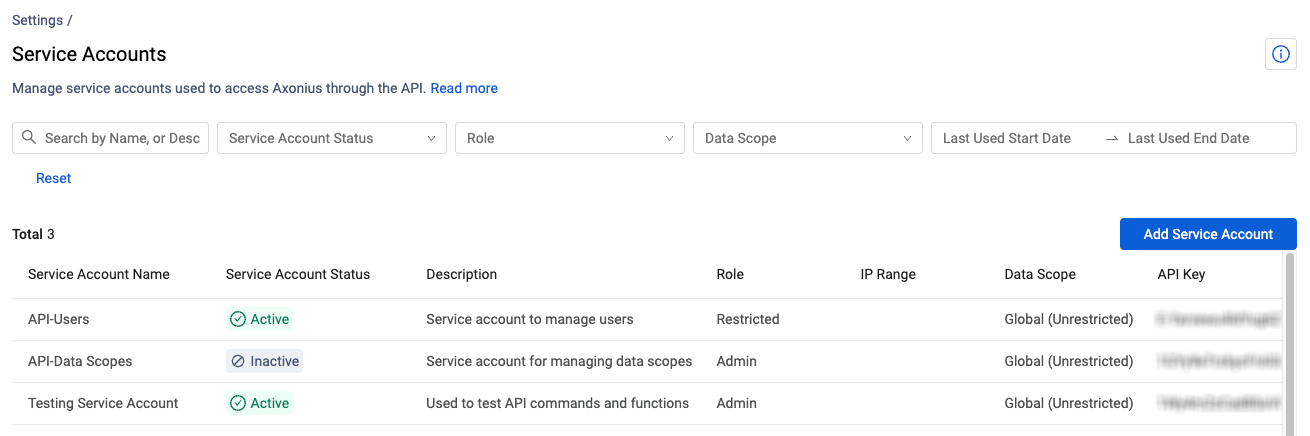
Login to Axonius and navigate to System Settings (gear icon) → User and Role Management → Service Accounts.
-
Open the account whose API key/secret is in Compyl and note its Role and Data Scope. API calls only see that data scope.
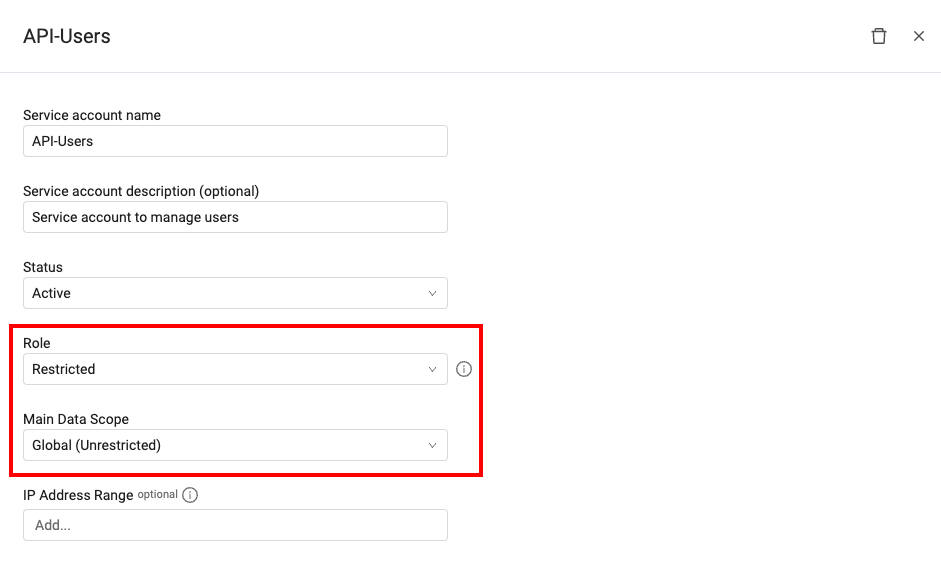
The role must already have Access → API Access → Enable API access. If it does not, the key will not work for REST at all.
Add Permissions to Role
- Navigate to User and Role Management → Roles and select the proper role to edit it.
- Adjust your asset5 permissions per type, following the table below:
Compyl collector Axonius permission API Devices Assets → Devices → View devices POST /api/v2/assets/devicesAsset Users Assets → Users → View users POST /api/v2/assets/usersSoftware Assets → Software → View (same View permission on the Software asset type) POST /api/v2/assets/softwareVulnerabilities Assets → Vulnerabilities → View POST /api/v2/assets/vulnerabilitiesVulnerability Instances Assets → Vulnerability Instances → View POST /api/v2/assets/vulnerability_instancesAdapters Adapters → Adapters → View GET /api/adapters(collector); probe isGET /api/adapters/list
- Save the role.
ImportantIf you are adding this to an existing AWS configuration in Compyl, open your existing AWS configuration, go to the Endpoints section and Validate your endpoints.
Then run a manual sync.
Add Configuration
-
Navigate to the Integrations tab using the left-hand menu, find Axonius, and select +Add Configuration.

-
Next, fill in the details below and select Continue.
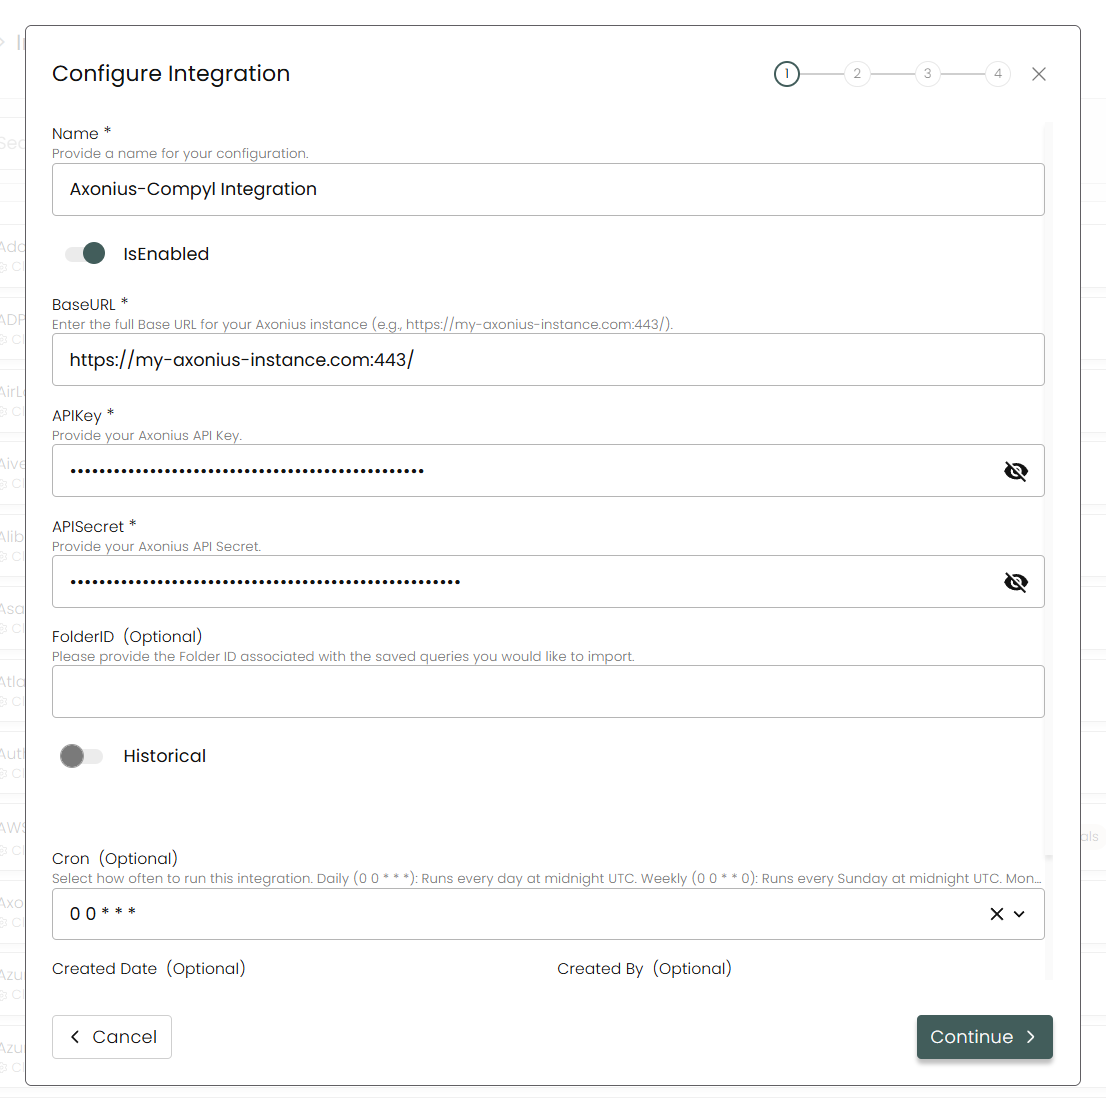
Name: Enter the name of the integrationis Enabled: Toggle button to ensure data is populated into Compyl
Base URL: The full Base URL for your Axonius instance (e.g.,
https://my-axonius-instance.com:443/).API Key: The API Key you generated above
API Secret: The API Secret you generated above
Folder ID: (optional) Provide the Folder ID for saved queries you want Compyl to import.
Historical: Toggle to retain historical Axonius query results across scheduled runs.

Retain Batch Count: When historical import is enabled, choose how many completed sync batches to retain (1–31). Older batches are pruned automatically.
Cron: Select how often to run this integration:-
Daily: 0 0 * * * – every day at midnight UTC
-
Weekly: 0 0 * * 0 – every Sunday at midnight UTC
-
Monthly: 0 0 1 * * – on the 1st of each month at midnight UTC
-
-
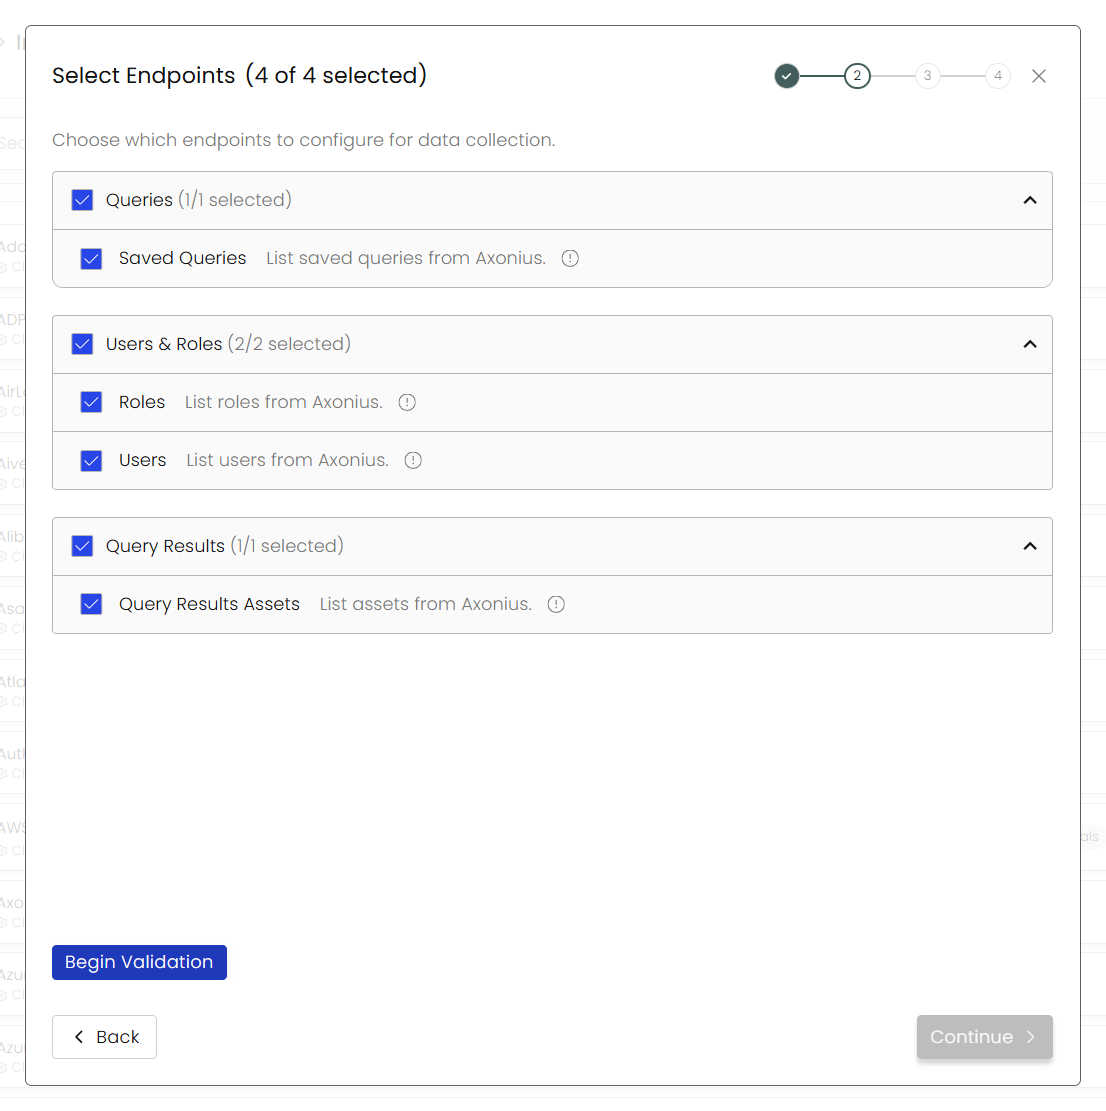
Choose your Endpoints and Begin Validation to validate your connection.
-
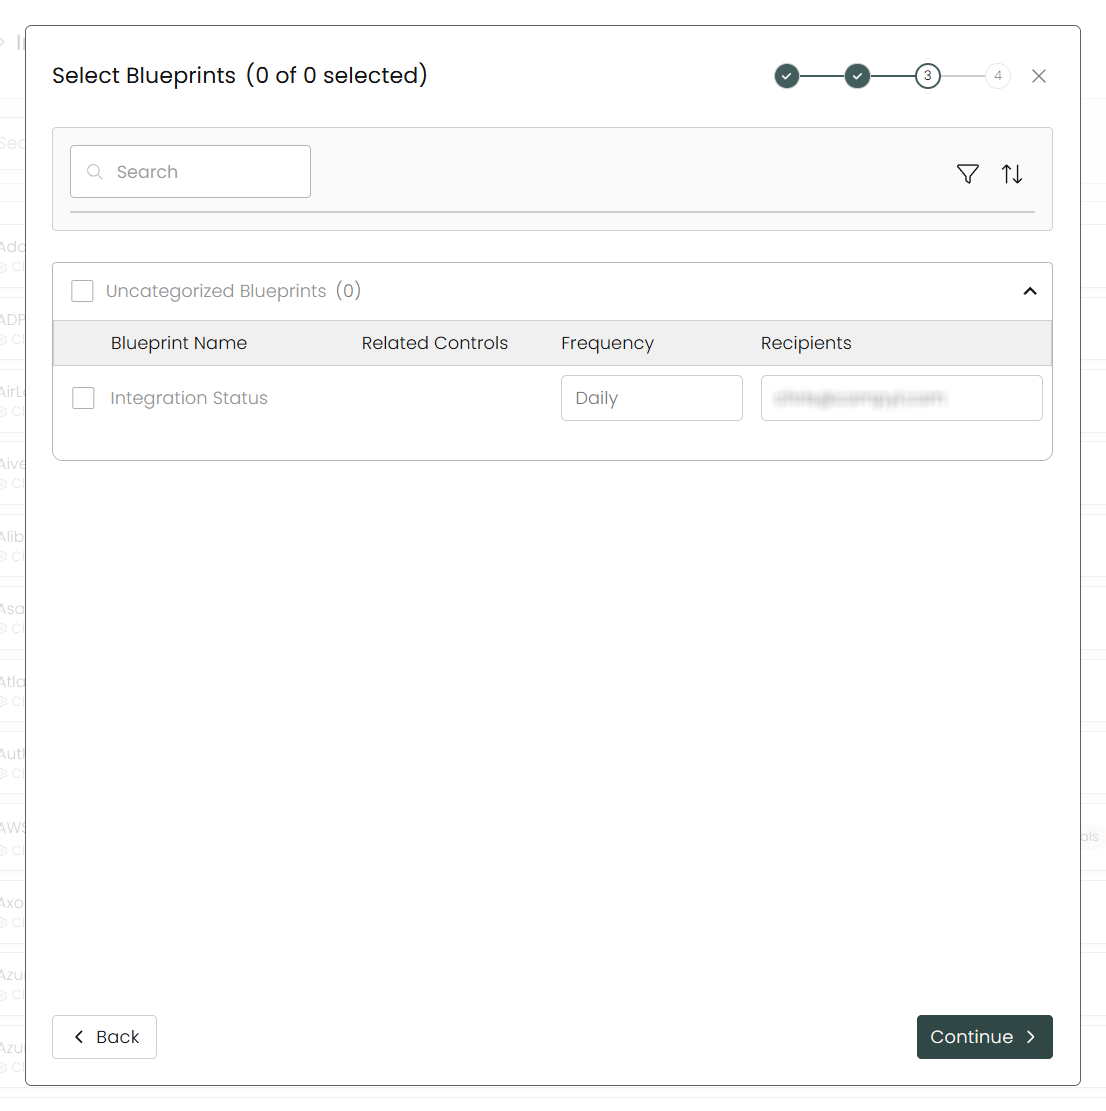
Select any Blueprints you wish to associate with this integration.
-
After you hit Continue, you'll see a summary screen. Click Return to Integrations to complete the configuration.
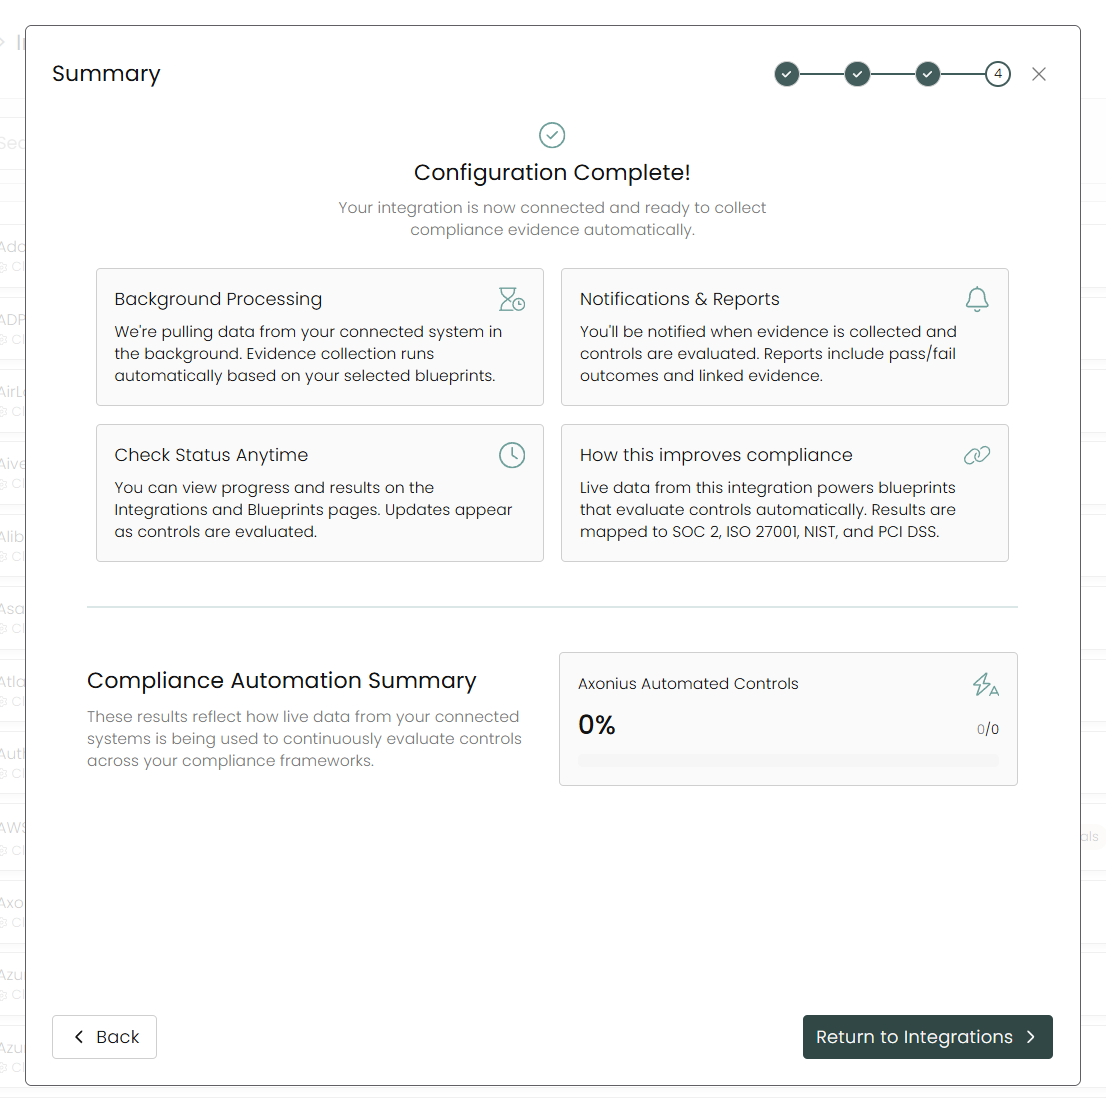
Once you have completed filling out the form click Return to Integrations.
You'll know the integration is successfully added when the status updates to Complete.

Data is synced on a recurring schedule configured by your Compyl administrator. Each sync pulls the latest data from all enabled endpoints.
To query the data from the integration, refer to the Blueprints article.
Updated 21 days ago