
Atlassian Integration
Integrating with Atlassian will give Compyl access to Jira and Confluence, enabling users to raise tickets through Compyl as well as review and validate important documents
Suggested StepCreate an Administrator Account in Atlassian. This account can be used for authentication and API token creation. This is suggested, but is not required. The advantage of creating a separate admin account is that you can segregate responsibilities between different users/accounts.
Creating an API Token
You will need to choose whether you are creating an API Token (legacy) or the newer API Token with Scopes.
-
Log into the Atlassian account that you want to use for the integration.
-
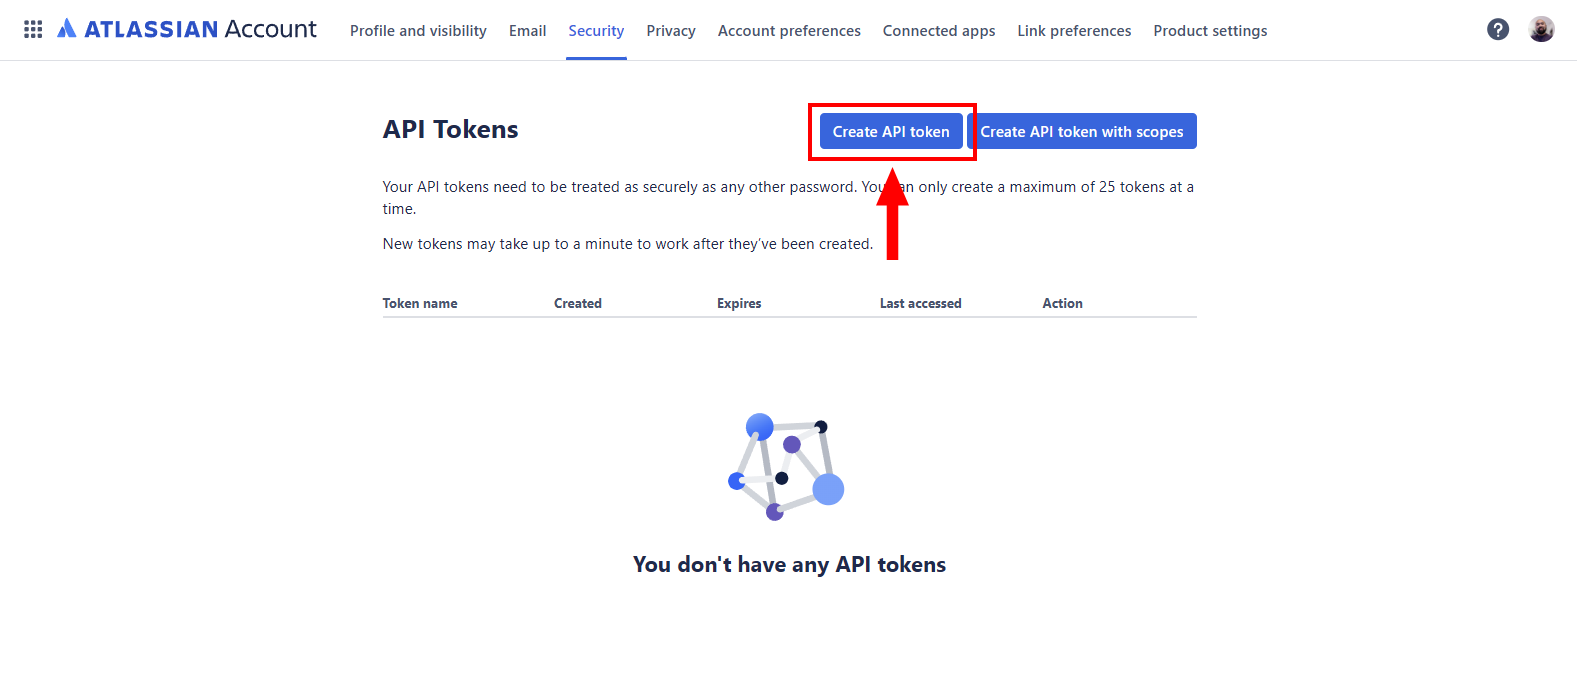
Navigate to Security → API Tokens and click the Create API token button.
-
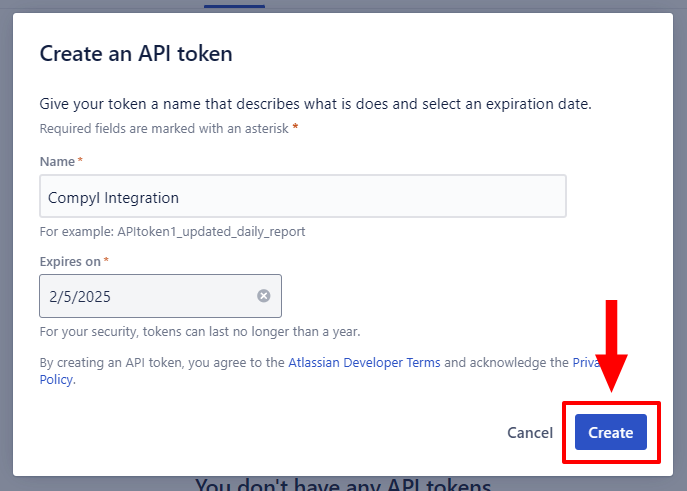
A new pop-up should appear. Enter a label for the token (e.g. Compyl Integration). This label cannot be changed. Click Create.
-
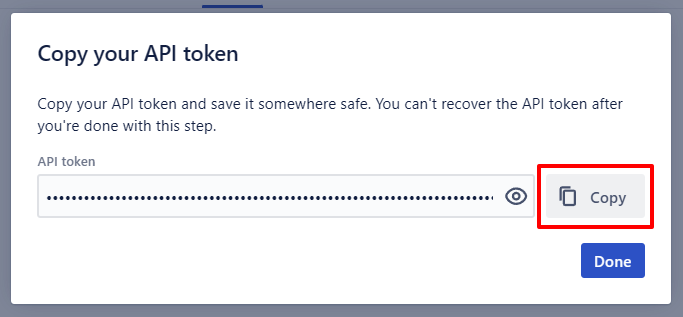
The pop-up will change and a field will be available with the API Token. Click the Copy button to copy the token to your clipboard. This will be used for the configuration in Compyl.
-
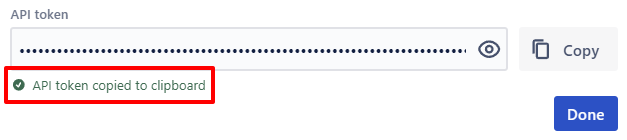
There will be confirmation text once the API Token has been successfully copied.
Add Configuration
-
Navigate to the Integrations tab using the left-hand menu, find Atlassian, and select +Add Configuration.

-
Next, fill in the details below and select Continue.
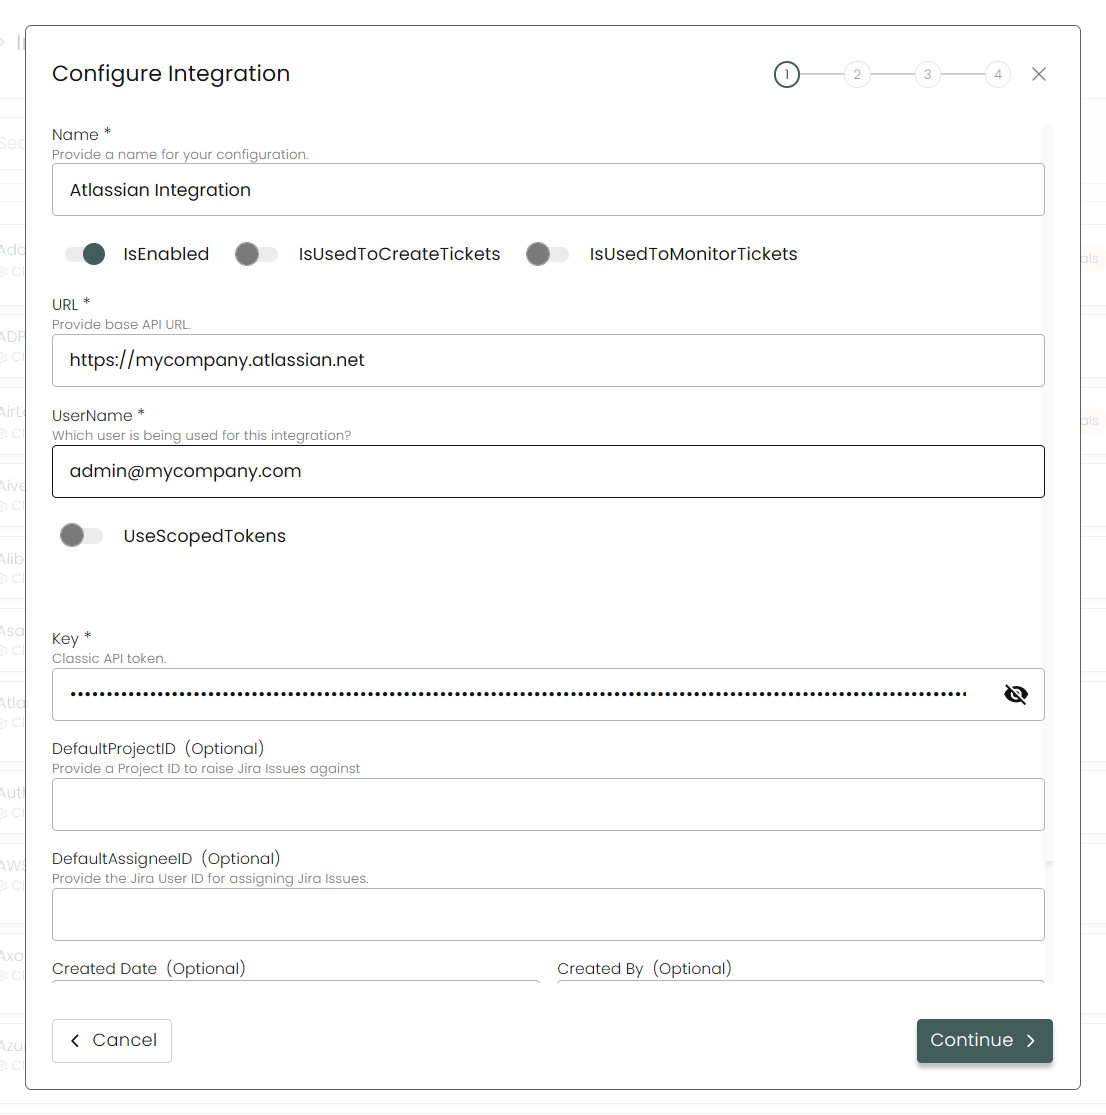
Name: Enter the name of the integration.
is Enabled: Toggle button to ensure data is populated into Compyl.
Is Used to Create Tickets: Toggle on to enable tickets to be raised via Compyl M-Tasks.
Is Used to Monitor Tickets: Toggle on the enable Jira ticket status to be updated in Compyl M-Tasks.
URL: Your Base URL should follow this format:
https://{company}.atlassian.net(e.g. https://compyl.atlassian.net/).Username: Email address of the account used in the instructions above.
Use Scoped Tokens: Ignore this toggle unless you are creating an API Token with scopes.
Key: The API Token created in the instructions above .
Default Project ID (Optional): The project ID of the project you would like any Jira issues to to be raised to (documentation on how to do this is here ).
Default Assignee ID (Optional): The Jira User ID for assigning Jira issues.
-
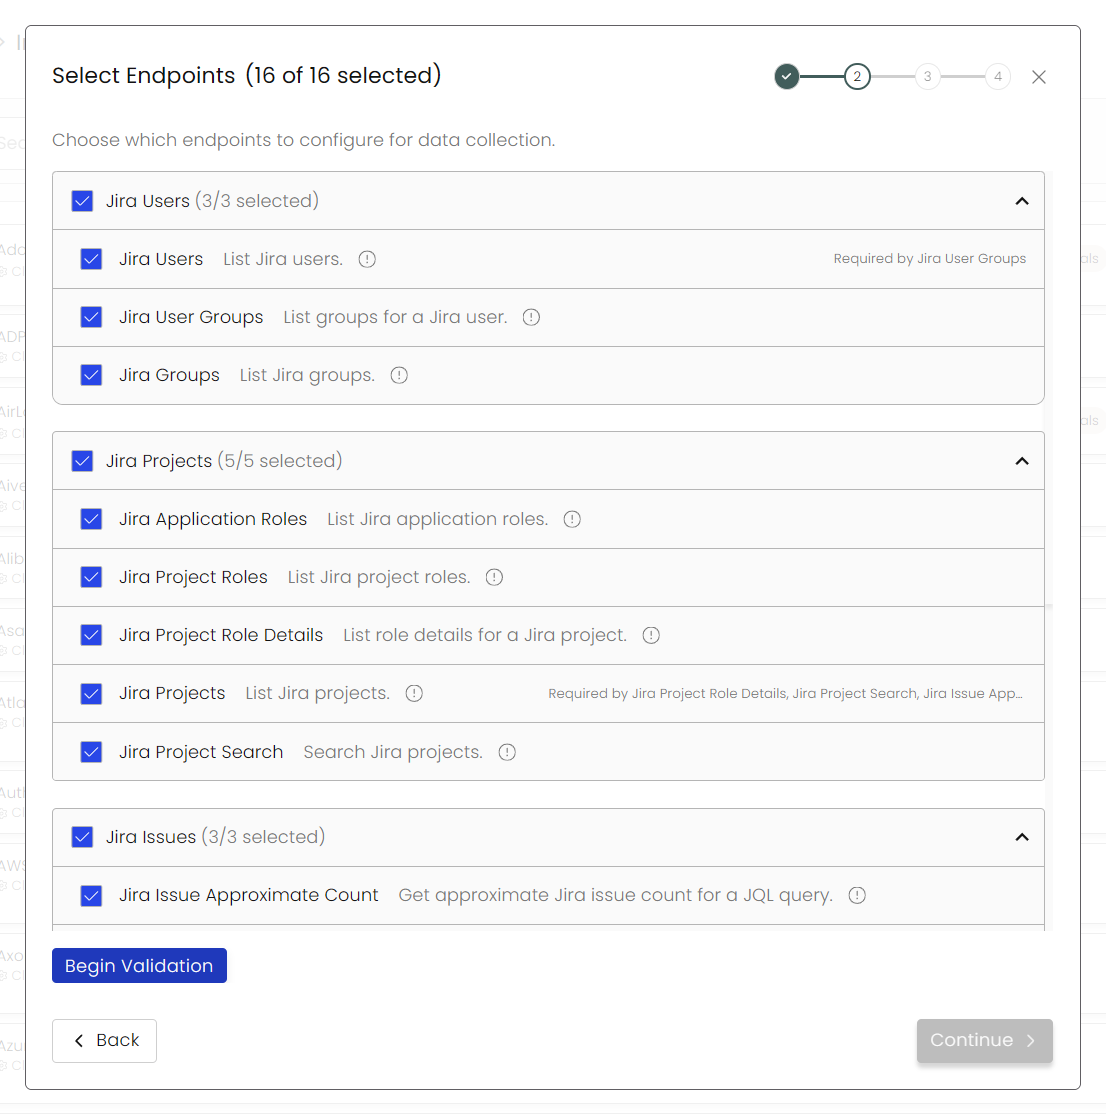
Choose your Endpoints and Begin Validation to validate your connection.
-
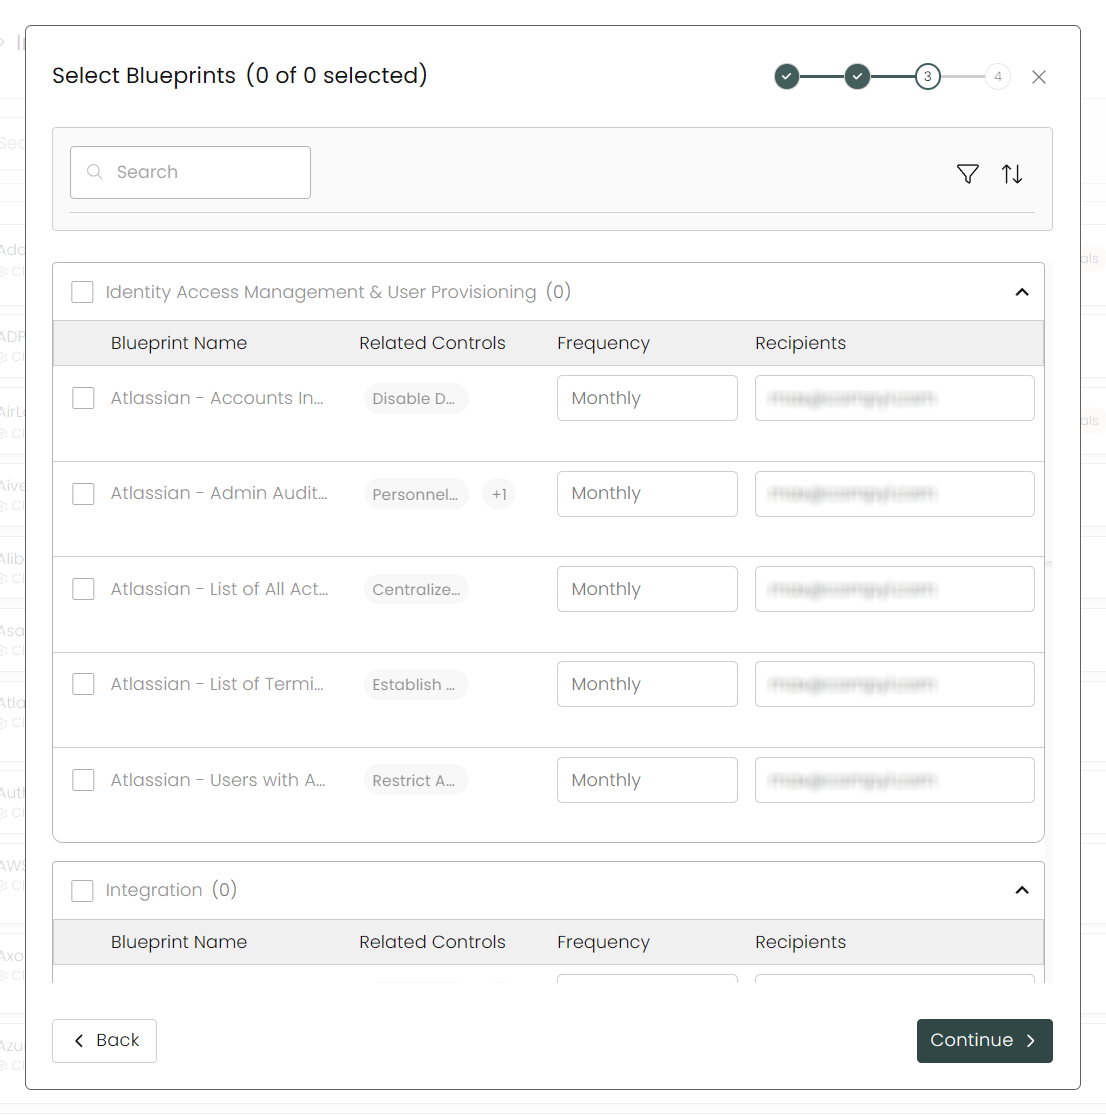
Select any Blueprints you wish to associate with this integration.
-
After you hit Continue, you'll see a summary screen. Click Return to Integrations to complete the configuration.
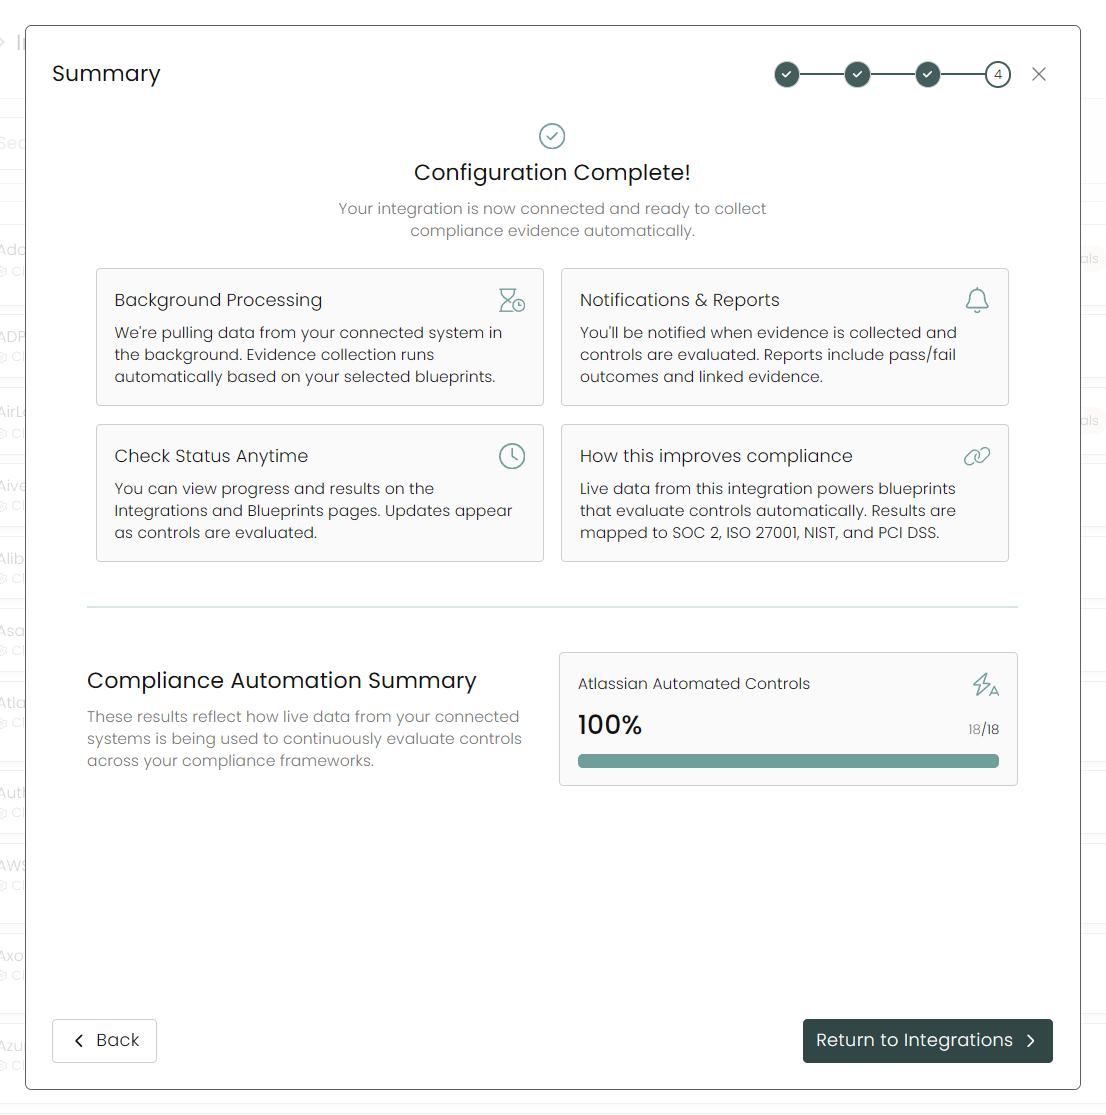
Once you have completed filling out the form click Return to Integrations.
You'll know the integration is successfully added when the status updates to Complete.

Data is synced on a recurring schedule configured by your Compyl administrator. Each sync pulls the latest data from all enabled endpoints.
To query the data from the integration, refer to the Blueprints article.
Updated about 2 months ago