
Cloudflare Integration
The Cloudflare Integration allows users to query their Cloudflare data using SQL
This plugin helps teams manage their Cloudflare infrastructure, including zones, DNS records, accounts, and more.
PrerequisiteBefore you begin, find your zone and account IDs .
Generating your API Token
-
Determine if you want a user token or an Account owned token . Use Account owned tokens if you prefer service tokens that are not associated with users and your desired API endpoints are compatible .
- From the Cloudflare dashboard , go to My Profile v API Tokens for user tokens. For Account Tokens, go to Manage Account → API Tokens.
-
Select Create Token.
-
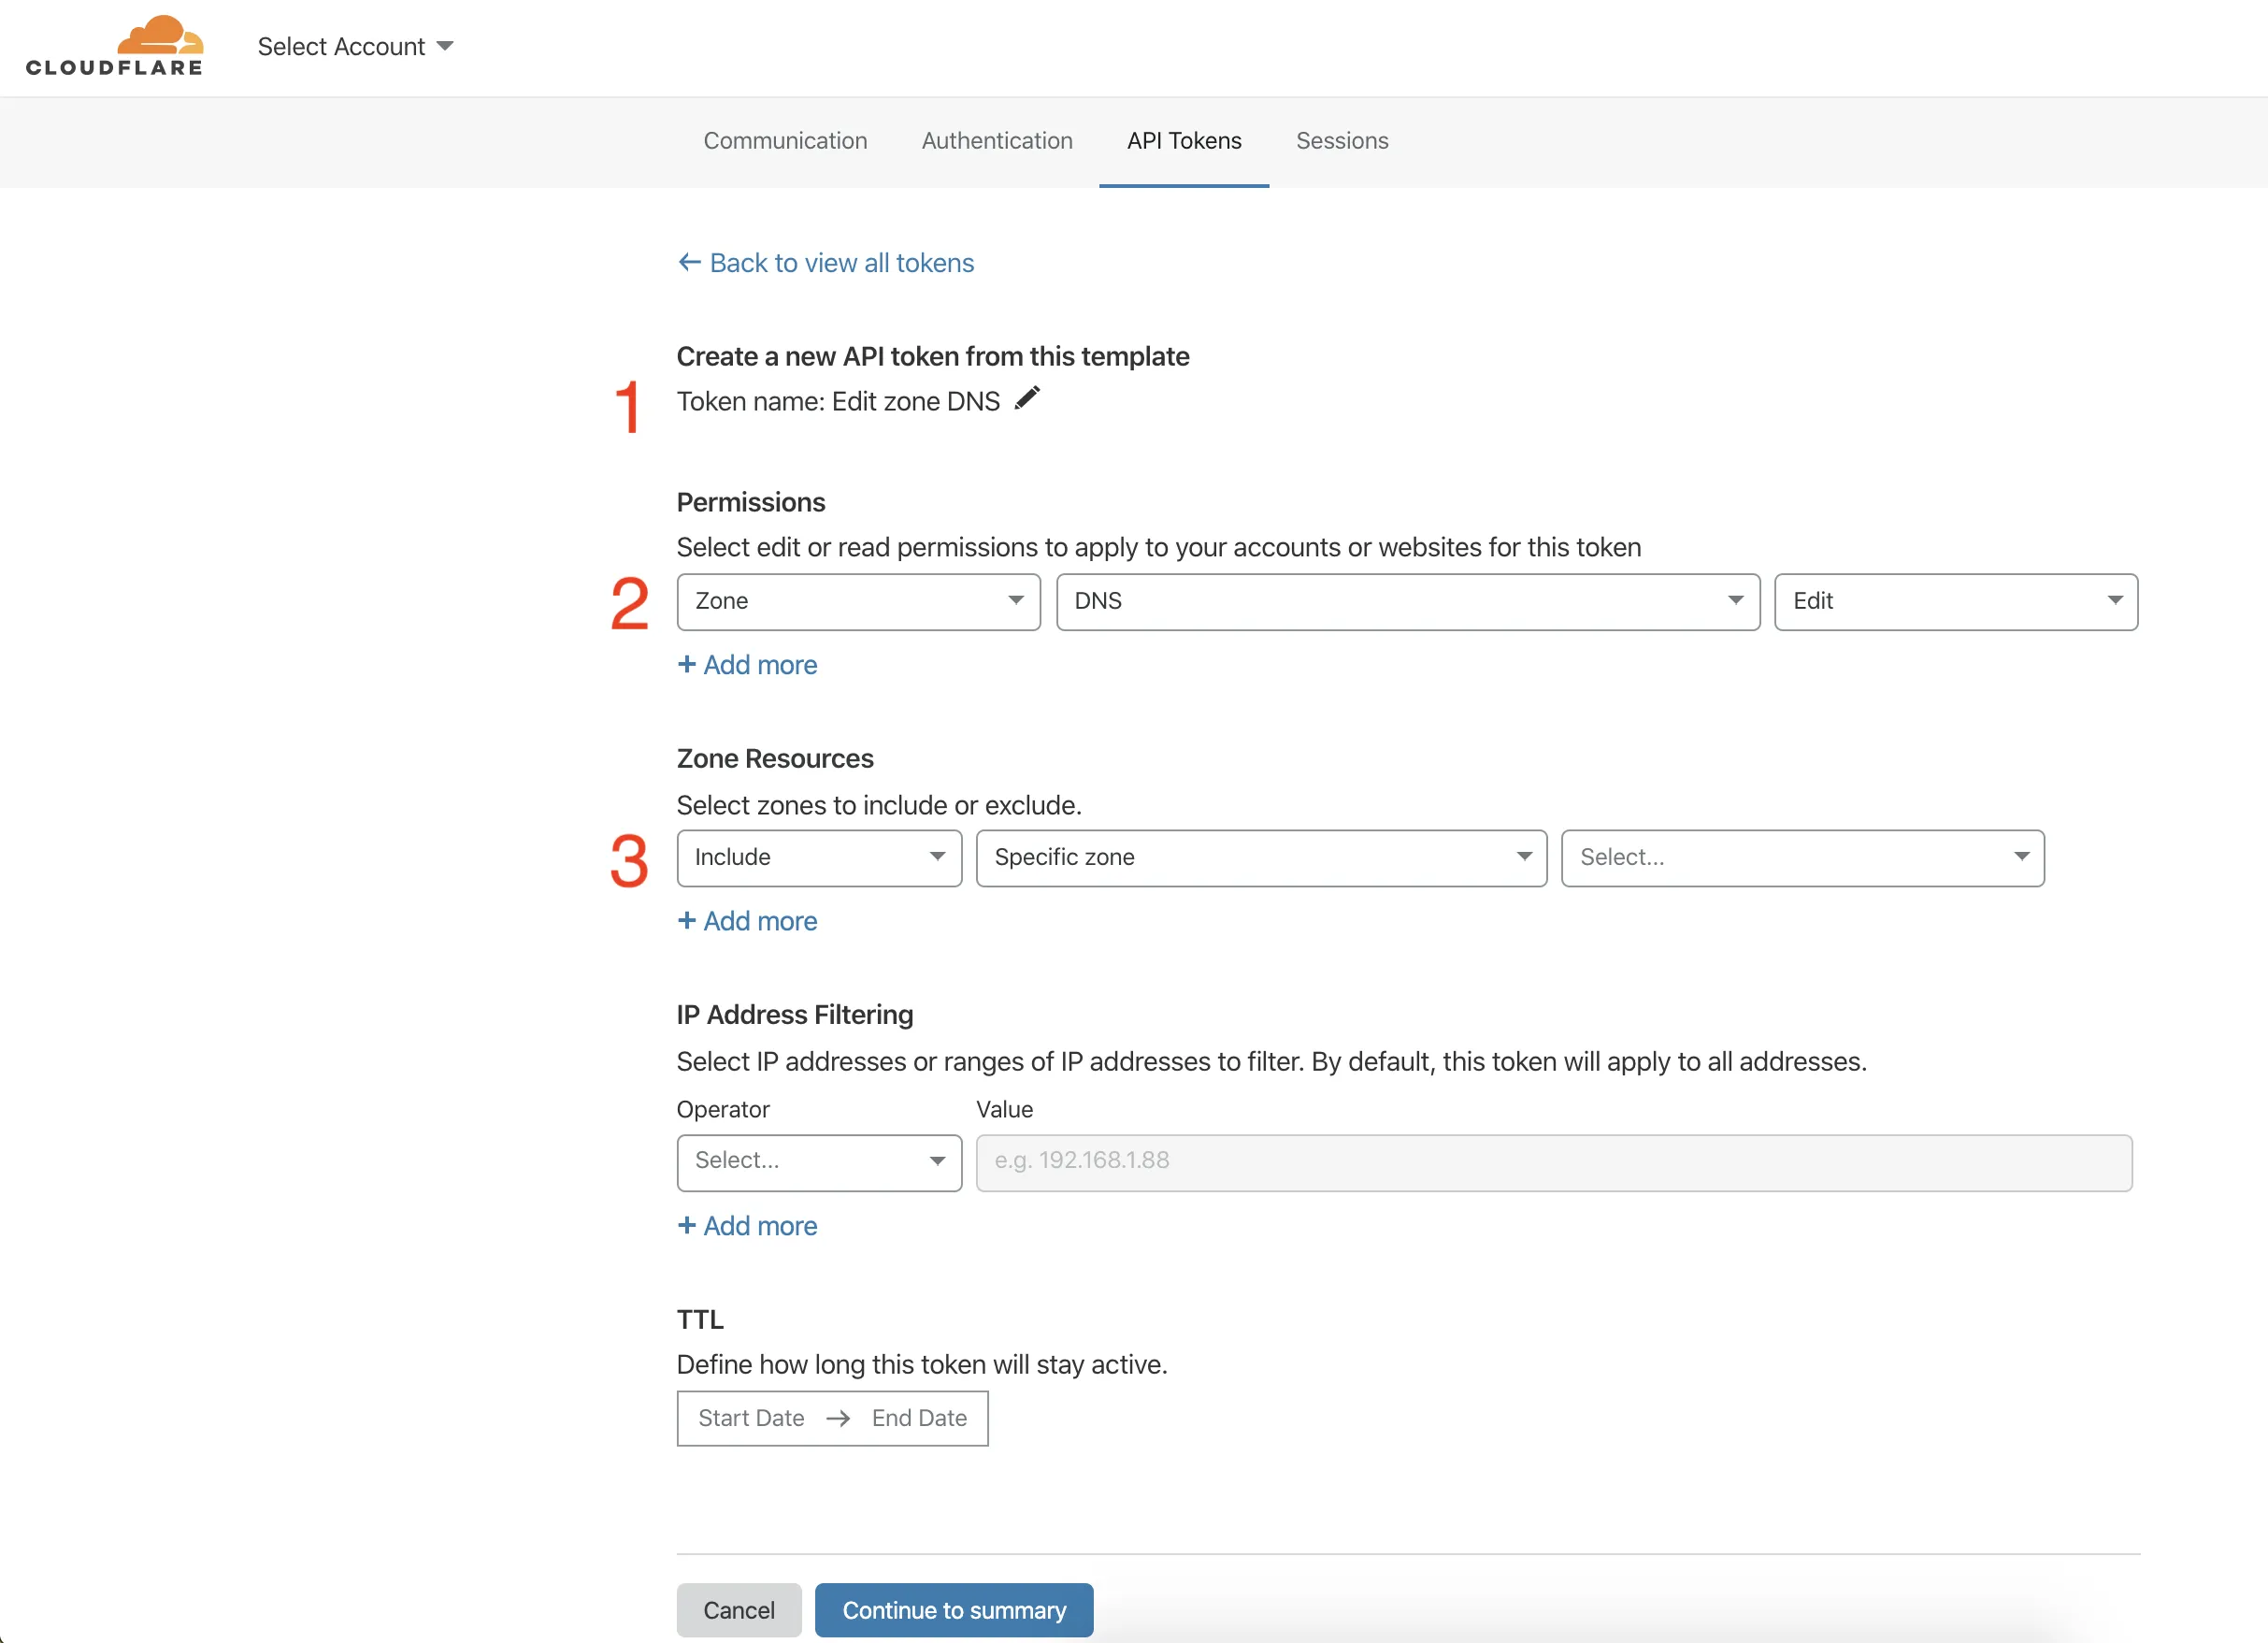
Select a template from the available API token templates or create a custom token. The following example uses the Edit zone DNS template.
-
Add or edit the token name to describe why or how the token is used. Templates are prefilled with a token name and permissions.
-
Modify the token's permissions. After selecting a permissions group (Account, User, or Zone), choose what level of access to grant the token. Most groups offer
EditorReadoptions.Editis full CRUDL (create, read, update, delete, list) access, whileReadis the read permission and list where appropriate. Refer to the available token permissions and our own Cloudflare Tables article for more information. -
Select which resources the token is authorized to access. For example, granting Zone DNS Read access to a zone
example.comwill allow the token to read DNS records only for that specific zone. Any other zone will return an error for DNS record reads operations. Any other operation on that zone will also return an error.
OptionalRestrict how a token is used in the Client IP Address Filtering and TTL (time to live) fields.
-
Select Continue to summary.
-
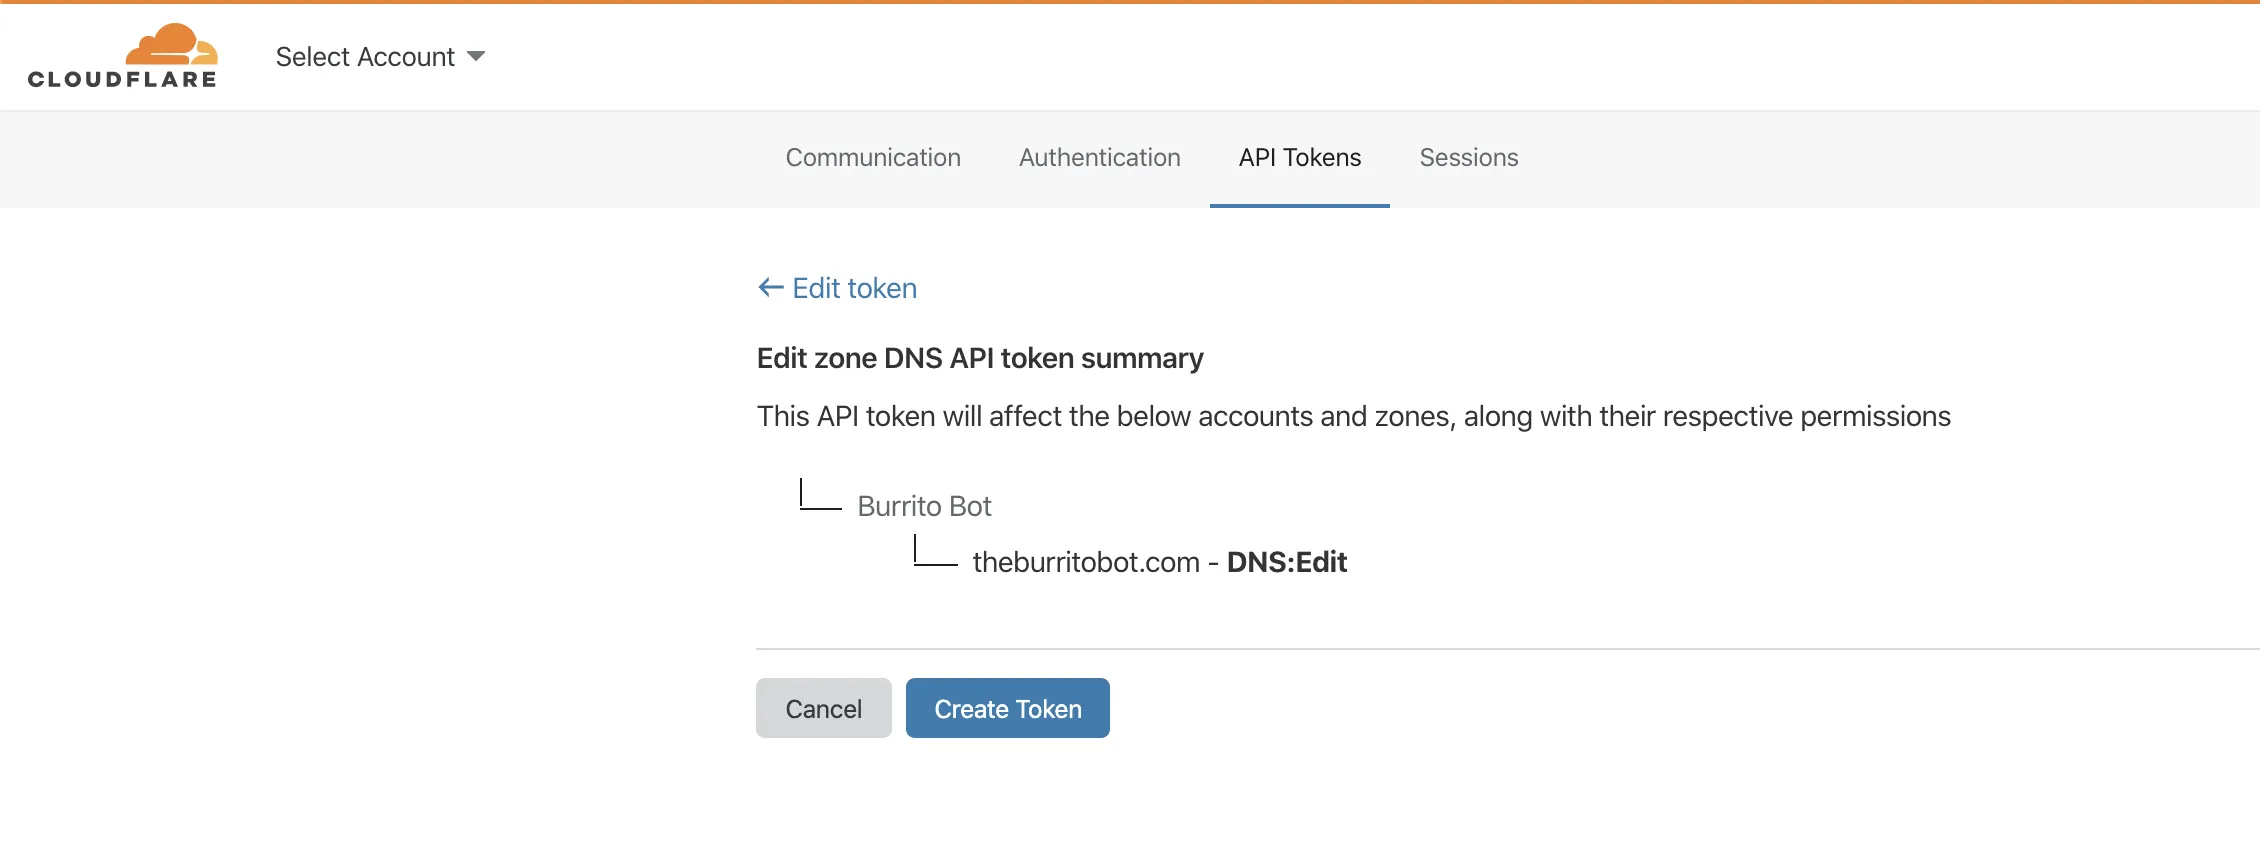
Review the token summary. Select Edit token to make adjustments. You can also edit a token after creation.
-
Select Create Token to generate the token's secret.
-
Copy the secret to a secure place.
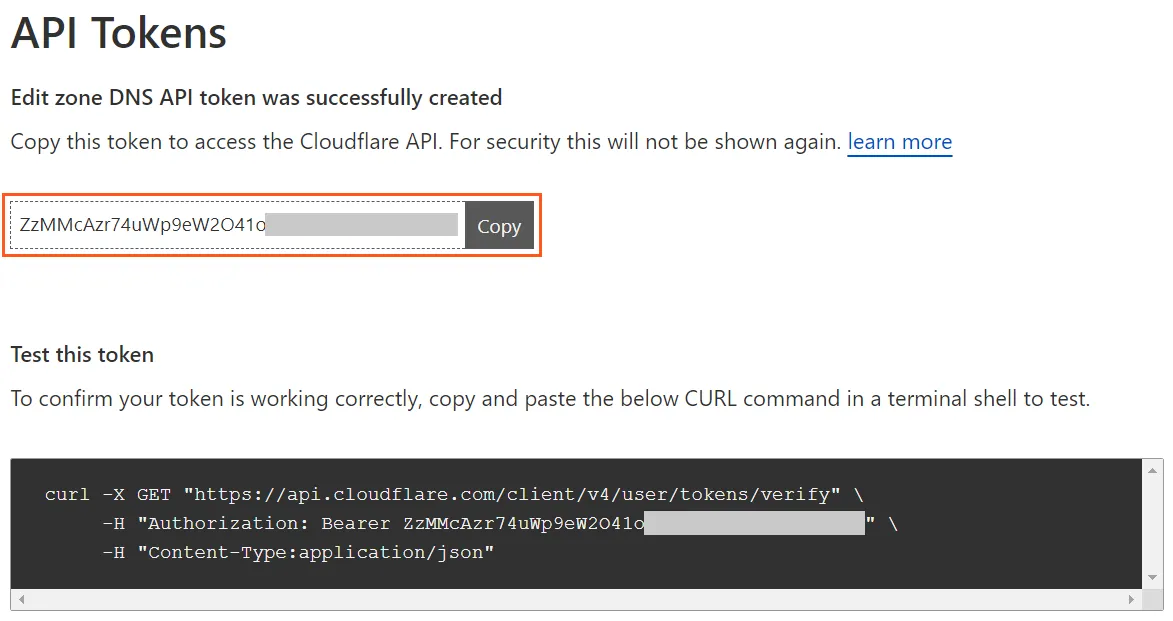
WarningThe token secret is only shown once. Do not store the secret in plaintext where others can access it. Anyone with this token can perform the authorized actions against the resources that the token has access to.
Add Configuration
-
Navigate to the Integrations tab using the left-hand menu, and select Cloudflare

-
Click the Add Configuration button and fill in the details below:

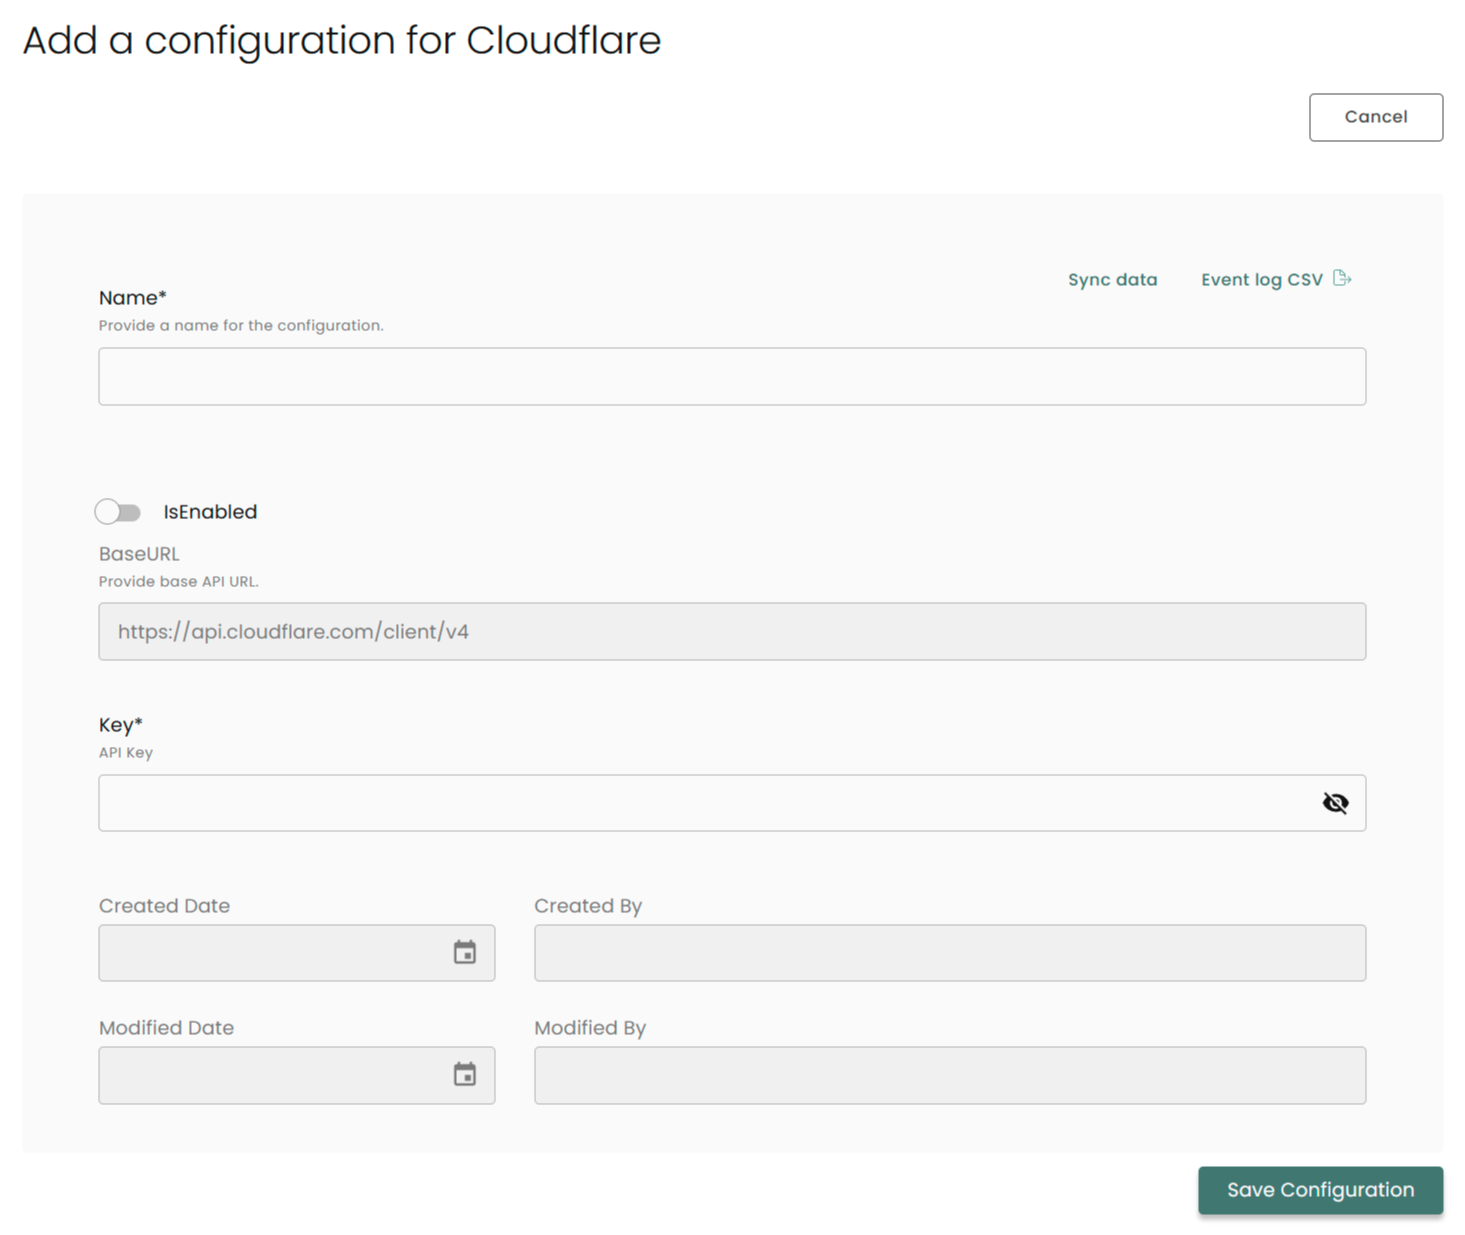
Name: Enter the name of the integration
is Enabled: Toggle button to ensure data is populated into Compyl
Base URL: This is automatically populated as https://api.cloudflare.com/client/v4
Key: The API Token you generated above
Once you have completed filling out the form click Save Configuration.
NoteTo check if the integration is connected, navigate to the Integrations page in Compyl. If the Status icon shows an unbroken link in the right-hand corner, your integration is properly connected.

This integration syncs daily.
To query the data from the integration, refer to the Query Builder article.
Updated 2 months ago