
Kandji Integration
Creating a Kandji API Token/Key
-
Log in to your Kandji account and click on Settings.
-
Click the Access tab.
-
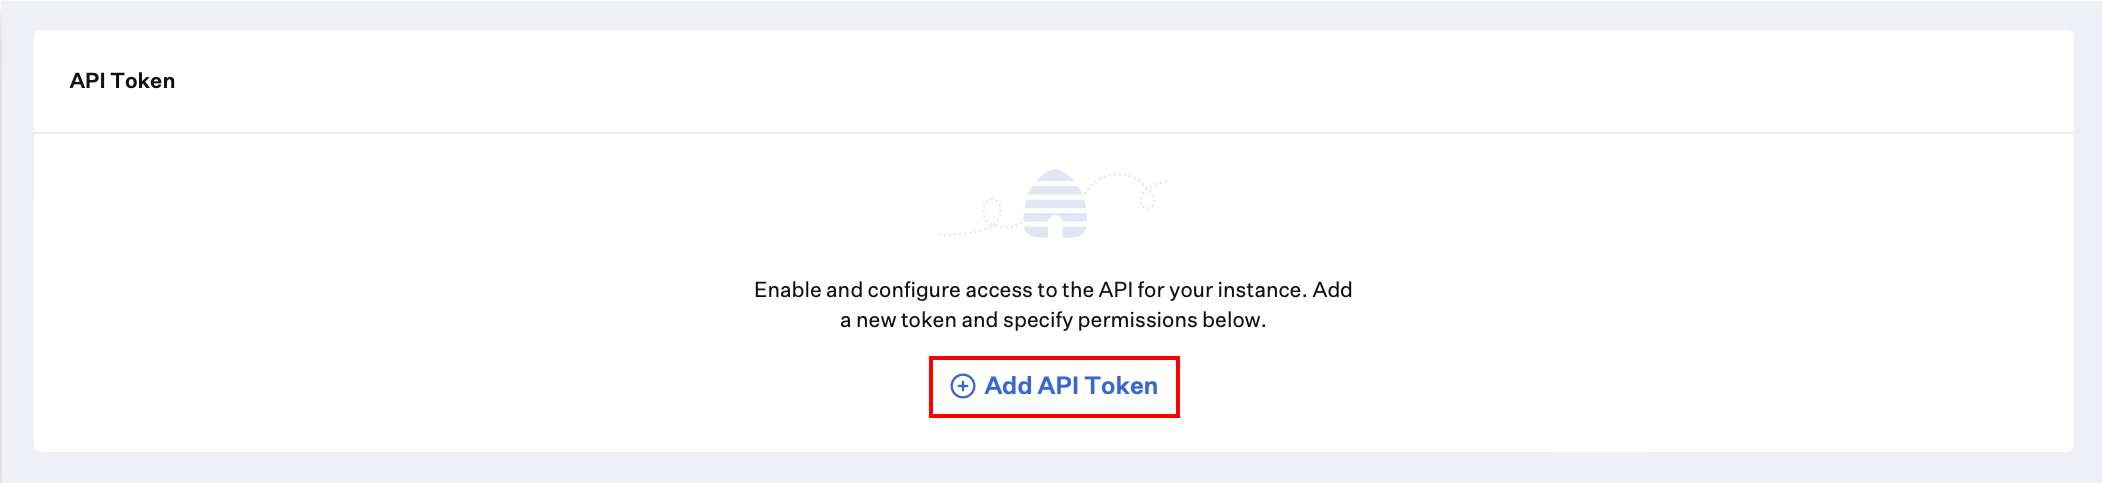
Click the Add API Token button to create a new API key.
-
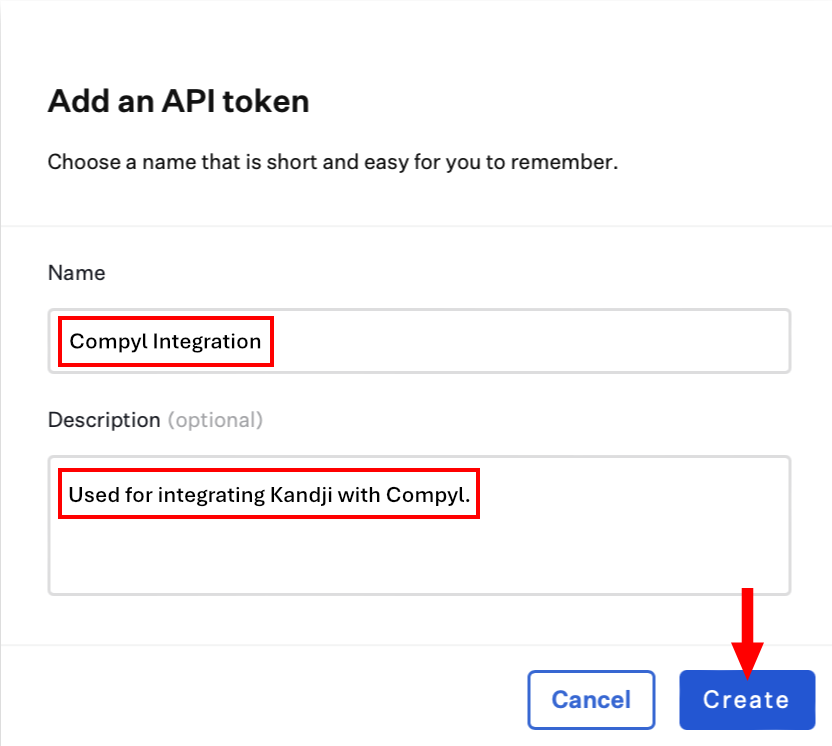
Provide a Name and a Description for your API token.
-
Click Create.
-
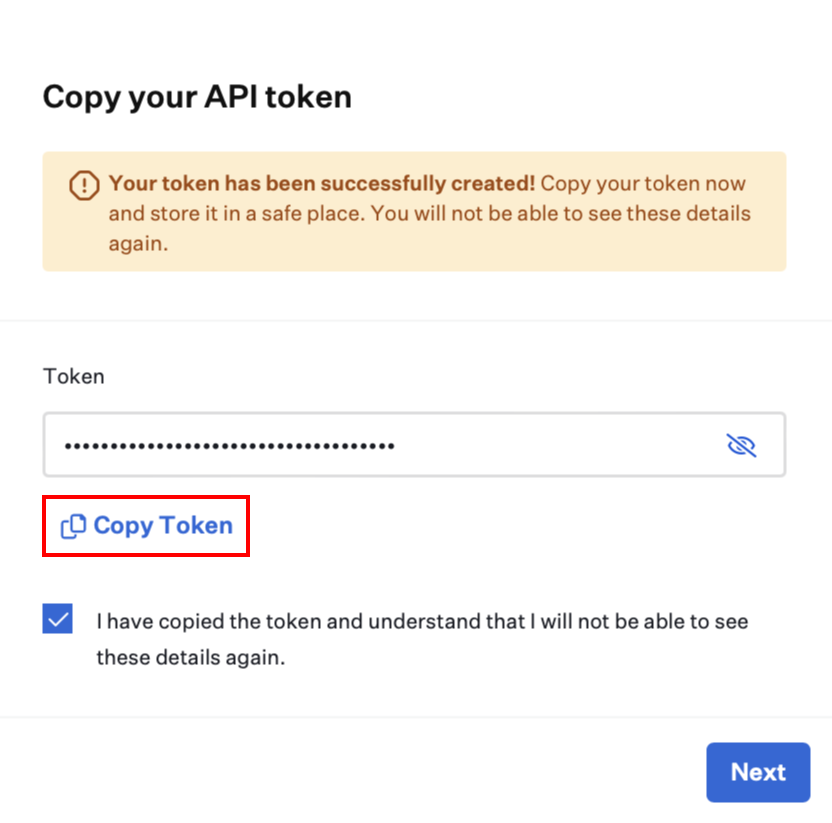
Kandji will display a modal with the API token. Click the visibility symbol to expose it or use the Copy Token button to copy the API token to your clipboard, storing it in a safe place.
NoteYou will not be able to see these token details again.
-
Click Next.
-
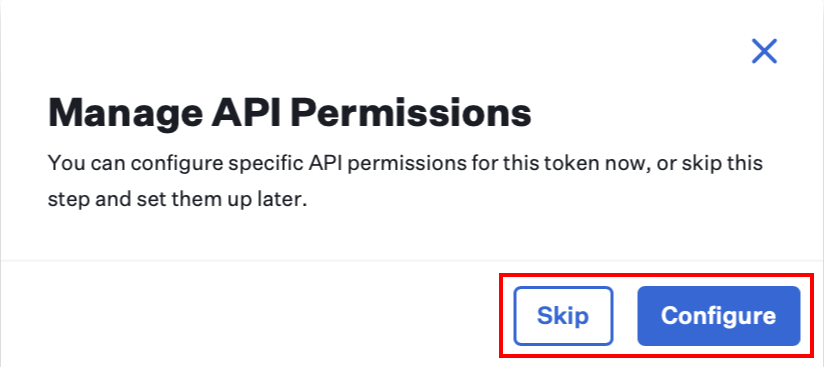
Click Configure to manage the API permissions for this specific token or Skip to change them later.
-
After making your modifications, click Save.
-
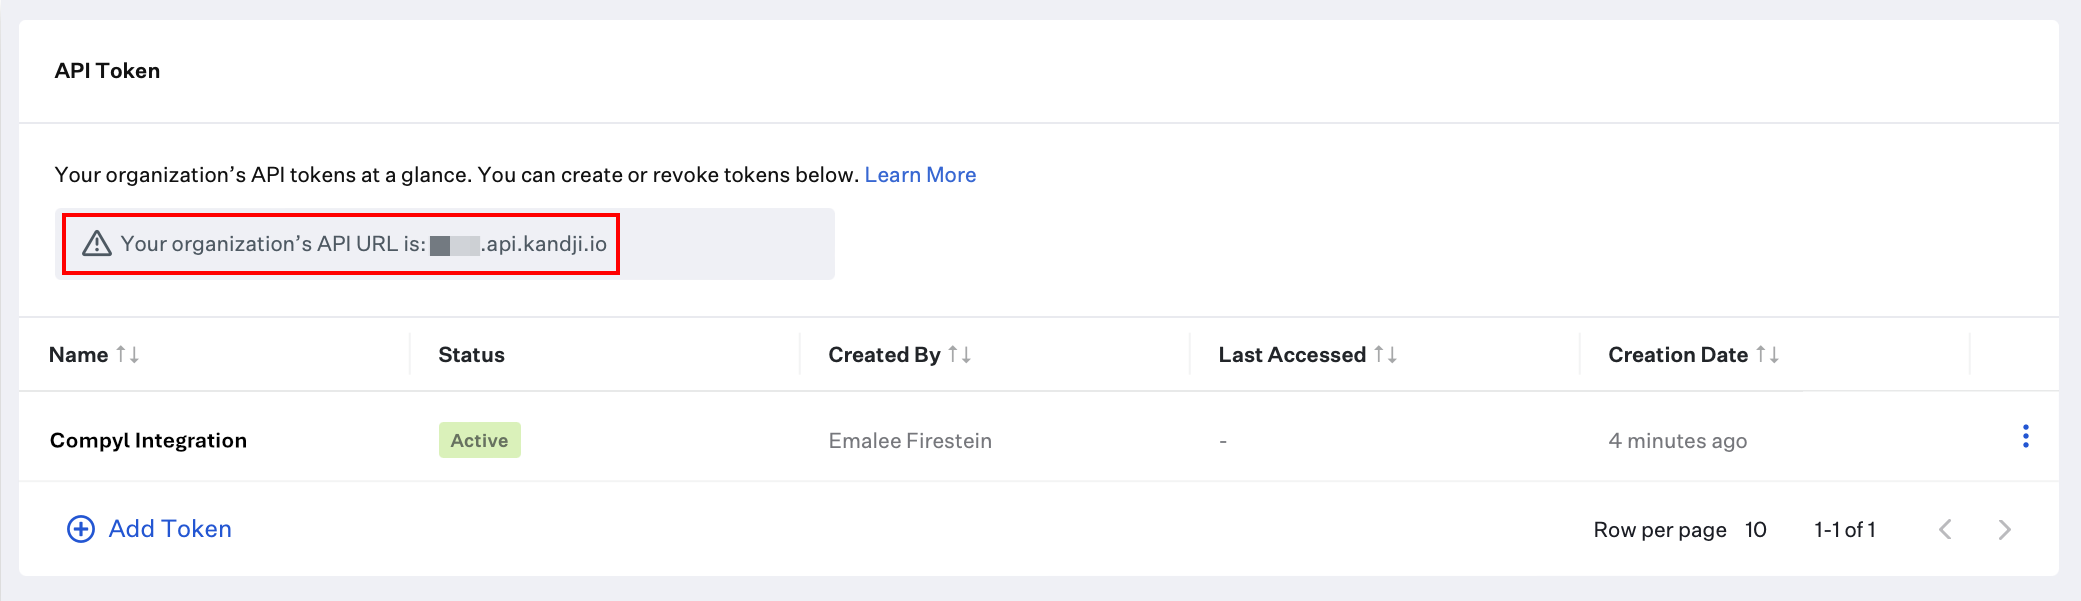
Once you create your first token, you will see your tenant-specific API URL.
Add Configuration
-
Navigate to the Integrations tab using the left-hand menu, and select Kandji

-
Click the Add Configuration button and fill in the details below:

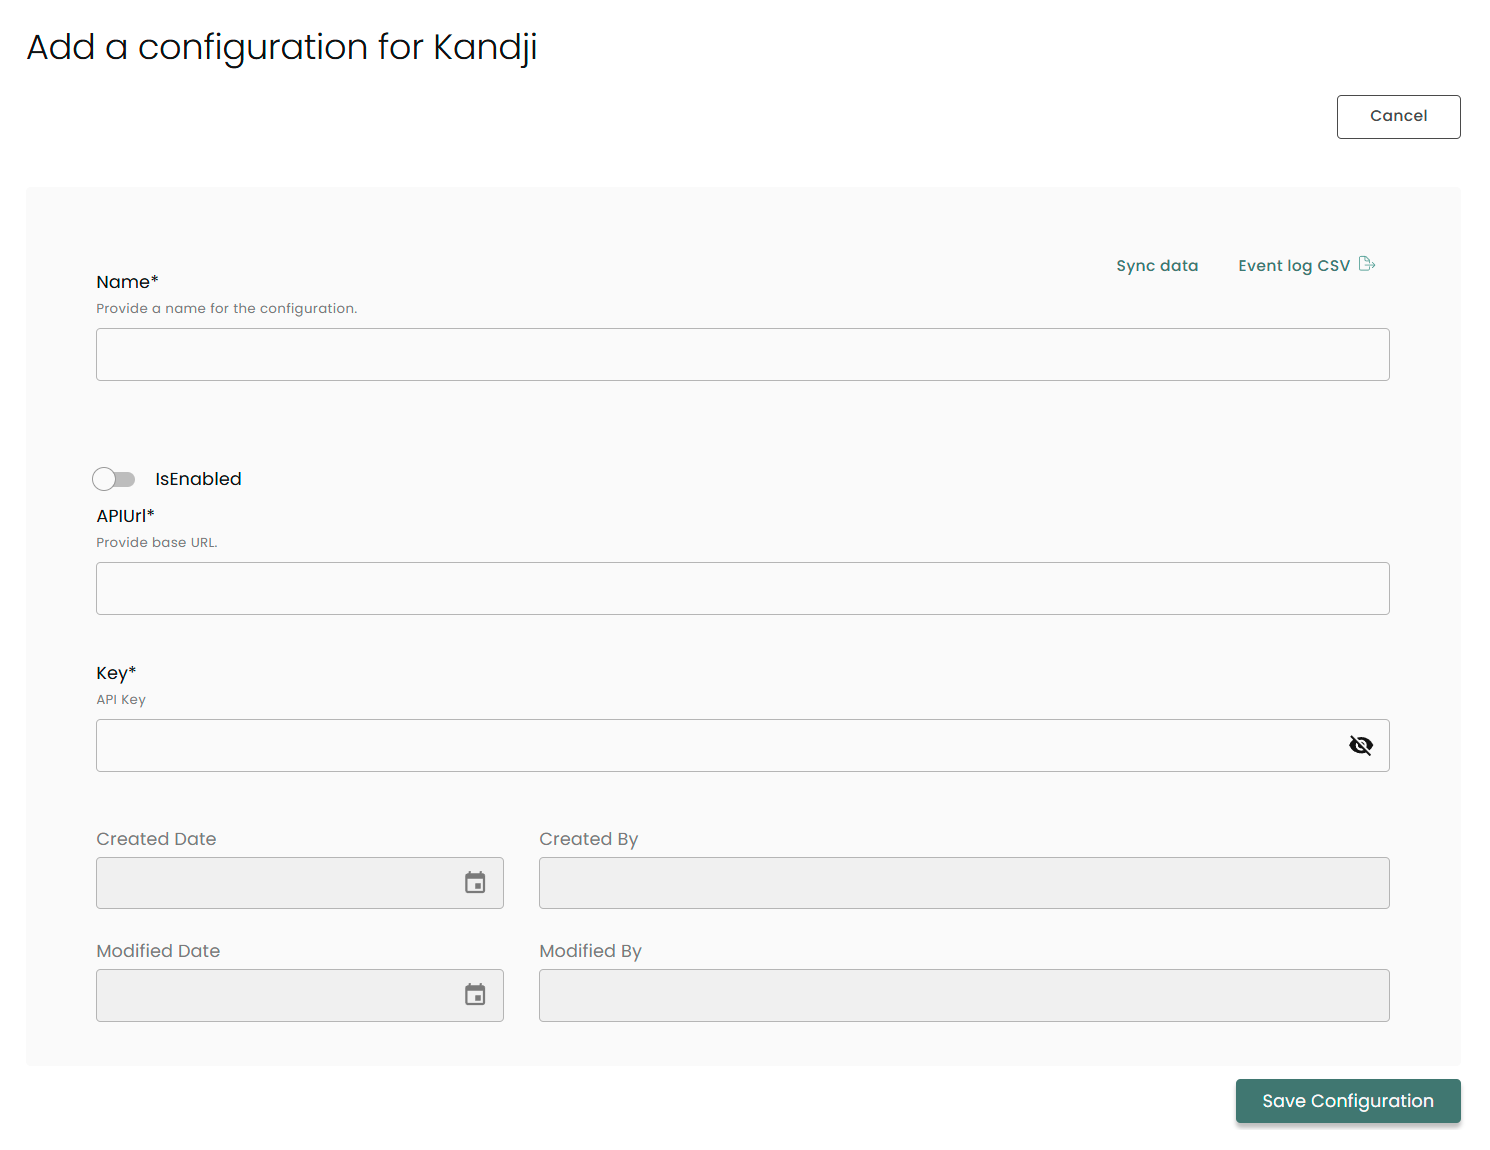
Name: Enter the name of the integration
is Enabled: Toggle button to ensure data is populated into Compyl
API URL: The URL generated at the end of the API Key creation process.
Key: The API Key you generated above
Once you have completed filling out the form click Save Configuration.
NoteTo check if the integration is connected, navigate to the Integrations page in Compyl. If the Status icon shows an unbroken link in the right-hand corner, your integration is properly connected.

This integration syncs daily.
To query the data from the integration, refer to the Query Builder article.
Updated 2 months ago