
Rippling Integration
Prerequisites
- You must have access to the Developer app in Rippling.
- Your Rippling account must have one of the following permission levels on the API Tokens tab:
- Admin (Manage the API Tokens app) — can view all company tokens, edit metadata on any token, and revoke any token.
- Create and manage API Tokens — can create, view, and edit your own tokens only.
- The scopes available during token creation are limited by your Rippling permission profile. If you cannot see a scope you need, contact your Rippling administrator to update your permissions.
Create the API Token
-
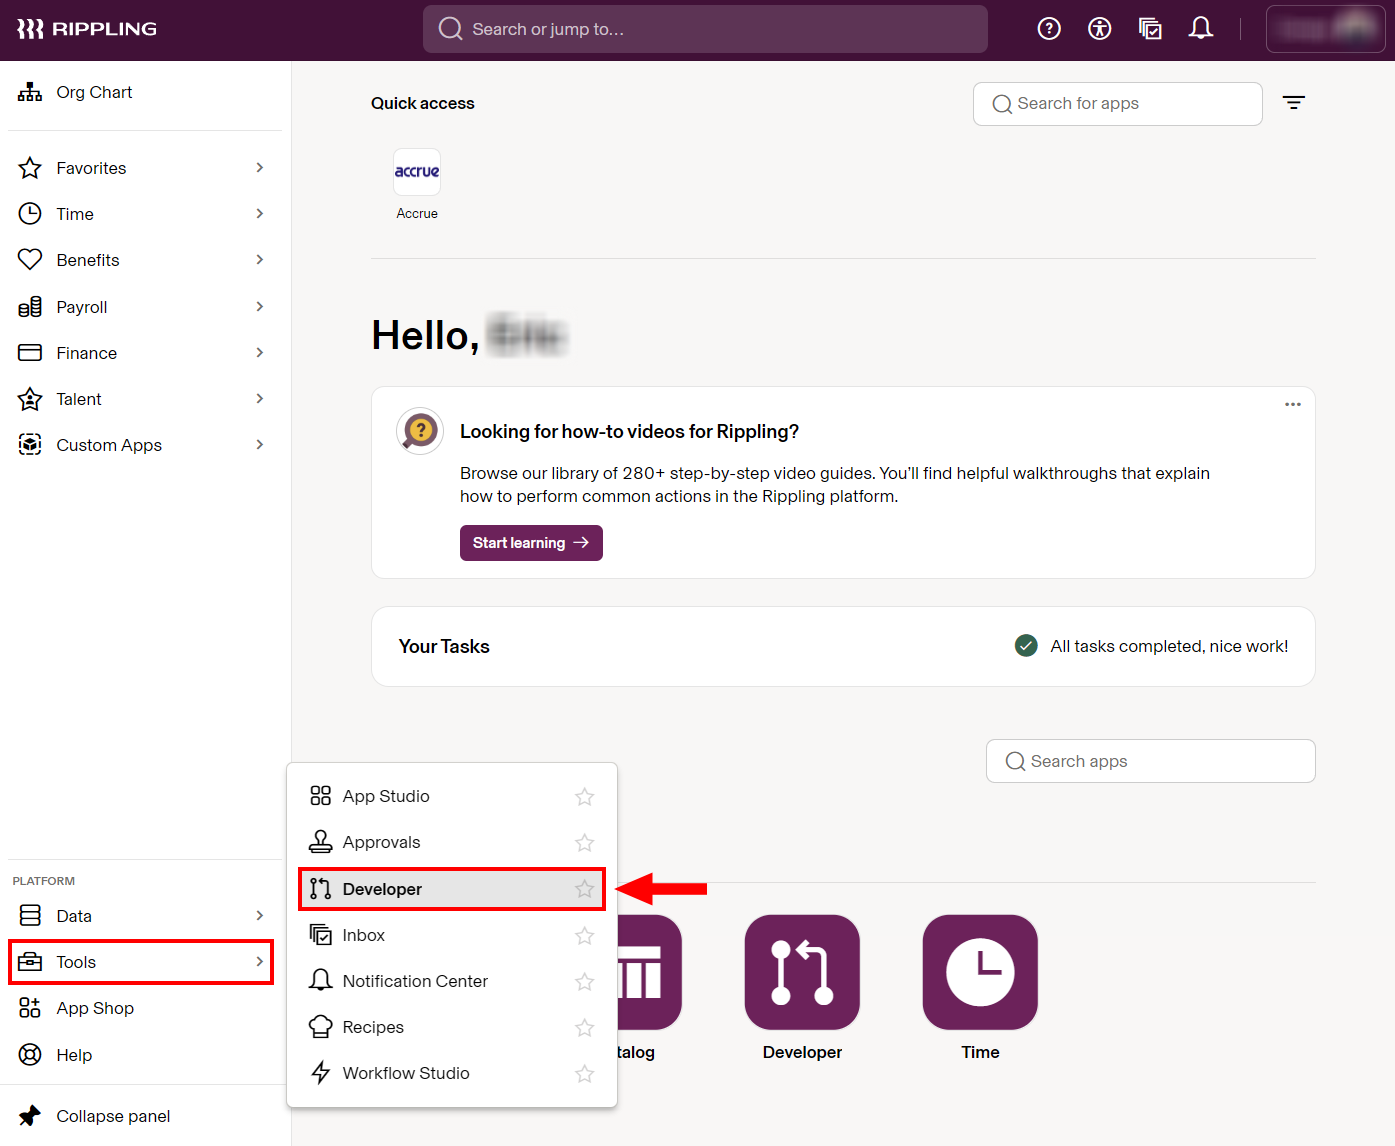
In Rippling, navigate to Tools → Developer.
-
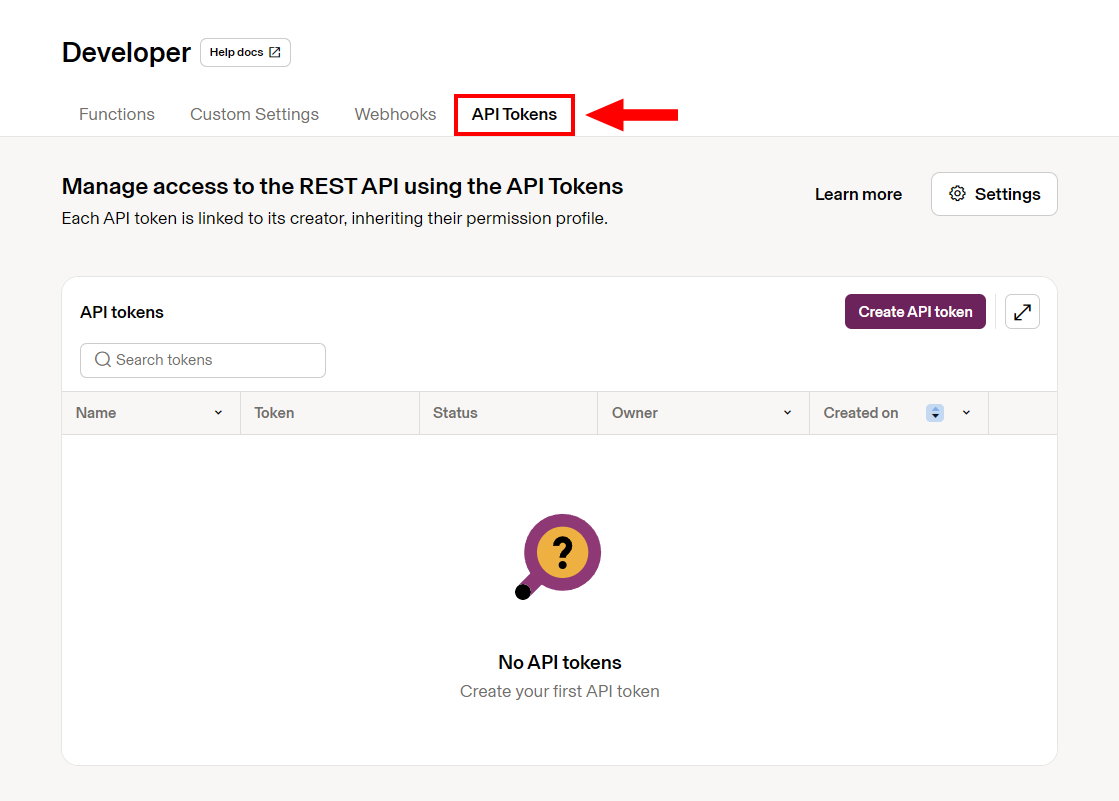
Then select API Tokens from the main menu or go directly to https://app.rippling.com/api-tokens/tokens.
-
Click Create API token, fill in the required fields, and click on Continue.
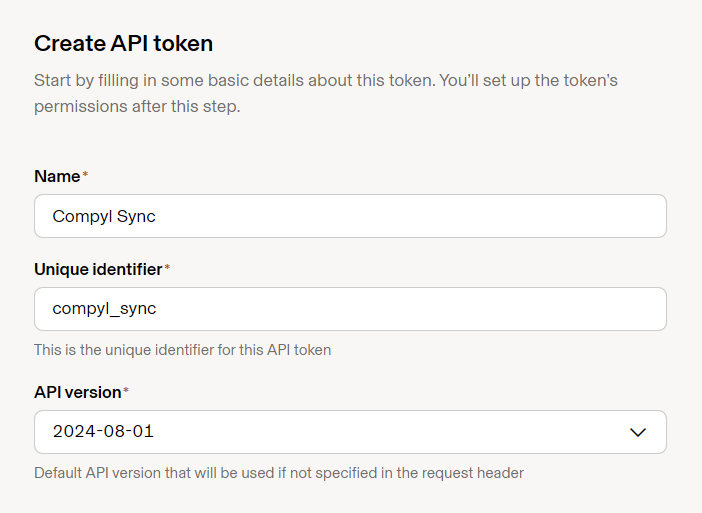
- Name: A descriptive label for what the token is used for (e.g., Compyl Sync).
- Unique identifier: A unique ID for the token (automatically generated based on the name).
- API version: The Rippling API version the token targets. Stays on its version until manually updated or the version is deprecated.
-
Next, select the API scopes the token needs. Only scopes your permission profile allows will be visible.
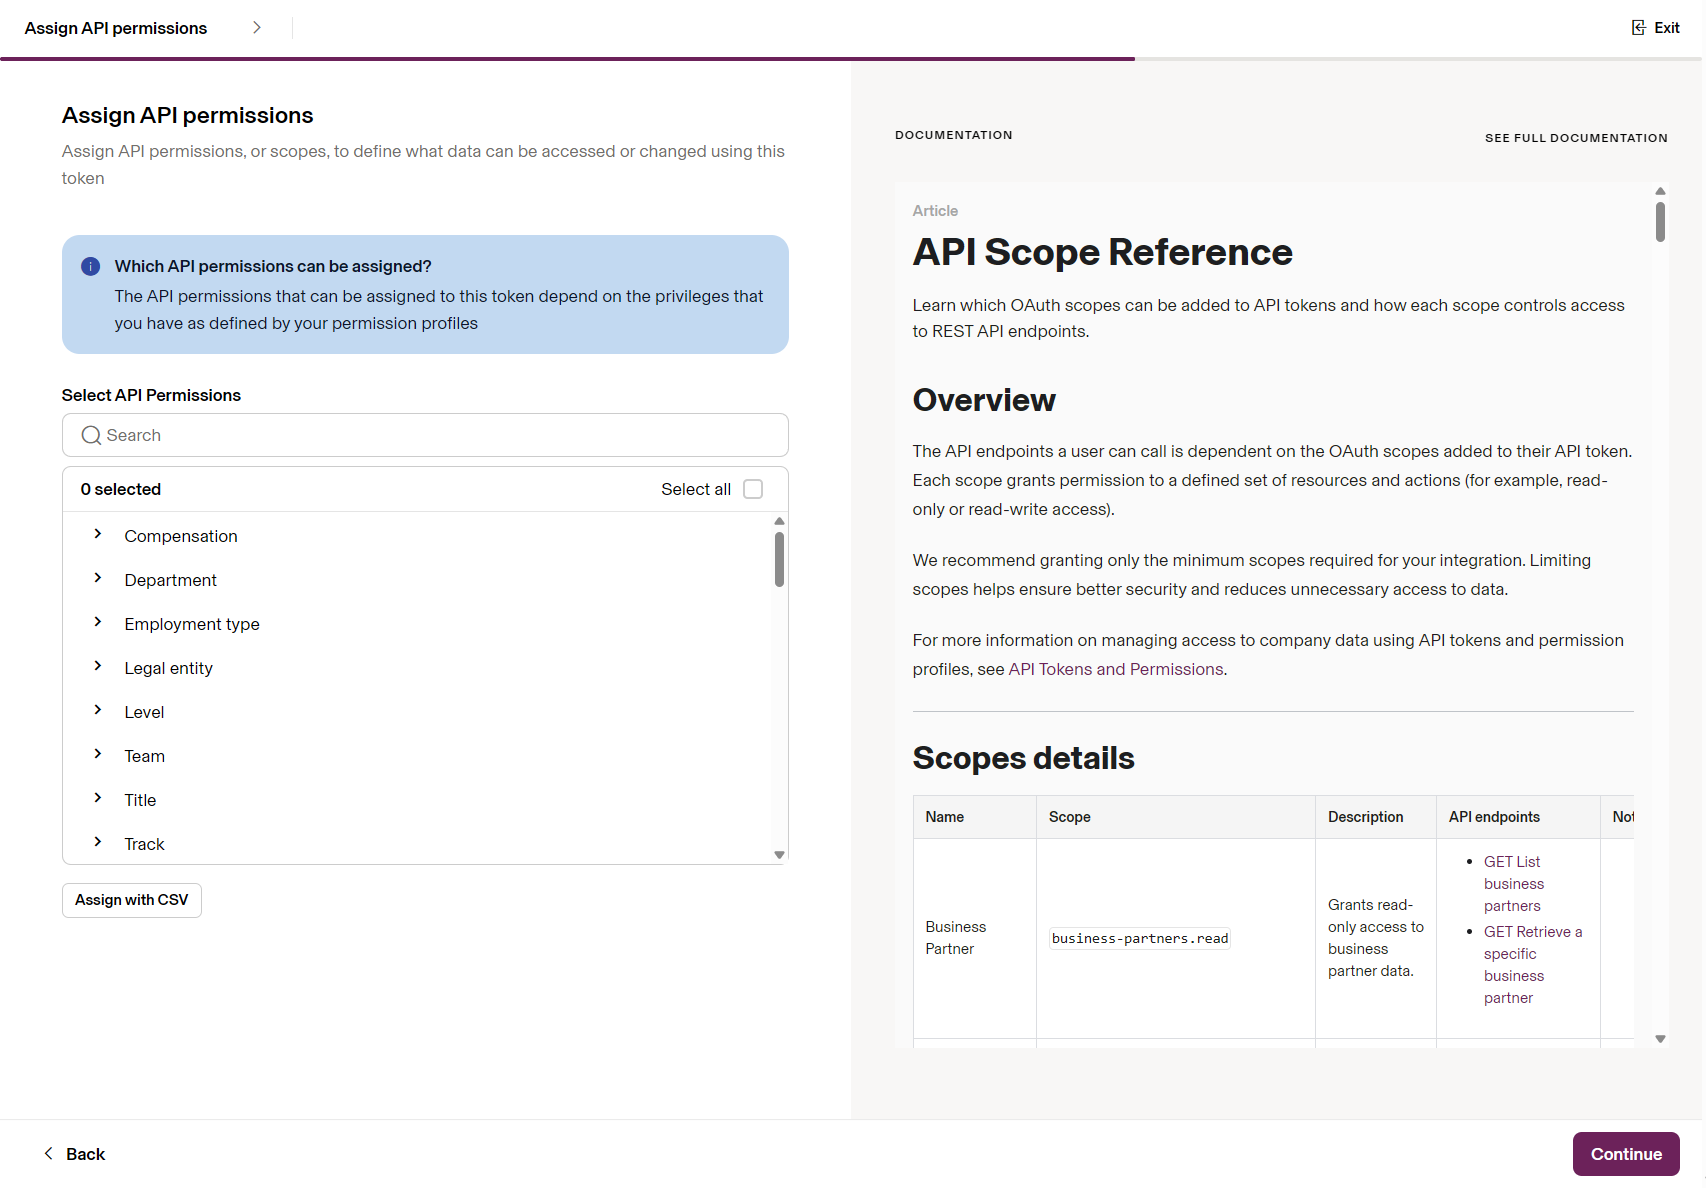
If you need access to Custom Objects or Custom Object Records, you will also be prompted to select which object/record types the token can access.
The following scopes are required for this integration:
Scope users.read workers.read companies.read departments.read teams.read levels.read titles.read job-functions.read employment-types.read work-locations.read supergroups.read business-partner-groups.read business-partners.read entitlements.read
-
After completing the creation flow, copy or download the token value immediately. Rippling will not display it again.
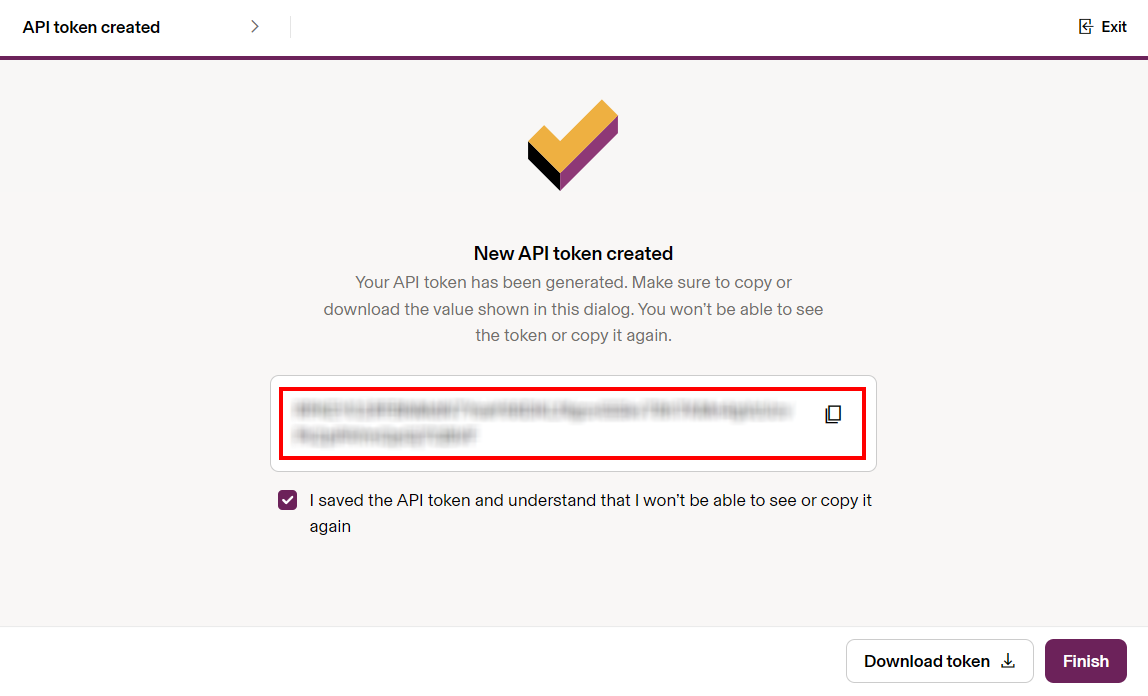
Treat the token like a password — any request made with it appears as if the token owner made the request.
-
Rippling sends an email notification (New API token created for your organization) to the token owner, API Token Admins, and company Super/Full Admins.
Important Notes
-
Token expiry: A token is automatically revoked if the owner is terminated in Rippling or the token goes unused for more than 30 days.
-
Permission changes propagate: If the token owner's Rippling permissions change, the token's effective access changes with them.
-
Editing scopes: Only the token owner can add or remove scopes after creation. Admins can only update the Name and API version of other users' tokens.
-
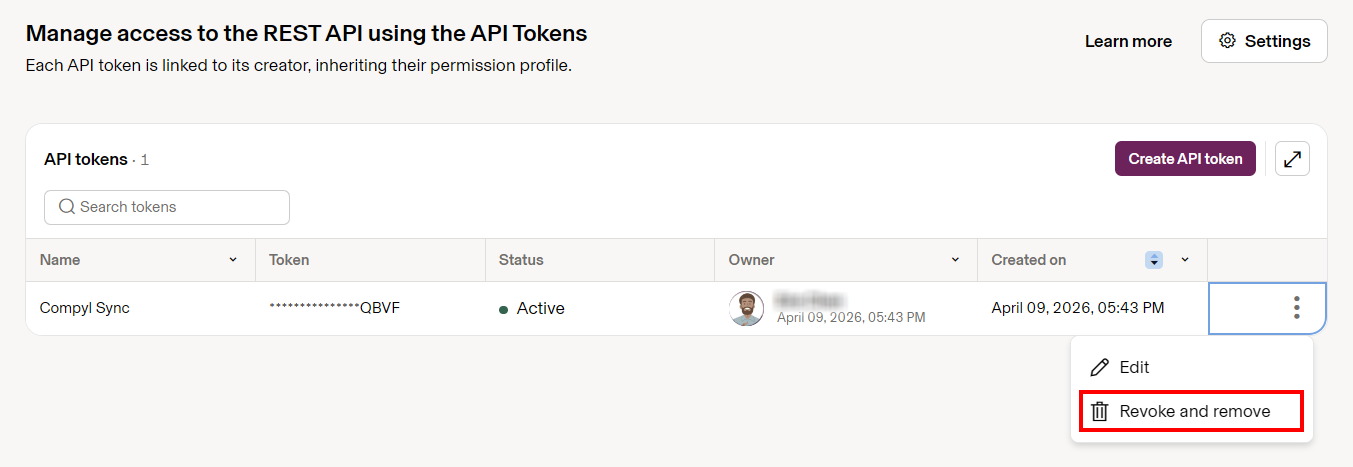
Revoking: Navigate to Tools → Developer → API Tokens, click the three-dot menu (⋮) next to the token, and select Revoke and remove. This is irreversible.
Add Configuration
-
Navigate to the Integrations tab using the left-hand menu, find Rippling, and select +Add Configuration.

-
Next, fill in the details below and select Continue.
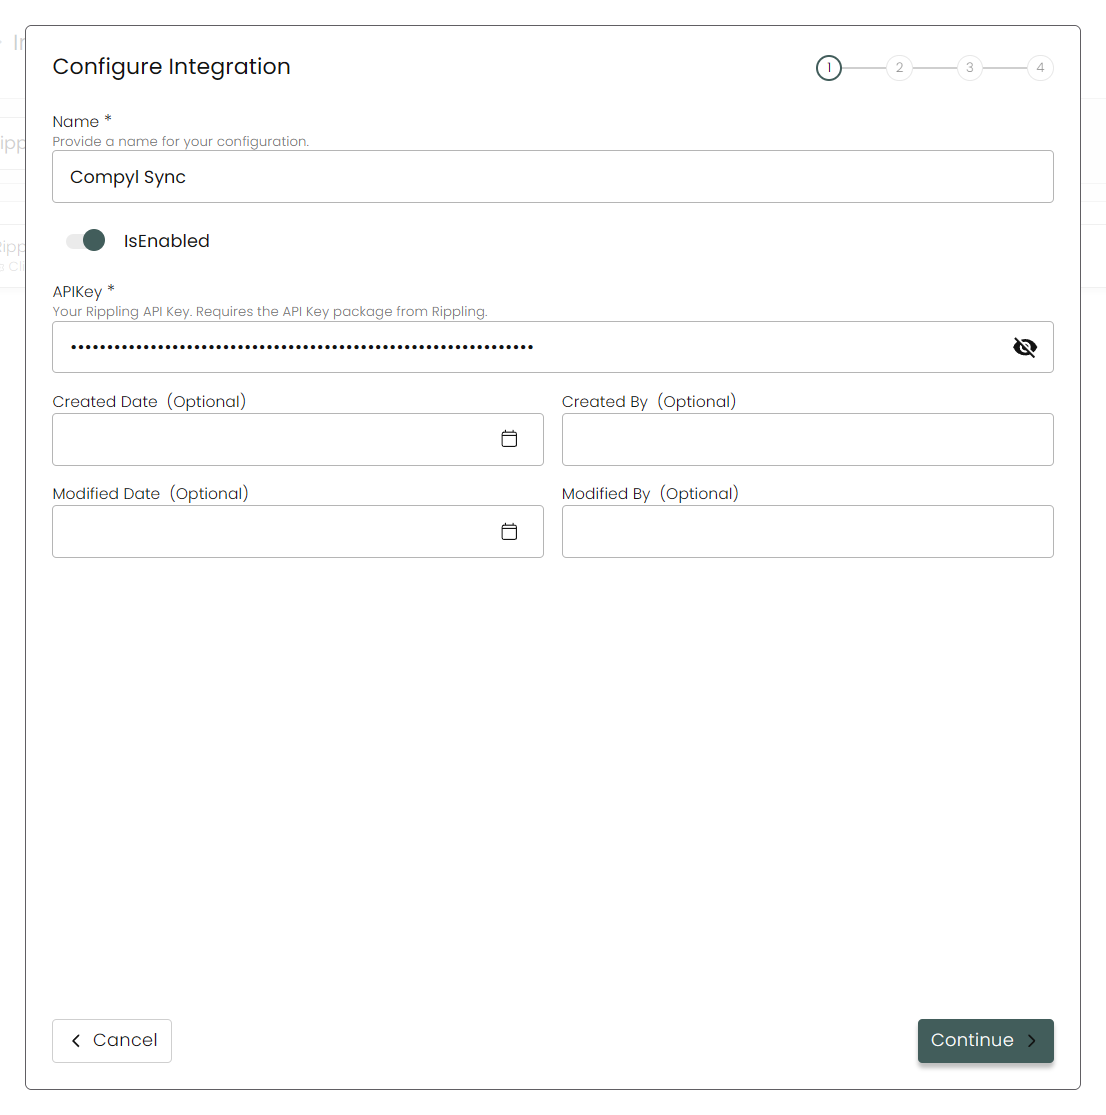
Name: Enter the name of the integration.
is Enabled: Toggle button to ensure data is populated into Compyl.
API Key: The API Token you generated above.
-
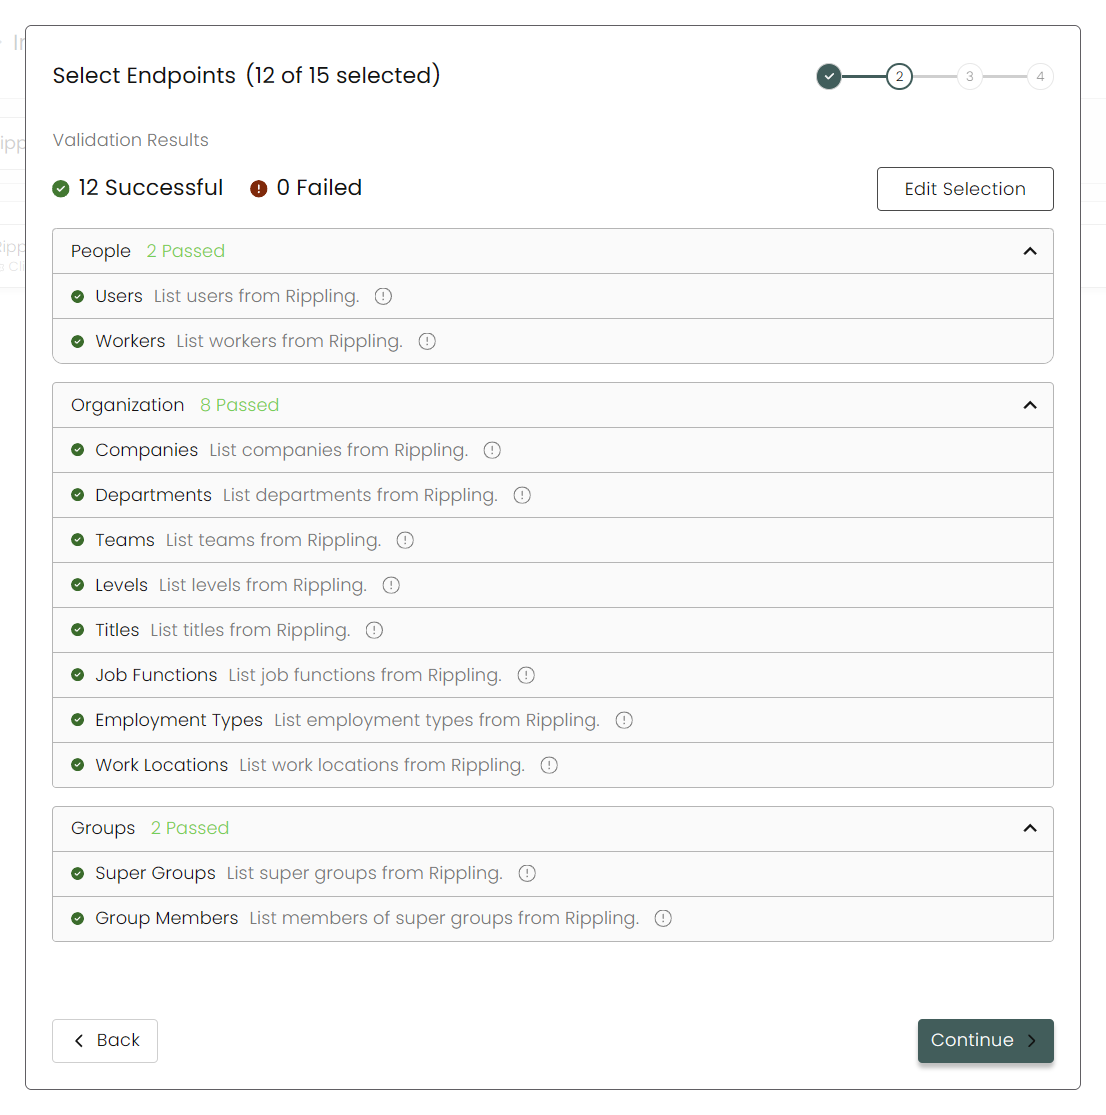
Select any Endpoints and Blueprints you wish to associate with this integration and Validate their connection.
-
After you hit Continue, you'll see a summary screen. Click Return to Integrations to complete the configuration.
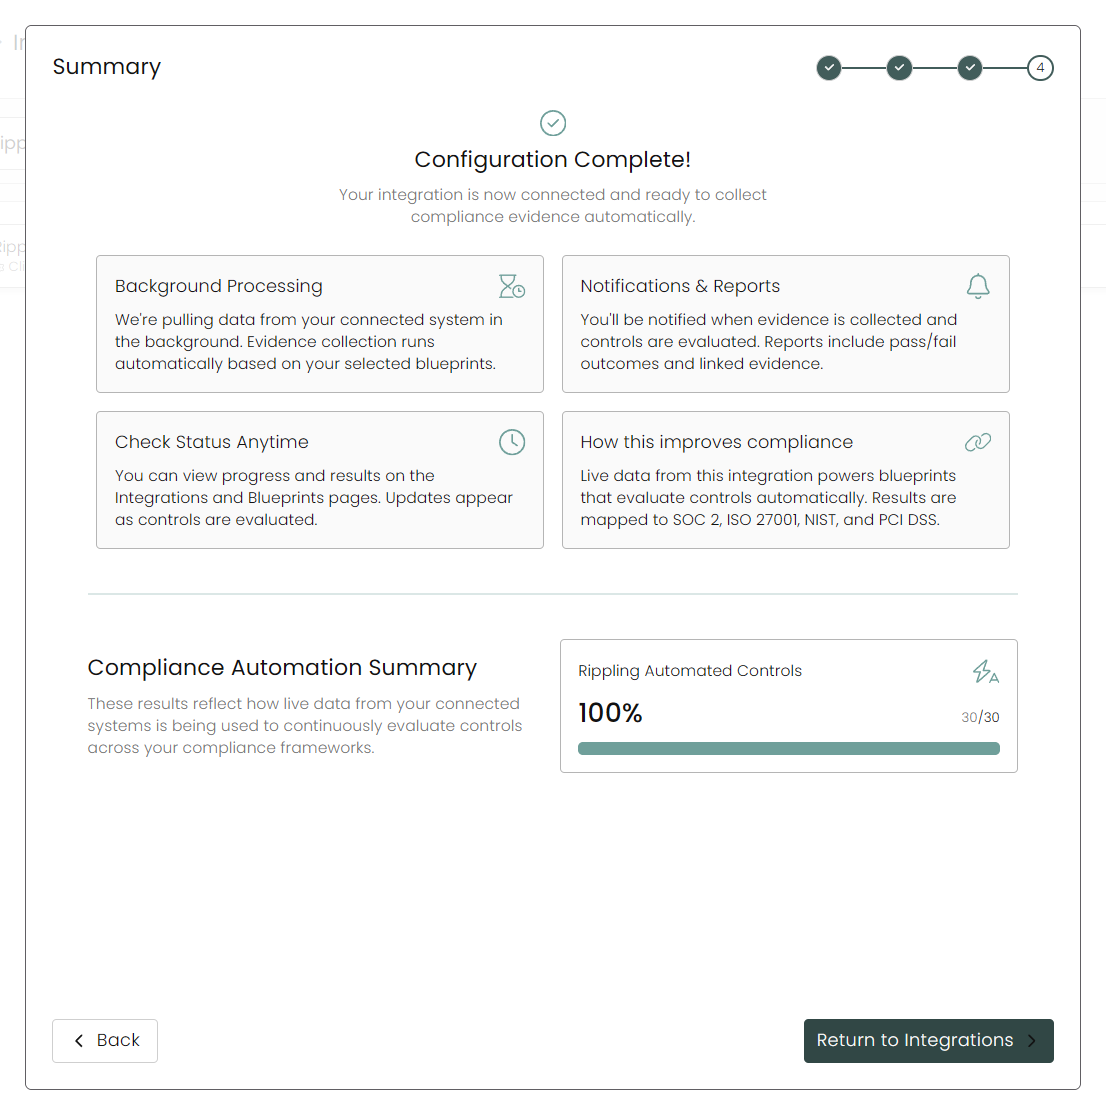
Once you have completed filling out the form click Return to Integrations.
You'll know the integration is successfully added when the status updates to Complete.

Data is synced on a recurring schedule configured by your Compyl administrator. Each sync pulls the latest data from all enabled endpoints.
To query the data from the integration, refer to the Blueprints article.
Updated 2 months ago