
Manage Data Sources
Introduction
In Compyl, you can add new data sources to your current dashboard or remove existing data sources. Follow these steps to manage your data sources effectively.
Adding a Data Source
1. Open Data Sources Page
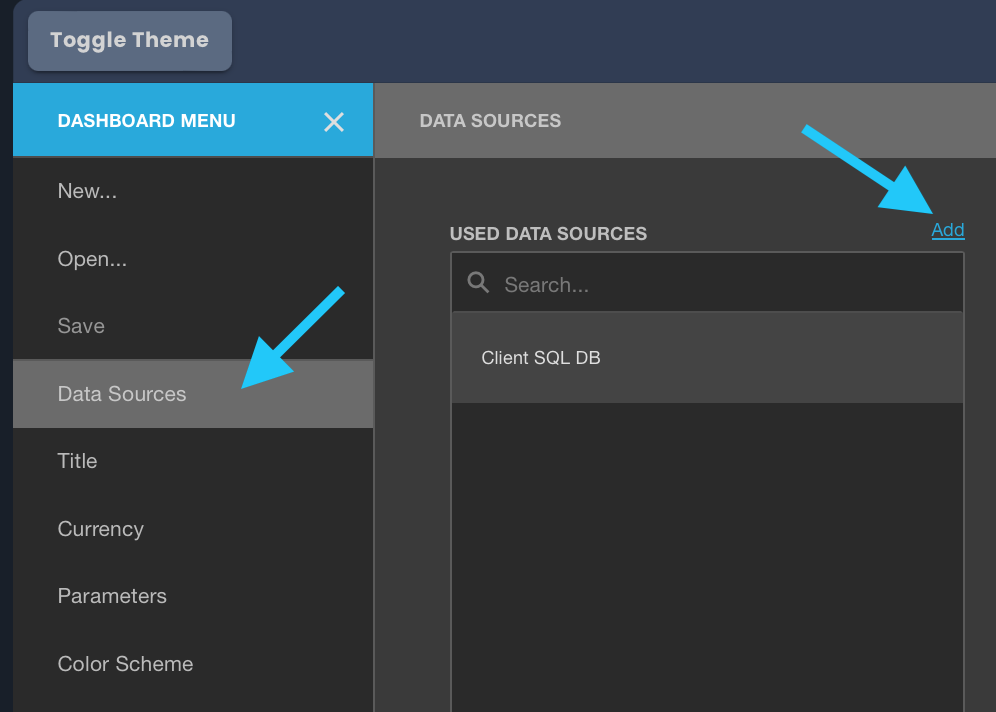
- Access Dashboard Menu: Open the dashboard menu and navigate to the Data Sources page.
2. Add a New Data Source
- Add Data Source: Click "Add" next to the Used Data Sources list to add a new data source.
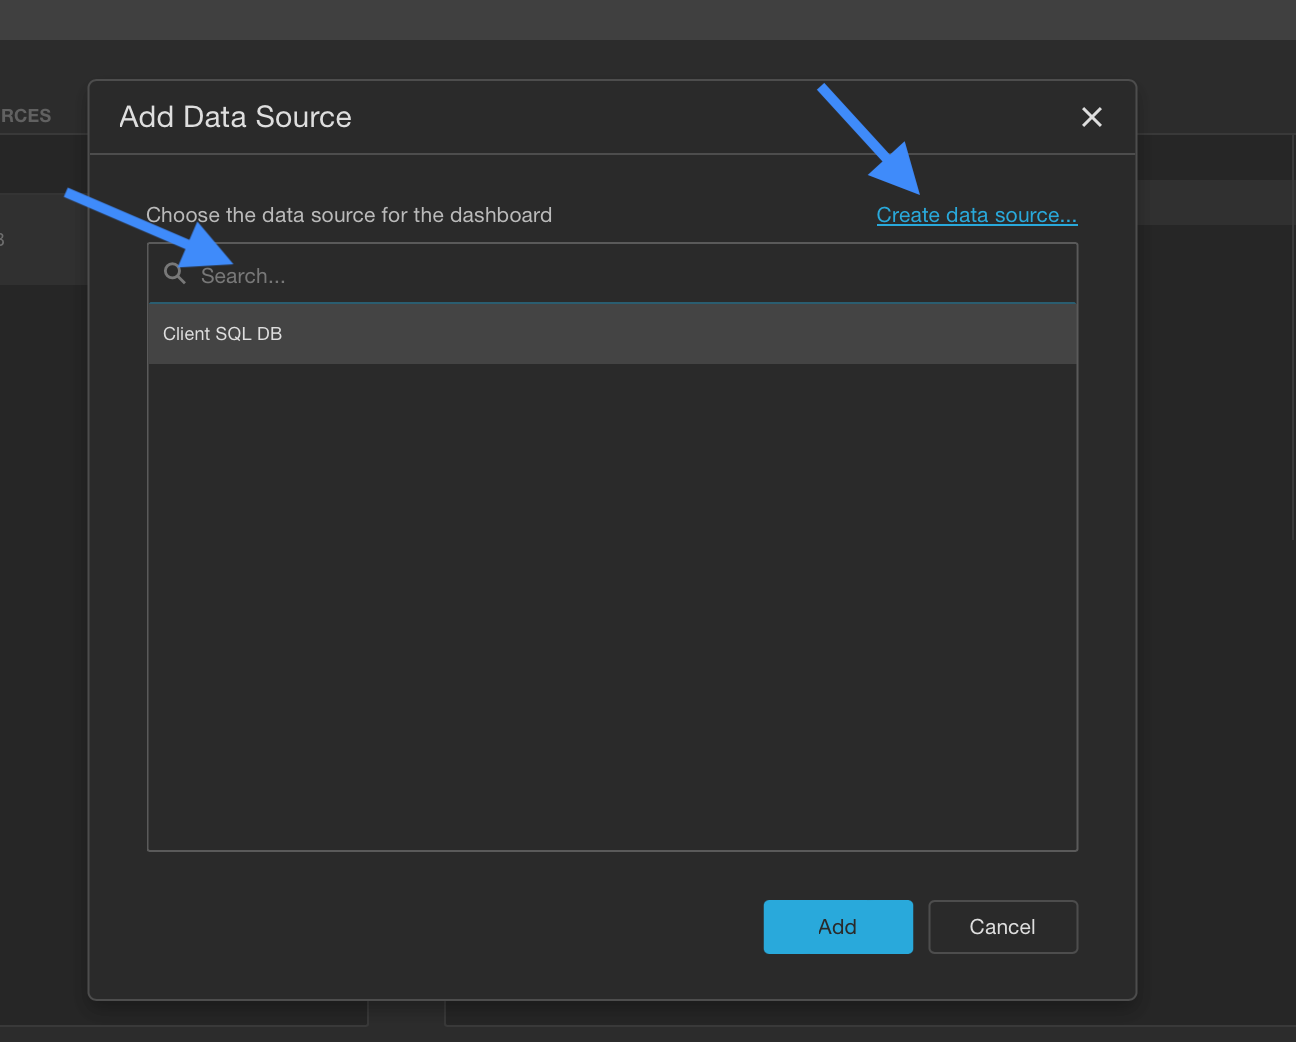
- Add Data Source Window: The Add Data Source window will appear.
3. Options in Add Data Source Window
- Add an Existing Data Source: Select the data source from the list and click the "Add" button.
- Create a New Data Source: Click "Create data source…". This will invoke the Dashboard Data Source Wizard where you can create a new data source based on a predefined data connection. After creation, click "Add" to include the newly created data source in the dashboard data sources.
4. View Newly Added Data Source
- The newly added data source will appear in the Used Data Sources list.
Managing Data Sources
1. Select Data Source
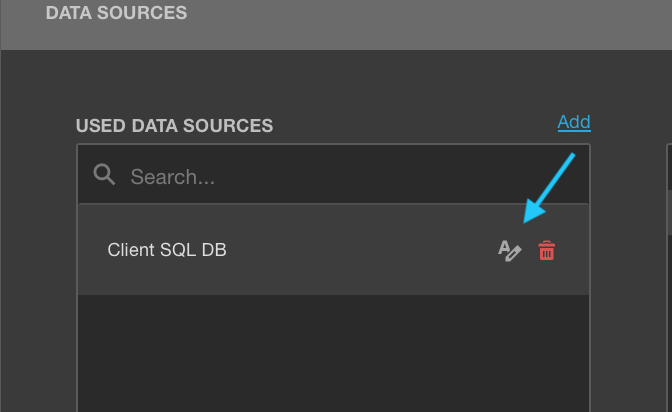
- Select Data Source: Choose the data source you want to manage from the Used Data Sources list.
2. Rename Data Source
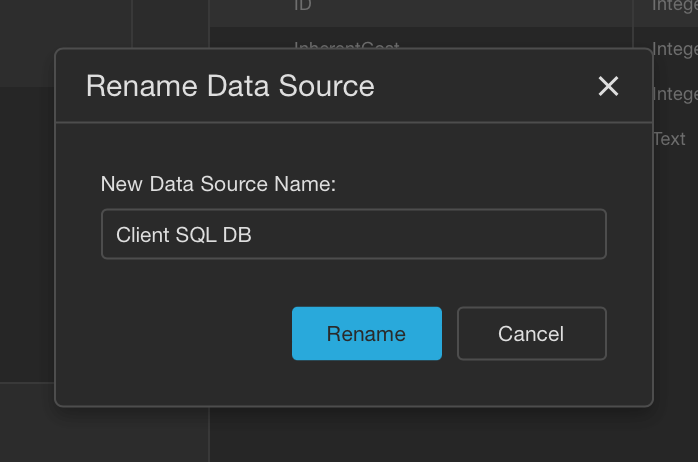
- Rename Button: Click the "Rename" button to rename the selected data source.
- Rename Dialog: The Rename Data Source dialog will appear, allowing you to enter a new name for the data source.
3. Remove Data Source
- Remove Button: To remove an existing data source, select it and click Remove (🗑️).
By following these steps, you can effectively manage your data sources in Compyl. This includes adding new data sources, renaming existing ones, and removing those that are no longer needed. For more detailed information and assistance, refer to the Help Center or contact Compyl customer support.
Updated 2 days ago
Did this page help you?